QuickBooks desktop won’t open or doesn’t start problem is one of the most annoying error that leaves you in an unexpected state. It is a technical error that is often seen while opening the QuickBooks software. This error usually occurs due to any corrupted program files, damaged installation or confliction with system components. In some cases, QuickBooks is already running in the background, which prevents the software from opening again. If you are facing any such issue, then this segment might be helpful to you. In this post we have briefed you with the causes and fixes to QuickBooks won’t open issue.
Moreover, if you don’t have much time to spend on fixingthis error, then you can get in touch with our professionals using our support number, i.e., 1-800-761-1787. Our certified professionals will be there to assist you in fixing this error with ease.
What is QuickBooks won’t open issue and why it occurs?
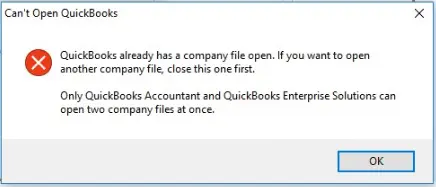
Well, before learning the causes and fixes to this technical snag, it is important for you to understand the basic facts about this error. This error is usually seen when a user tries to open the QuickBooks desktop or a company file but failed to do. It comes up with an error message stating "QuickBooks Won’t Open" or "Doesn’t Start". However, in some situations no error might appear on the screen, but the system freezes suddenly. As a consequence of this error, you might face issues with the system as well. It might also affect the company file and it’s data. There are several possible triggers to this error, which we will be discussing later in this post.
Methods to resolve QuickBooks Desktop doesn’t start or won’t open issue
Now that you know what factors might cause the issue, signs and symptoms, and various other facts related to this error. It is the right time to start with the fixation procedures.
Important tips before troubleshooting
You can perform these steps before proceeding to the fixation methods:
Repair the QuickBooks desktop software installed on your PC.
Now check out the methods that can help users in resolving the QuickBooks won’t open error:
Method 1: Rename the QBWUSER.INI file
The steps to rename the QBWUSER.ini file are given as under:
Initially, you need to access the folder housing the Ini file.
Click on the QBWUSER.INI file and also select the Rename option.
Type in Insert.old in the last file name and change the name of the Ecml file.
Check if the error persists.
Method 2: Suppress the QuickBooks desktop installation
For this, you will have to right click the QuickBooks desktop icon.
Hit the Ctrl key and choose the open tab. Hold Ctrl key till the No company open window appears.
Open the QuickBooks software to cross-check whether the error got stemmed out.
Method 3: Access the company file from different folder location
Many times, the location of the company file might get damaged or corrupted, which ultimately lead to this error. The steps involved in this process are as follows:
Press the Windows + E keys together to open the Windows explorer.
Search for the file with .qbw file extension. When you look for a file location on a network server, that needs to be done in the Network drive on which the data file is located.
Next step is to right-click the file and select Copy.
Locate the C: drive and make a New folder there and after that name that as QBTEST.
Open the new QBTEST folder and paste the company file.
Also open QuickBooks while holding the CTRL key.
In the last step, you need to click on Open or restore an existing company option and examine the C:\QBTEST folder created earlier.
Lastly, open the Company file copied in the QBTEST Folder.
Method 4: Perform a clean installation of QuickBooks
Many times, Clean installation of QuickBooks rectifies a lot of errors. As such, it is recommended to uninstall and reinstall the QuickBooks desktop to fix the QuickBooks won't open error. However, if it doesn’t work, you can check out the other available options as well.
Method 5: Rebooting your system
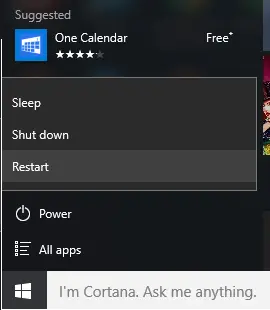
There can be certain errors that can be fixed by merely restarting the system. Hence, you are suggested to open the Start menu and then hit a click on the Power tab, followed by selecting the restart option. After the restart is done, you can open QuickBooks desktop and check if the error persists.
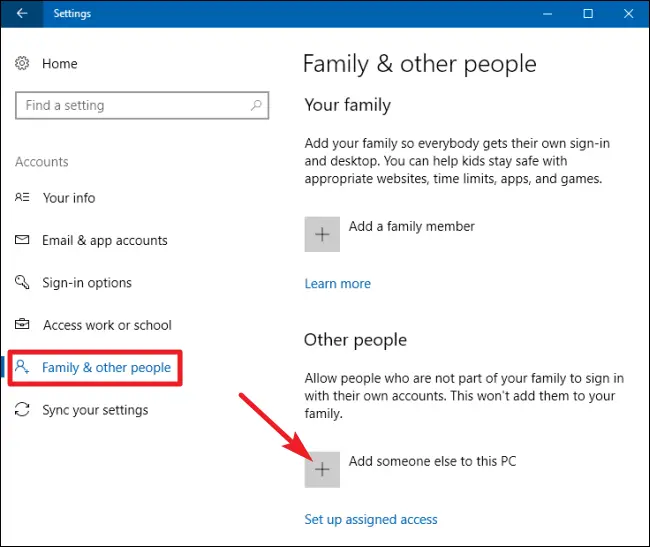
Method 6: Creating a new Windows admin user
In this process, you need to click the Control panel and then navigate through it.
Then, double-click the User account option, followed by choosing the Manage user tab.
Also, click the Add tab.
Once done with that, you need to enter the name as well as domain of the admin and hit OK button.
Now choose Administrator if you are using Windows 10.
Last step is to click on Finish, which will direct to the user accounts dialog box and also hit OK and you are good to go.
What triggers to QuickBooks Desktop doesn't start or won't open error?
Talking about the factoring causing or triggering this issue, the list is not huge. There can be a couple of factors that can end up in QuickBooks doesn’t start issue. Let us have a look at some of the most common factors:
There might be a corrupted hard disk on your system.
Extremely long company file name.
QuickBooks desktop has certain system requirements.
Few are the services running on your system that are conflicting with QuickBooks and prevent it from opening.
You might also encounter this issue if the Windows run slowly.
If the system hangs every now and then.
If the system responds slowly to keyboard or mouse inputs.
You can't able to open your QuickBooks.
Conclusion!
Implementing any of the above-stated methods can work in fixing the QuickBooks won't open issue. However, if a situation arises when none of the above methods works, then in that case, we recommend you get in touch with our QuickBooks enterprise technical support team of experts and certified professionals who can handle the situation for you. Give us a call using our tech support number, i.e., 1-800-761-1787, and our dedicated support team will ensure to provide you with the best possible support services.
FAQs
What should I do if QuickBooks does not open?
You can rename QBUSER.ini file, suppress QuickBooks desktop, use the QuickBooks tool hub and perform a clean installation of QuickBooks in order to fix this issue.
Why QuickBooks does not open?
The reasons can be missing or damaged QBWUSER.INI file, long company file name, use of outdated operating system, incorrect installation of QuickBooks desktop or corrupted hard drive.
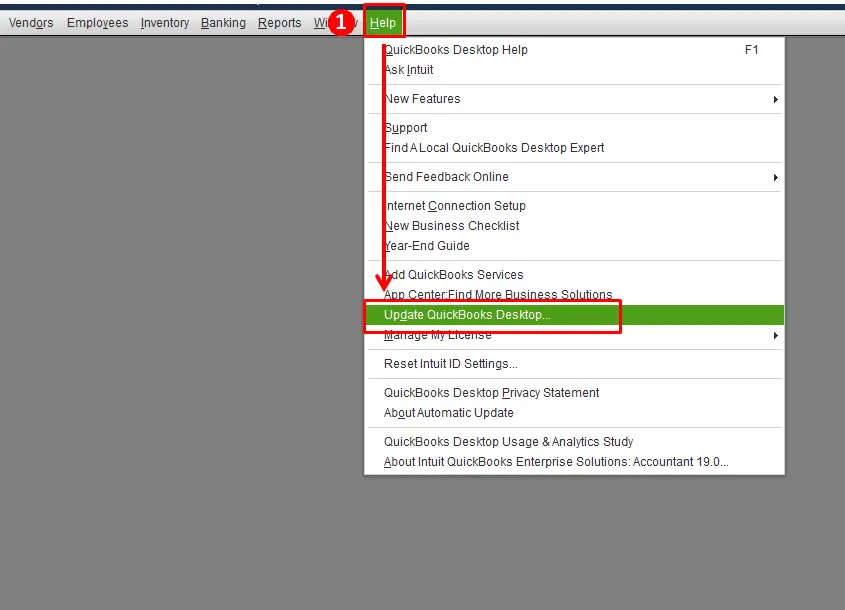
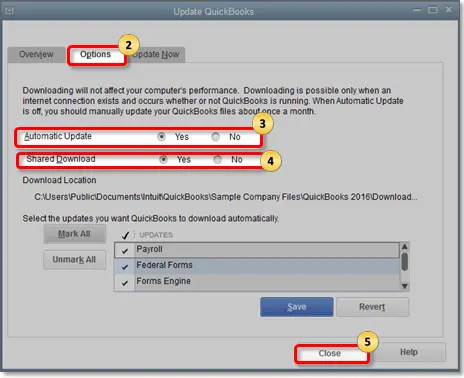
How should I update QuickBooks when it is does not run?
Download the updates for QuickBooks desktop manually from Intuit. Provide correct product details, then install the updates.
What Tool Hub utilities are best for fixing “QuickBooks won’t open”?
You need to tun Program Problems > Quick Fix my Program to close stuck processes and repair the app. Then move to Installation Issues > QuickBooks Install Diagnostic Tool to repair .NET/MSXML/VC++ dependencies. You should update your Tool Hub to the latest version first.
What if QuickBooks shows “needs a subscription” and won’t open?
That message indicates an unsupported/expired desktop subscription. You need to install a supported version or renew/verify the license in the account portal before retrying.
Resolve QuickBooks error in no time with few simple steps
Are you a victim of Error 15311 and don't know how to fix it? Well, don't worry as this article is based on a complete guide on how to resolve QuickBooks error code 15311. This error is basically a runtime error, which might be seen at the time when the installation process of the program takes place or while starting or shutting down the windows. This error appears on the screen and displays a message stating as:
Error 15311
“QuickBooks update cannot be completed successfully”
Problem
“Cannot connect to QuickBooks payroll”.
This error can be a bit annoying for the users to tackle with, but carrying out the procedure discussed later in this post can help you in dealing with the issue. So, make sure to read this segment till the end and find out the methods to fix QuickBooks error 15311. However, an alternative for the same can be to get in touch with our experts to fix the error for you. You can simply make a call at 1-800-761-1787, and our QuickBooks payroll support team will be there to fix the error for you.
Symptoms of QuickBooks update error 15311
In order to fix this error, you need to have an idea of when and where QuickBooks update error 15311 takes place. So, here are the symptoms of this error.
Update error 53111 occurs and crashes the active window program.
System often crashes with 15311 when running the same program.
Also, QuickBooks error itself appears on the screen.
Windows run slowly and do not respond to mouse or keyboard inputs.
Easy Methods to Get Rid of the QuickBooks Payroll Error 15311
To get rid of the QuickBooks error 15311, you can adopt any of the below stated methods. Let us check those methods one by one:
Method 1: Download and install a digital signature certificate
Make sure that you have the latest digital signature certificate setup on your system. The steps to set up the latest digital signature are given as under:
The first step is to press Windows key and then in the search box type QBW32.exe
If the file is not visible, then click on More results.
Moreover hit a click on the Computer icon.
Followed by spotting QBW.exe file in the search results.
And then right click the QBW3.exe and select Properties option.
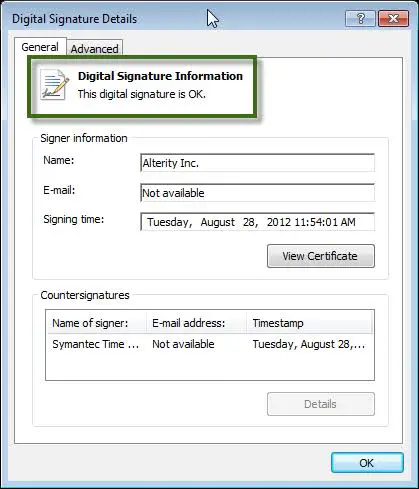
Now tap on Digital signature tab and then make sure that Intuit inc. is checked in the list.
Next step is to tap on Details.
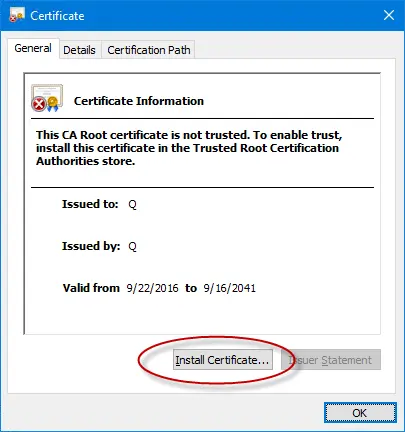
After that select the View certificate in the digital signature details window.
And then, you will see the certificate window and select Install certificate.
You are then required to keep clicking on Next till the Finish tab appears.
Hit a click on Finish.
And lastly, reboot the system to Allow changes to take place.
And also check if the error persists or not.
Method 2: Verifying the Internet Explorer settings
You need to ensure that Internet explorer is set as the default browser and then only move ahead and carry out the steps:
Make sure that the Date and time of the system are correct.
After that, double-click the Time display option.
And then, rectify the Date and time only if needed.
Next step is to choose the Time zone and then select the Correct time zone.
Followed by verifying the Cipher strength.
Once done with that, move to the official Intuit website and then press the Alt key to see the Menu bar.
Next, you need to click on the File and then select Properties option.
Check the number under connection and then Phrase bit encryption.
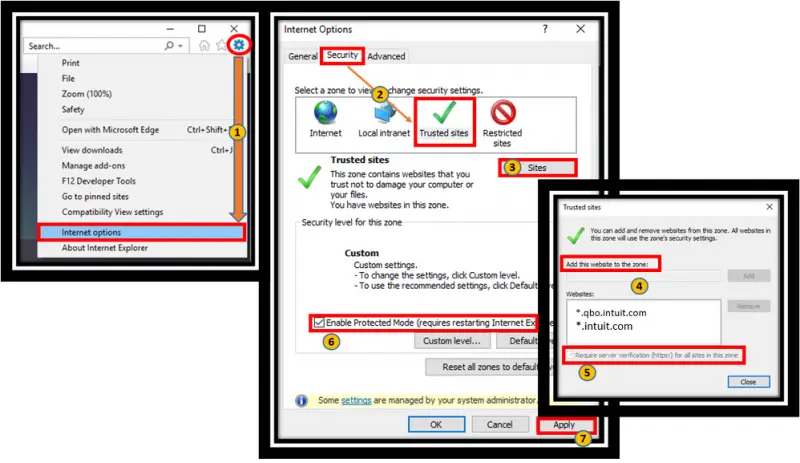
Now you need to update settings through the Tools and then move on to Internet options.
Also, select the Tools option first and go to the Internet options.
The next step is to choose all Temporary files and then delete them by pressing Delete key.
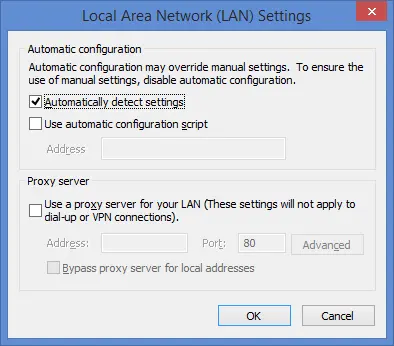
Once done with that, move to the Connections tab and then choose LAN settings.
Next, you need to select the checkbox next to Automatically detect settings.
Also, ensure that proxy servers are blank, if you don’t plan to use any of them.
Now scroll down in the Advanced tab and then mark SSL 2.0 and SSL 3.0 checkboxes.
Next step is to Verify the publisher’s certificate and then clear the box next to that.
And again, scroll down till the bottom of the list on Advanced tab.
The last step is to ensure that TLS 2.0 should remain unchecked, and you are good to go.
Carrying out the steps enlisted above can help you in getting rid of QuickBooks error code 15311. However, there can be situation when none of the above methods work, then in that case, make sure to consult our QuickBooks error technical support team.
You can ring up at 1-800-761-1787 and ask our professionals to troubleshoot this issue for you. We are a group of certified professionals, who work round the clock to provide the best possible technical assistance services round the clock. So, do not hesitate in talking to our professionals, we'll be happy to provide technical assistance to you,
Frequently Asked Questions
What is QuickBooks Error 15311?
This error indicates issues in update process.
What causes QuickBooks error 15311?
The possible causes are QuickBooks installer corruption, Virus attack, QuickBooks files deleted and incompatibility.
How to fix Error 15311 in QuickBooks?
This issue can resolve by: 1st Method: Install the "latest digital signature certificate". 2nd Method: Configure the Internet settings. 3rd Method: Uninstall QuickBooks-related entry.
Learn how to Fix QuickBooks Error 193: 0xc1 while trying to start the QuickBooksDB27 service
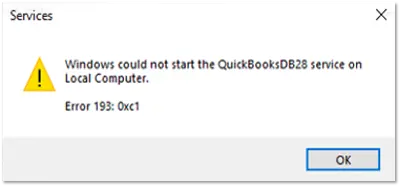
Whenever you work on QuickBooks software with full concentration, you can be distracted by technical issues. In this segment, we will discuss about one of the common error that shows up as "QuickBooks error 193:0xc1 Windows could not start the QuickBooksDBXX service on local computer". You might bump into this error when you open or use QuickBooks desktop in multi-user. This error typically arises when the POS system fails to access or read specific company files. As a result of this error, you might be unable to start the QuickBooksDB27 service manually or automatically. Furthermore, you can also encounter this sort of error when starting the QuickBooks database server manager.
This error can be quite confusing and can cause a loss of your precious data, so here we are with this technical segment, where we will be discussing few simple steps to resolve this issue. For technical guidance, you can call our accounting professionals at 1-800-761-1787. You may see the following error message on your computer screen when this error occurs:
Error
Description
Warning
Error 193: 0xc1, Unable to start the service error.
Warning
Error 193: Services - Windows could not start the QuickBooksDBXX service on Local Computer.
You can proceed with this segment, to unleash the correct steps you are supposed to follow, whereas if you feel that the error is too complex for you to handle, then feel free to ring up to us at 1-800-761-1787. Our experts will be happy to provide you with the best possible support services round the clock.
Causes behind error 193:0xc1 in QuickBooks desktop
There can be various reasons behind to this error. Few are as:
You might be trying to open a deleted or merged customer names.
Corrupted or damaged .qbt files in your database.
You may have same department codes or names in your software.
Your QuickBooks has a corrupt customer list at the remote store.
There are a few damaged company files.
Your Windows O/S may be out-to-date.
Methods to Rectify the QuickBooks Multi-user Error Code 193
There can be certain solutions that can help you to resolve QuickBooks Error code 193. It should be noted that the following steps are for Windows operating system, which is not an Intuit product. So, if you are a bit sceptical in performing these steps, then Intuit recommends to consult to the system’s manufacturer or IT professional. Let us begin with the process to fix the error:
Method 1: Perform a clean installation of QuickBooks desktop
The first method that you can opt for is to perform clean Installation of QuickBooks desktop. This method is expected to fix the error up to a certain degree. The steps to be followed are as under:
Press Windows Start or click on Start button on your computer.
Go to the for Control Panel and open it.
Opt for Programs and Features option or Uninstall a Program.
Choose QuickBooks Desktop from the list of installed programs.
Pick Uninstall/Change opt and click on Remove.
At last, hit on Next and reinstall your QuickBooks Desktop.
Here, the KB4338548 has the link to the Microsoft Update Catalog. You can choose the required and appropriate Microsoft update from there. Or you can also contact an IT professional for further assistance on the same.
If you are using versions Windows 10 and 2013:
You are supposed to choose the Customer from the list and click on the Shift tab.
For using version 9:
You need to press Ctrl + A keys to go for all the Customers and move to the File menu of the headquarter server.
Moreover, for validating the mailbag in the store, choose the Utilities tab and then Resend the same.
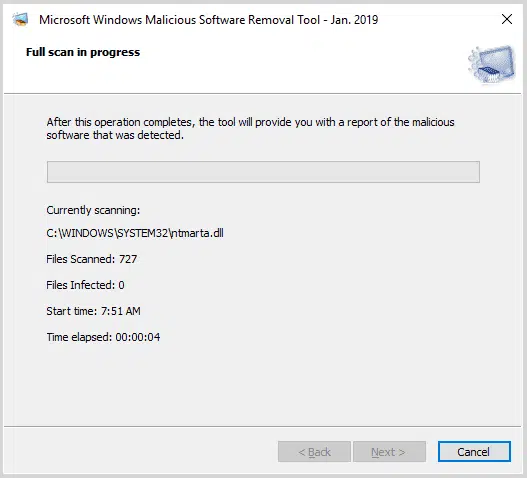
You are recommended to go for a complete virus scan in their system by using some security software like antivirus. This process can also help to contain this QuickBooks error. In this context, users need to set up and launch their antivirus program to check the computer for any virus intrusions.
Method 4: Delete customers in QuickBooks
At first, select the Reports tab after launching the QuickBooks.
After that, select the Customer Lists. A list will show up on the screen. Pick the very first client.
You are now required to click on Customer twice.
Then examine the details and open the list of this customer.
Now select All Options, then select I Want to.
In the next step, select Delete the Customer option.
Next, select the File menu and opt for Utilities & Resend option.
The mailbag of the store must then be examined.
The final step is to open the QuickBooks and check if error 193:0xc1 got resolved.
We end this post over here with the hope that the information shared above might be of some help in fixing the QuickBooks error 193:0xc1 Windows could not start the QuickBooksDBXX service on the local computer. If in case you need any expert assistance, feel free to give us a call using our technical support number i.e., 1-800-761-1787. Our certified QuickBooks desktop support team will be there to assist you in a single call.
FAQs
What is the main cause of QuickBooks error 193:0xc1?
The major causes include: 1. Damaged Windows registry entries. 2. QuickBooks Database Server Manager is not functioning properly due to some damage. 3. Running background programs conflicting with Quickbooks.
What is QuickBooks Database server manager?
QuickBooks Database Server Manager is a tool which allows multi-user access over a network to a company file in QuickBooks.
Can uninstalling and reinstalling QuickBooks fix Error 193?
Yes! If none of the other methods fix the error, users can uninstall and reinstall QuickBooks. This can also be possible with the use of the QuickBooks Clean Install Tool.
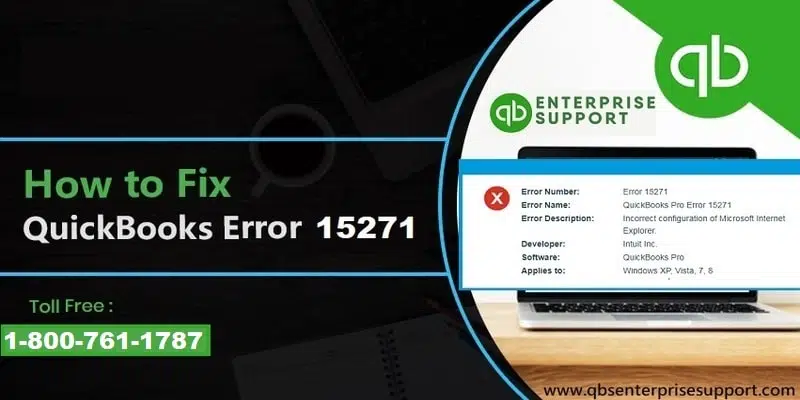
Learn the different ways to fix payroll update error 15271 in QuickBooks Desktop:
Encountering QuickBooks Error Code 15271 and unsure why your updates won’t go through? If that’s the case, you’re not alone, and you’ve reached the right place for guidance. This error is basically seen when Windows cannot validate or verify the integrity of critical update files needed by QuickBooks to install payroll or product updates. Validation failures happen when system files are corrupted, important QuickBooks components are missing, user account settings interfere with updates, or security settings block essential processes.
If you are also facing this error, then, in that case, make sure to read this post ahead, as we will be discussing the quick fixes, causes, and various other facts related to this error in this article. For additional assistance on other QuickBooks issues or technical guidance, you can contact us directly at our helpline at 1-800-761-1787. Our experts will leave no stone unturned in addressing all your QuickBooks queries.
Well, theupdate error 15271 in QuickBooks is basically one of the commonly encountered errors, especially when you try to update/install or while downloading the QuickBooks desktop version i.e. the Pro/Payroll/Desktop. This error code basically comes up with an error message:
Error
Description
Error 15271:
The payroll update did not complete successfully. A file cannot be validated.
Error 15271:
The update did not complete successfully. A file cannot be validated.
The error messages basically indicate that there is a file that cannot be validated. There can be plenty of reasons behind the occurrence of this error, which will be discussed later in this post.
What triggers the QuickBooks payroll update error 15271?
There can be a bunch of causes behind this update error 15271, a few of which are as follows:
In case the QuickBooks pro software is not completely installed on the system or the downloaded software file is corrupted.
This sort of error can also be seen if the Windows registry gets corrupted due to any recent change in the QuickBooks pro software.
You can also encounter this error if the corruption in the Windows file system or program file persists due to any kind of virus attack.
Another factor causing the error can be if the QuickBooks pro related files got delete mistakenly.
Windows files are corrupted, or Windows files required for running QuickBooks may be damaged.
The wrong SSL of internet explorer can also lead to such error.
Important points to consider
Before beginning with the process to fix the issue, you are recommended to carry out the steps below and take the backup of the company file:
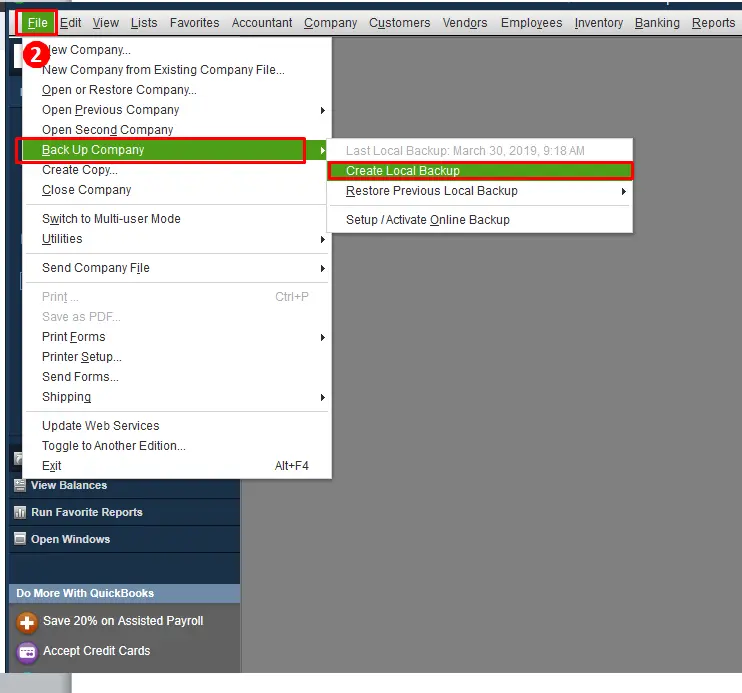
First of all, open QuickBooks desktop.
And then move to the File menu.
After that hit a click on the Backup company and then click on Create local backup.
This brings us to the last method to fix the error, in which it is supposed to turn off the UAC in windows. The steps to be followed are:
In Windows Vista:
If you are a Windows Vista user, then you will have to follow the steps below:
The first step is to select Windows tab and then select the Control panel.
Now type in UAC in the given search box and then hit Enter key.
After that, click on the Turn user account ON or OFF.
Followed by clicking on the OK button.
And lastly, reboot the system.
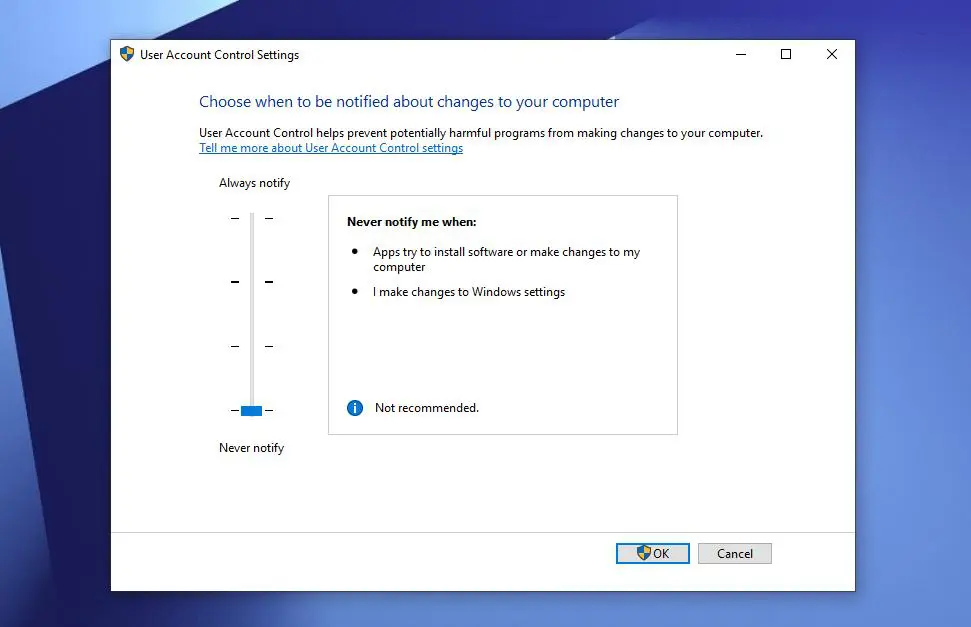
In Windows 7, 8, and 10:
For Windows 7, 8, and 10 users, the first step is to move to the Control panel settings.
In Windows 7: Choose the Start tab and then select Control panel.
In Windows 8: From the Start menu, type Control panel, you will have to click on Control panel.
After that you need to Enter UAC.
Followed by, click on Change user account control settings.
Followed by Turning off the UAC and moving the slider to Never notify.
And after that, click on OK and then Enter the password or confirmation, when prompted. In case you want to make any changes, then you will have to reboot the system.
Now turn as ON your UAC, by moving the slider to when you want to be notified.
And lastly, hit a click on OK tab.
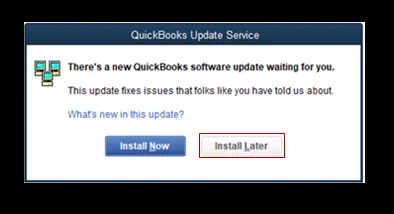
It should be noted that this will help you in critical situation. In case the error persists, then it is recommended to restart the system. Also, if the QuickBooks update service message window appears, then click on Install later tab and Reset the QuickBooks release update.
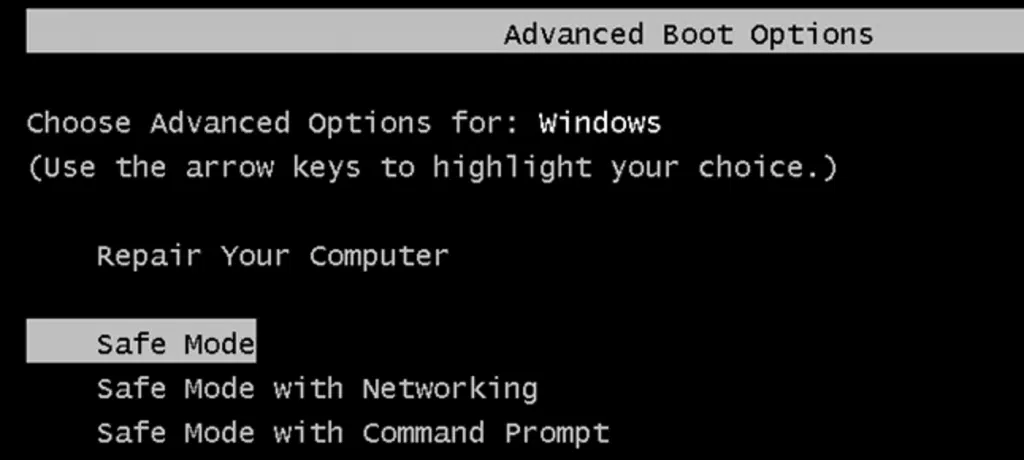
Method 6: Use Safe Mode to install Payroll Updates
Press the Start button and you need to select Restart from the Shutdown menu.
After that hold down the F8 key as Windows reboots to display the Advanced Boot options screen.
Now hit a click Safe Mode and then press Enter key.
Install the payroll updates one again once Windows restarts in Safe Mode.
With this, we come to the end of this post, and we hope that the above discussed solutions might have helped you in fixing the QuickBooks payroll error code 15271 up to certain extent. Moreover, in case the error persists you can also make a call at i.e. 1-800-761-1787, and let our 24X7 QuickBooks payroll support team to fix the error for you. Do not hesitate in calling us anytime, as our U.S based best accounting experts and certified professionals work round the clock to provide the best possible assistance for sorts of QuickBooks related queries.
QuickBooks is a renowned accounting software and is highly preferred by entrepreneurs across the globe. But at the same time, there are certain errors that might hinder the smooth working of this software. One such error is 'QuickBooks unable to create PDF error' or 'QuickBooks could not save your form as a PDF file'. In this post we will be clearing out all your confusion regarding the causes of this error and also the fixes to the same. This error can be pretty much annoying for the QB user, as it restricts you from creating a PDF and also couldn’t save the form as PDF.
This article aims to give a detailed explanation of this error message: QuickBooks cannot create PDF. So, read the article carefully until the end or you could reach out to the 24/7 QuickBooks error support team. Our experts will deal with the issue for you.
What is Error: QuickBooks could not save your form as a PDF file?
Your forms were not sent because QuickBooks could not create the necessary PDF file error indicates that the error with PDF file mailing and printing. This error is often seen when you try to create, email or print a report. Also, it can be seen when you refresh the Windows 10 or Windows 11 and then move to the PDF files. This is often seen when you navigate to Windows 10/11, and then the Microsoft XPS report essayist gadget is added to the framework design, and this joins itself default port named PORTPROMPT that can conflict in times of higher printing demand.
Screenshot showing the “QuickBooks could not save your form as a PDF file” error message during PDF creation.
What factors lead to QuickBooks cannot create PDF issue?
Major causes of QuickBooks unable to create PDF error are listed below:
Methods to Resolve the QuickBooks Unable to Create PDF Error
There can be certain solutions that can be implemented to fix the QuickBooks error unable to create PDF error. We will be exploring each of the methods one by one:
Method 1: Reinstalling Microsoft XPS
The first method that one can opt for is to reinstall Microsoft XPS. The steps involved in this process are as follows:
Screenshot showing the steps to reinstall Microsoft XPS Document Writer to fix QuickBooks PDF issues.
To verify and ensure XPS services are enabled, you need to click on the Windows or Start button.
And then go to the Control panel.
After that you need to move to the System group and then hit a click on Uninstall/change a program.
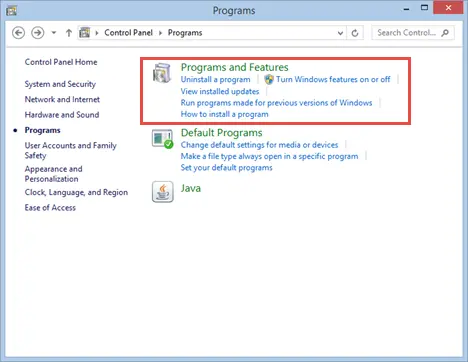
Followed by clicking on Turn windows features on or Off.
Screenshot displaying the “Turn Windows Features On or Off” window used to enable Microsoft XPS for QuickBooks PDF repair.
Next step is to scroll down and make sure that the XPS services and the XPS viewer are enabled:
You need to put a check-mark in both boxes, and then hit OK tab. After that, test QuickBooks after switching on both services to see the issue is amended.
In case you identify both the options, and the problem persists, then you need to carry out the steps below:
Reinstall XPS Document writer in Windows 8
The steps to re-install XPS document writer in Windows 8 might differ from that for other windows version. Explorer the steps below, if you are windows 8 user.
You can take the mouse to the corner to reflect the start screen.
Select the Settings option.
Now hit a click on the Control panel.
Followed by selecting Devices and printers.
Screenshot showing the Printer Control Panel in Windows used for managing and troubleshooting printing devices for QuickBooks.
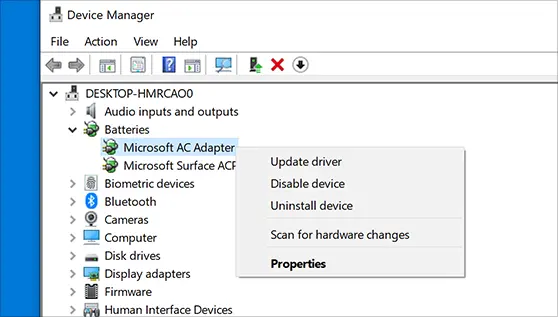
Right click the Microsoft XPS document writer icon and then click on the Remove device option.
Screenshot showing the option to remove the Microsoft XPS Document Writer from Windows to repair QuickBooks PDF functionality.
Now click on yes to Confirm.
From the toolbar, and then press Add a printer and select Add a local printer/network print with manual settings.
Screenshot displaying the option to add a local printer or network printer using manual settings in Windows.
Followed by selecting PORTPROMPT- local port.
Screenshot showing the selection of PORTPROMPT as a Local Port during manual printer setup in Windows.
Hit Next tab.
Select the Microsoft and click on Microsoft XPS document writer v4 from the manufacturer list.
Screenshot showing the Microsoft XPS Document Writer v4 option during printer setup in Windows.
Hit Next tab, and then select the Replace the current driver option and hit Next again.
Next step is to bring out the Version 4 to ensure the name is Microsoft XPS document writer.
And lastly click on Finish button.
Reinstalling XPS document writer for Windows 7 and Vista
If you are Windows 7 and Vista user, then the below steps would surely assist you in reinstalling XPS document writer.
In this, you are supposed to move to the Windows start menu.
And then select Drivers and printers.
Followed by right clicking the MS XPS document writer icon and then select Remove device.
Hit on Yes.
From the toolbar and then select Add a printer and then select Add a local.
The next step is to click and Select use an existing port.
After that select XPSPort- the local port and hit Next tab.
And then select Microsoft >> choose Microsoft XPS Document writer and hit Next tab.
Select replace current driver and you are good to go.
Method 2: Download and run QuickBooks PDF and print repair tool
Another method to opt for is to download and run QuickBooks PDF and print repair tool from QuickBooks tool hub program. The steps to be followed for this are:
Screenshot of the PDF Print Repair Tool in the QuickBooks Tool Hub used to fix PDF and printing-related errors.
The first step in this process is to transfer and run QuickBooks print and PDF repair tool.
And then perform the .pdf file related task that originally leads to this error.
In case you find the error on the screen, the reboot the system and then try again.
Confirm to Print the XPS document author and then Save it as a PDF file.
You can save the XPS document author as a PDF file with the help of XPS document author elements.
Followed by opening the notepad and then typing in something.
Move to the File and then hit Print.
Next, select the XPS document author and then select the Print option.
And then select the desktop within.
Now move to the desktop and lastly, check if you can read the XPS document written from the tab.
Method 3: Run system file checker to repair MSXML 6.0
You are now supposed to run system file checker to repair the MSXML 6.0 that is built into windows 8. The system file checker is basically a facility given by Microsoft to repair the Windows system files:
For Windows 8:
The initial step is to press the Windows start button.
Type in the Command and then right click the same.
Followed by clicking on the Option on the bottom bar to Run as an admin.
Screenshot showing the option to run QuickBooks or related tools as System Administrator for proper permissions.
If you are asked to Enter the admin password, then enter it and hit a click on OK.
The last step is to type SFC/scan now.
Screenshot showing the System File Checker (SFC) scan running in Command Prompt to repair corrupted Windows system files.
For Windows 7 and windows vista:
You are supposed to run the system file checker to repair MSXML 6.0 built into Windows 7. The steps to be carried out are as follows:
Click on the Windows start option.
Select all programs and then press on Accessories option.
Right click the Command prompt and then select Run as admin.
To begin with, you are supposed to open Printer control panel in the Windows.
This screenshot displays the Windows Printer Control Panel where installed printers and printing devices are managed.
Right-click the Microsoft XPS document writer.
This screenshot highlights the Microsoft XPS Document Writer within the Windows Printer settings.
Followed by selecting the Printer properties.
Next step is to hit a click on the Advanced tab and then click on the Print directly to the printer option.
This screenshot shows the option “Print directly to the printer” enabled within the Advanced tab of the Microsoft XPS Document Writer printer properties.
Save changes by clicking OK button.
To end the process, close Printer properties.
Method 5: Making a new template for the form
This screenshot displays the QuickBooks template customization section, where you can create or select a new template for your form before generating a PDF.
You should generate a new template for the form and then for the transaction, and also you need to change the template. Also, create the .pdf file.
Method 6: Managing Windows user permissions for XPS document writer
If none of the methods helped, you can opt for managing Windows user permissions for XPS document writer. This might work up to a certain extent. The steps that one needs to opt for in this are as follows:
The initial step is to open the Printer’s control panel.
Right-click the Microsoft XPS document writer.
This screenshot shows the Windows security settings for the Microsoft XPS Document Writer, where user permissions are adjusted to ensure proper access for creating and saving PDF files in QuickBooks.
Also, press the option Printer properties.
Followed by clicking on the Security option.
Look for the everyone User cluster.
And then press Add tab.
You are then supposed to type in everyone and then click on the Check names option.
Hit the OK button and then press Print option and check-mark the row having allow Column and then hit OK button.
Moving ahead, move to C:Windowssystem32spool in.
This screenshot displays the security settings for the Windows System32 Spool Printers folder, where user permissions are configured to enable full access required for QuickBooks PDF creation.
Right-click the Printers option and then click on the Security option.
Now hit a click on Edit and Add respectively.
Followed by entering the Local service.
Also, ensure that the local service is having Full control and then click OK button.
This screenshot shows the Windows security permissions settings for common system files, ensuring proper access rights required for QuickBooks to create and save PDF documents.
The final step is to open QuickBooks and create a .PDF file.
Method 7: Check if reconcile window is listed
In case selecting reconcile from the banking menu locks up QuickBooks, but the PDF functions continues to work properly, then the reconcile window might appear off of the screen. You should follow the steps below:
Verify if the reconcile window is listed in the list in the Window menu.
And then select Close all.
The last step is to Start the reconcile process again.
We have ended the post here, with the hope that the information that we have shared in above might be of some help in fixing the QuickBooks unable to create PDF error. However, in case any of the query persists, feel free to call us anytime and discuss the issue with our industries best experts. Get in touch with our dedicated support team at 1-800-761-1787, and let our QuickBooks enterprise technical support team fix the error for you in least possible time.
How to troubleshoot PDF issues by using QuickBooks Tool Hub?
The steps to resolve PDF issues using the Tool Hub are: 1. Run the Tool Hub. 2. Then go to Program Problems. 3. Now, choose QuickBooks PDF and Print Repair tool and allow the diagnosis.
How to change PDF viewer in QuickBooks?
1. From the Start menu, make a move for Settings. 2. In the Settings, go to the Default apps. 3. Now, make a choice for the option to Choose default apps by file type. 4. Now, opt for .pdf and hit on Choose a Default. 5. Opt for the PDF viewer.
Does QuickBooks require Adobe Reader?
Yes! PDF viewers like Adobe Reader can be used for accessing the PDF files in QuickBooks.
The steps to resolve PDF issues using the Tool Hub are: 1. Run the Tool Hub. 2. Then go to Program Problems. 3. Now, choose QuickBooks PDF and Print Repair tool and allow the diagnosis.
1. From the Start menu, make a move for Settings. 2. In the Settings, go to the Default apps. 3. Now, make a choice for the option to Choose default apps by file type. 4. Now, opt for .pdf and hit on Choose a Default. 5. Opt for the PDF viewer.
Yes! PDF viewers like Adobe Reader can be used for accessing the PDF files in QuickBooks.


 Scan Screenshot")


