All that you need to know about the QuickBooks Desktop backup
QuickBooks has never failed in assisting businesses in managing their finances, payroll, bookkeeping work, inventory management, and more. In fact, it is often said that QuickBooks have brought a great change in the accounting industry, making it hassle-free. QuickBooks stores many important data of the companies and the loss of these data can cause great loss. Keeping this data safe is very much essential, which makes taking backup or recording the data a must. Moreover, if you open QuickBooks on a regular basis then it becomes essential to take a backup so that you can restore it.
This is an in-depth guide about how to backup of the data files in QuickBooks desktop for your future use. Scrolling through the piece of writing till the end is highly recommended. However, you can also reach out to our 24X7 QuickBooks support team by means of our support number i.e. 1-800-761-1787. Talking with our experts and certified professionals will assist you and clear all your clouds of confusion.
Note: In case you don't need a complete backup and want to move the accounting data only, then you can create a portable company file. Also, if the backup copy is in a compressed file format, then make sure to use the restore wizard to bring the data back into QuickBooks. Also, do not use the copy command from Windows.
You may also read: How to Resolve QuickBooks Checks Printing in Reverse Order Issue?
Steps for Creating a Backup of the Company File in QuickBooks Desktop
Backing up company files stores everything that is present in the company file at that particular moment. It saves accounting data, templates, letters, logos, images, and various other related files. It should be noted that it doesn't back up the payroll forms. In order to back up the data, you have two options either they can do it manually or automatically.
Step 1: Set up QuickBooks Automatic Backup
Below are the simple steps to take easy backup of your data in QuickBooks and get rid of the problem of QuickBooks Automatic Backup doesn’t work:
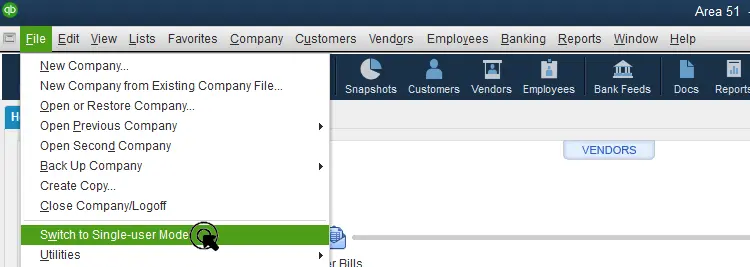
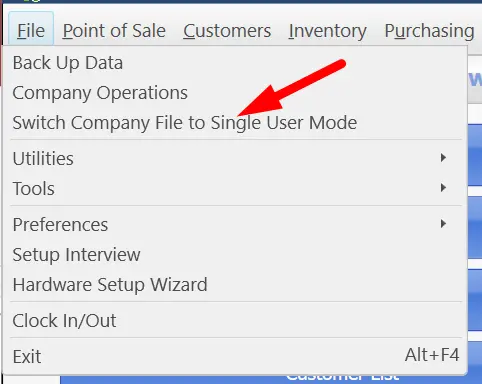
- At first, open the File Menu and switch to single-user mode.
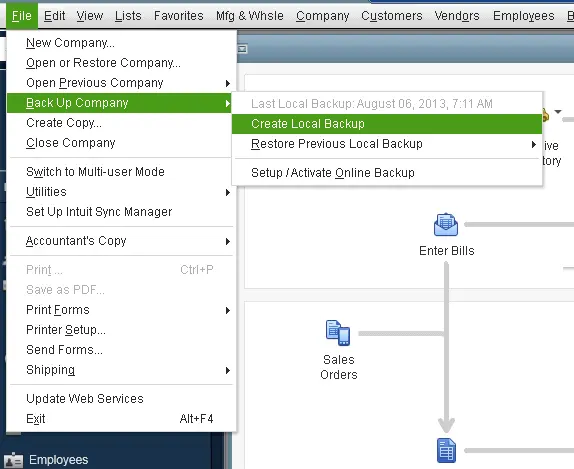
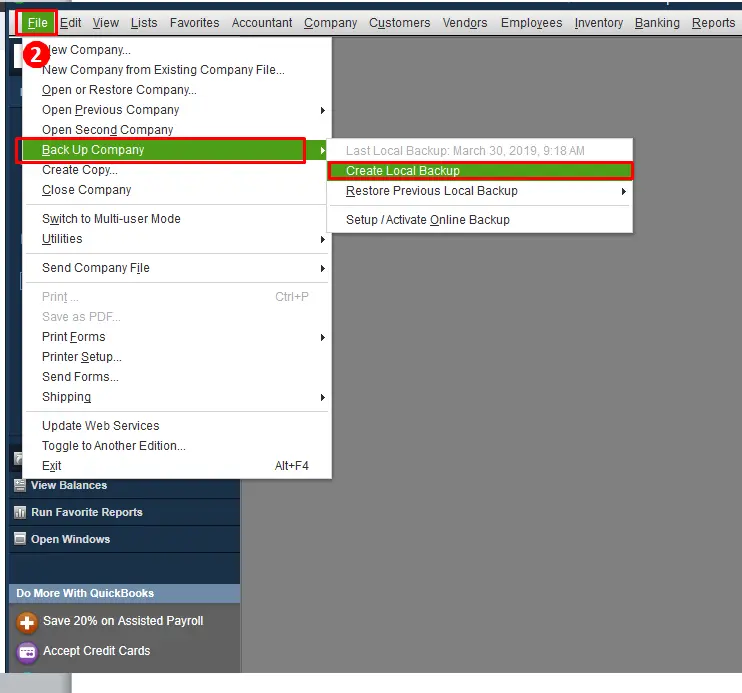
- After that choose Save Copy or backup company and create a local backup.
- Once you have chosen the backup copy and then click on Next.
- Select Options to set up the backup defaults, and then click on Next option.
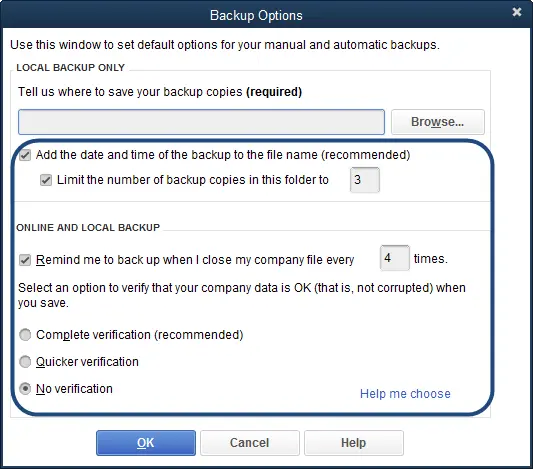
- You are supposed to look for and note the date and time of the file backups to determine the files. You can also use the checkbox to limit the number of backup copies and put a number to cap the number of backups created for every company.
- Click on the checkbox remind me to backup when I close my company file every time, so as to receive reminders for creating backups, and set a frequency.
- Always hit a click on options for verifying the data before saving the changes. Skip this step to make the process faster, but it is recommended to enable it so as to get the alert messages whenever damage in file is spotted. You will get the following options: Complete verification, Quicker verification, and No verification.
- After the backup options window pops up on the screen, you are supposed to click on browse and then select a location to store the copy.
- Select the opt to Change Location tab or Use this Location, followed by clicking on Next.
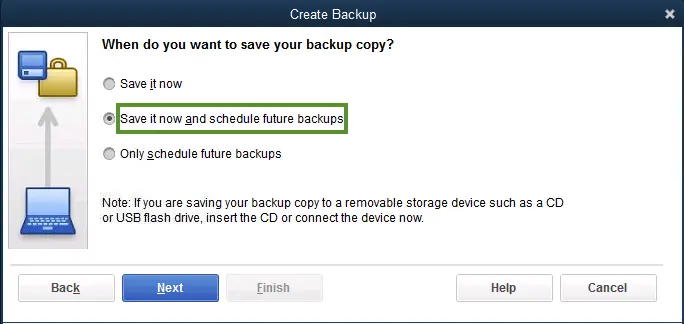
- Now hit a click on the option Save it now and schedule future backups or only schedule future backups and then tap on Next.
- Once it is done you now have to select the option Save backup copy automatically when I close my company file every time.
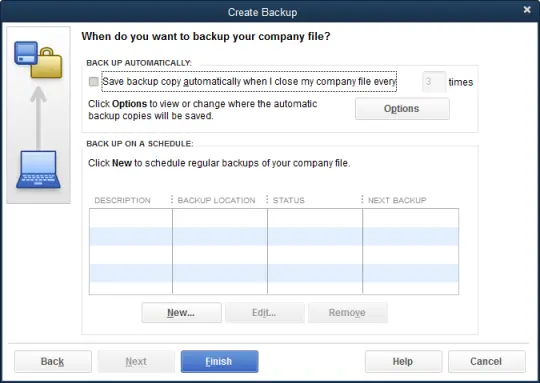
- Now in the field, enter a number and click on Finish,
Step 2: Set Up QuickBooks Schedule Backups
You are now required to set up scheduled backups in QuickBooks, the process for which is listed below:
- Open the file and click on Save Copy or Backup. Once done a backup wizard will open for you.
- After that select the Backup copy option and click on the Next tab.
- Also, go for Options so as to set backup defaults and then click on Next.
- The next process will be clicking on Only Schedule future backups and then Next option.
- Now go to the Backup on a schedule section and then click on it.
- You have to provide a description for the Schedule backup that you are creating.
- You also have to now look for folders where you want to Save your backup copies.
- In the next step, hit a click on the Number of backup copies to keep the checkbox and then Enter a number.

- Once done now, click on Store Passwords followed by Store Windows Passwords and then provide the Windows login details.
- Now choose the Date, weekly frequency, etc., for the backup.
- Once you have chosen, click on it.
Read Also: How to Resolve QuickBooks Error Code 2107?
Step 3: Setting up QuickBooks Backup Reminders
Due to your very busy schedule you might end up forgetting to take the backup of the data. And to save you from such a situation you can set backup reminders. Below are the ways to set up QuickBooks backup reminders.
- At first, you need to go to the File menu and then choose Save Copy or backup.
- After that select backup copy and then click on Next option.
- Followed by clicking on Options.
- Once done, you will come across the field. Tell us where to save your backup copies and browse through the directory where you want to Save the backup files.
- After this you have to choose the Remind me to backup when closing data every time and then provide a number in the field as you might require.
- Once done, select Add time and date of the backup to the file name box and hit on OK button.
Step 4: Backup your company file manually
In case you prefer, you can back up the company files anytime.
- Move to the File menu and then select Switch to single-user mode.
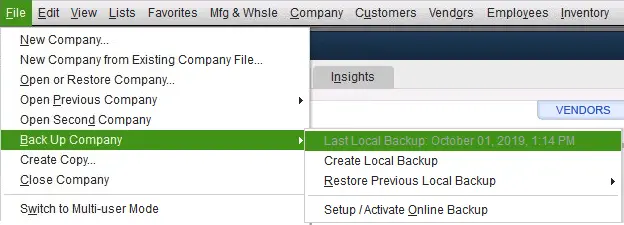
- Move to the File menu again and then hover over the Backup company. After that, Create local backup option should be selected.
- Moving ahead, select Local backup and then click on Next tab.

- In the local backup only section, select the Browse option and also choose the Location for saving the backup.
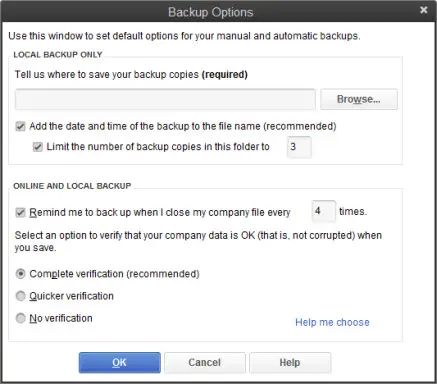
- Now set the number of backups that you wish to keep. And also, keep a note that this step is not a compulsion.
- It is recommended to Set backup reminders using the options in the Online and local backup section.
- Run a test to ensure that the backup file is in good shape.
- Now hit on OK button.
- Ascertain to opt for the Save it now option and hit the Next button.
When you get the confirmation message, the process would end.
See Also: How to Fix Error Message – There is not Enough Space on Drive C?
Step 5: Adjusting the backup settings
In order to see when you last backed up the company file, you will have to visit the file menu and then hover over the backup company. Then see the time and date at the top of the menu.
In order to make any changes to the backup preferences, carry out the steps below:
- You need to choose the File menu first and hover over the Backup company.
- Next, hit a click on Create local backup option.
- The next step is to select Options.

- Make required changes and hit OK button.
- Finally you have a Backup company file that you can use to restore your QuickBooks company file. This file has a .qbb extension at the end of the file name.
In case you keep the backup company files on an external device or hosting service like Box, then you might have to remove them to the local hard drive first and then carry out the restore process.
An important point to be considered is that in case the QuickBooks finds the company file with the same name in folder, QuickBooks will ask whether to replace the existing file. In such a situation, you will have to avoid replacing else the existing file will be erased.
Step 6: Use Express start method
The procedure to use the Express start method involves the following steps:
- Start Creating a company file and hit a click on Express start.

- Enter the needed information in QuickBooks setup.
- Later on, select Help me choose to see a description for every business type. You can also preset chart of accounts that QB will create as per industry.
- Also, hit a click on Create company.
- Now create a chart of accounts, customers, and services, once you create the company file. Such step can also be done later by choosing the Start working option.
Restoring backup settings in QuickBooks desktop
You are supposed to restore QuickBooks company file, after taking the backup of the company file. It should be noted that this file will have a .qbb extension at the end of the name. And, if you keep the backup company files on an external device or a hosting service like Box, then you will have to move them to the local hard drive first before restoring.
See Also: How to Fix QuickBooks User is Already Logged into the Company file Error?
Wrapping up!
These are the simplest methods through which you can take automatic backup, schedule backups or set reminders to take backups of your QuickBooks desktop data. In case if you are having any questions regarding the same then you can connect with QuickBooks enterprise support team who are there 24/7 to offer you rapid assistance. You can reach out to our U.S. based accounting professionals using our support line i.e. 1-800-761-1787. We are a hub of technically sound accounting professionals, so do not hesitate in calling us anytime, you will find the most relevant answers to all your queries here!
Similar articles:
How to Fix QuickBooks Online 502 Bad Gateway Error?
How to Export and Convert QuickBooks Online Data Files to Desktop?