Expanding your business? Or hired new members to your team? Need QuickBooks on multiple computers? Well, it is surely possible to use QuickBooks on multiple computers, you simply have to allow QuickBooks sharing on multiple computers. But for that, you definitely need an upgraded version of QuickBooks. And you will have to enable multi-user mode within QuickBooks to let more than one user to use QuickBooks at the same time. Multi-user mode actually allows multiple users to access the same company file at the same time. To understand how to allow QuickBooks sharing on multiple computers, make sure to stick around this piece of writing carefully. Thus, stay connected to this article till the end.
Allow QuickBooks sharing on multiple computers using multi-user mode
You can switch to multi-user mode by performing a simple set of steps.
Step 1: Download and Install QuickBooks Desktop
- If not already, you need to download and install QuickBooks from the official Intuit website.
You can also directly download the QuickBooks from here: https://downloads.quickbooks.com/app/qbdt/products
- Now under Installation type, you need to click on Custom and Network options.
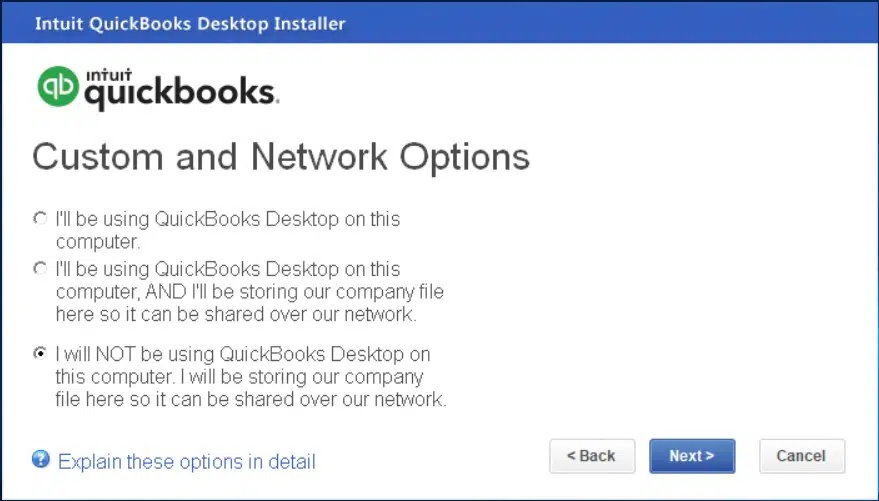
- After that select I’ll be using QuickBooks Desktop on this computer, AND I’ll be storing our company file here so it can be shared over our network….
- Now, perform the onscreen steps to complete the installation.
- After that, select the multi-user host installation option.
Step 2: Mapping the network drive
- At first, press the Windows+ E keys on your keyboard to open the Windows Explorer on the host computer.
- After that click Map a network drive.

- Here you need to select unused drive letter and click on Browse tab.

- Now go to Network location of the QuickBooks file and tap on OK button.
- Here you need to reopen the file from the newly mapped drive.
- Lastly, set up the folder permissions on the server computer.
Check Also: How to Upload or download files with Intuit Customer File Exchange?
Step 3: Enable Multi-user host access
- For this, you need to simply open QuickBooks and click on the file.
- After that, choose the Utilities tab and go for Multi-user access.
- The next step is to check whether you have Stop hosting multi-user access option or host multi-user access.
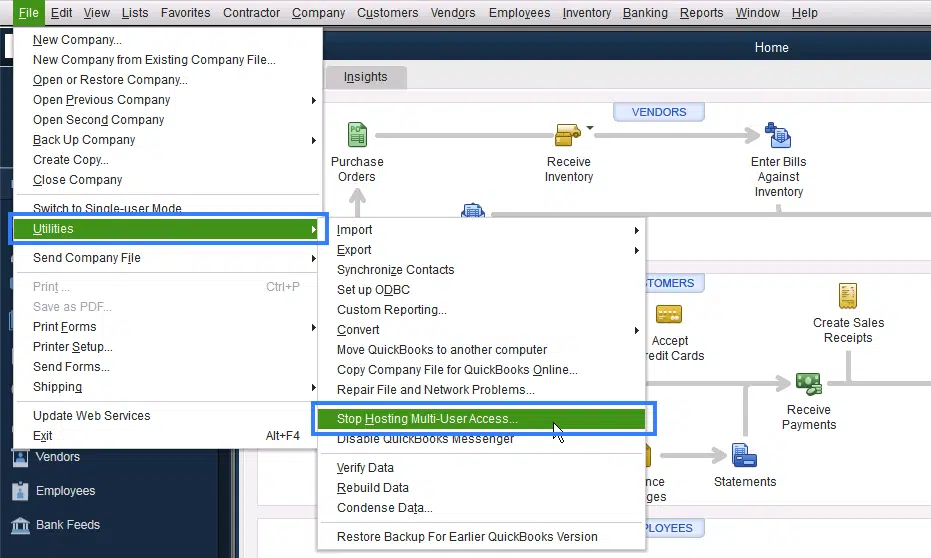
- If the option states stop hosting …, then it means that you are already using multi-user mode. If not, then turn it on.
After this process, turn on multi-user mode. The steps are:
- Run QuickBooks, then move to the File menu.
- Then, select Switch to Multi-user mode.

- Lastly, open your company files in the workstation.
Step 4: Scan company file with QuickBooks database server manager
- Here you need to search for the Company file on the system.
- After that, click on the Start tab and also head to Programs.
- Once done with that, open the QuickBooks database server manager.

- Also, select the Scan folder to continue.
- You now have to Add the specific location and folder that you want to save the file.
- And then, click on OK to proceed.
- In case required, add a new folder using the Add folder option.
- You further need to click on Start Scan to automate the scanning process.
- And, lastly tick mark and click on Close.
Also Read: How to Resolve QuickBooks Error Code 1618?
Step 5: Prepare the company file for multi-user access
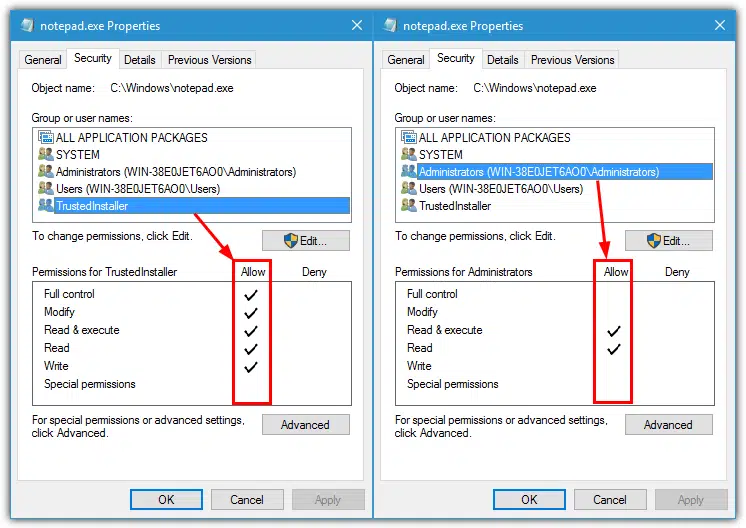
- You need to add All users and grant them access to the company file.
- Furthermore, secure the company data by setting a password.
Step 6: Log in to the company file with other users
- You need to discuss with other users to access QuickBooks company file and login.
- Also, ensure that the system hosting the company file is powered on.
- In order to setup the Multi user mode, head to the file menu and choose Utilities tab.
- And then, head to the Host multi user access tab.

- And confirm by selecting the Yes tab in the confirmation window.
Check Also: How to Prepare and File Federal 1099s with QuickBooks Desktop?
Winding up!
Still having queries related to allowing QuickBooks sharing on multiple computers? We can help you with that. You can give us a call at 1-800-761-1787, and our technically sound ProAdvisors will assist you with all your queries immediately. We have a team of QuickBooks desktop support experts who understand what it takes to allow QB sharing on multiple systems. Just dial our toll-free number and get answers to all your QB queries.
FAQ’s
Can I use QuickBooks on more than one computer?
Yes, you can use QuickBooks desktop on multiple computers by setting up multi-user mode. It allows multiple users to access and work on the same company file simultaneously. Make sure you need to provide the correct QuickBooks license for each user.
What do I need to set up QuickBooks sharing?
1. Provide a separate QuickBooks license for each user/computer.
2. Verify that all computers must be on the same network.
3. The company file should be stored on a host computer (server).
4. QuickBooks database server manager should be installed on the host computer.
How do I enable multi-user mode in QuickBooks?
1. Install QuickBooks on each computer.
2. You need to place the company file on the host computer.
3. On the host computer, you need to open your QuickBooks and go to File menu > Utilities > Host Multi-User Access.
4. On other computers, you need to open QuickBooks and select File menu and select Switch to Multi-User Mode.
How do I share the company file between computers?
1. Store the company file on a shared network folder on the host computer.
2. Ensure that all users have access permissions to the folder.
3. You need to use QuickBooks to open the file from the network location on each computer.
How many users can work in QuickBooks at once?
The number of simultaneous users depends on your QuickBooks license:
Pro: Up to 3 users.
Premier: Up to 5 users.
Enterprise: Up to 30 users.
More helpful topics:
How to Fix QuickBooks Unable to Connect to Remote Server Issue?