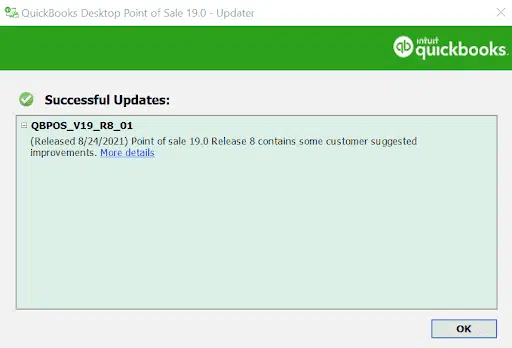
Learn how to fix QuickBooks error code 1606: Could not access network location:
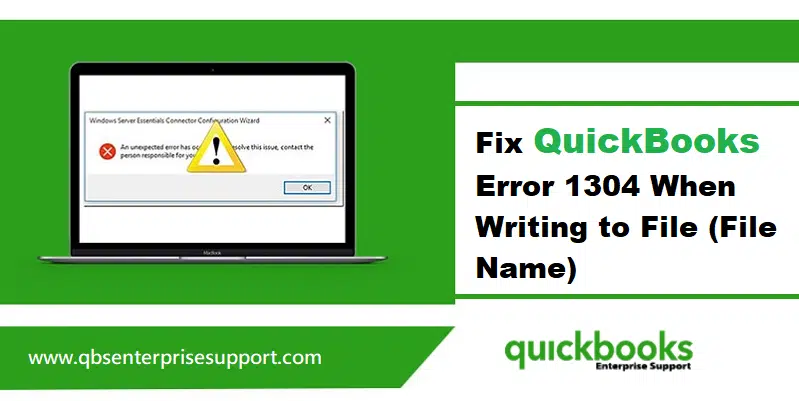
While installing QuickBooks updates, did you ever receive a message “Error 1606: QuickBooks couldn’t access network location”. Well if yes, then need not to worry anymore, as today through this post we will be dealing with this error, and will also discuss the causes of the same. According to the experts, QuickBooks error code 1606 shows that QuickBooks is unable to find or access a network location during the installation of QuickBooks, or the Windows current user account has been damaged. There can be a variety of factors causing this error, which we will be discussing later in this article. So, make sure that you read the article carefully till the end. You may see the following error message on your desktop screen:
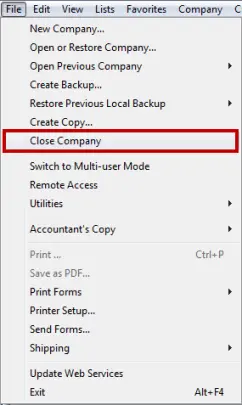
Warning
Error 1606: Could not access network location
You can also get in touch with our support team, in case you feel that the error is too typical for you to handle. Give us a call right away and leave the rest to our experts and certified QuickBooks ProAdvisors.
Triggers to QuickBooks error 1606 (Could not access network location)
As we said before there can be a couple of causes behind the QuickBooks error code 1606 out of which, we have tried to cover some of the common ones below:
In case your profile on Windows system has been corrupted.
Also, when the installation of QuickBooks has not been completed due to a corrupt setup file.
Another situation when such error might appear can be if the windows installer is failed to access the data from QB installation disk.
If the Windows registry is damaged or corrupted.
Solutions to Fix QuickBooks Error 1606 - Could Not Access Network Location
Below are some of the most effective methods that can be implemented by users to fix the QuickBooks error code 1606. Let us check out each of the methods one by one:
Method 1: Downloading and installing QuickBooks Desktop using admin credentials
The first method can be to download and install QuickBooks using admin credentials. This can be done by carrying out the steps below:
Initially reboot your system and then sign into the account by using the windows admin username and password.
After that, install and run QuickBooks to see if error 1606 is resolved or not.
Method 2: Installing QuickBooks again in Windows safe mode
It is recommended to start your Windows in Safe mode and then attempt to install QuickBooks.
Reboot the Windows in safe mode. You can do this by Tapping the F8 key repeatedly on the bootup screen.
After that, select Safe Mode with Networking, followed by hitting Enter key.
Now install QuickBooks via the setup file.
Method 3: Installing QuickBooks via new Windows admin user
You need to create a new user account on Windows with admin privileges. You are also needed to reboot the Windows and sign in to the recent account.
Windows 10:
For Windows 10 users, the procedure to create a new Admin user is given below:
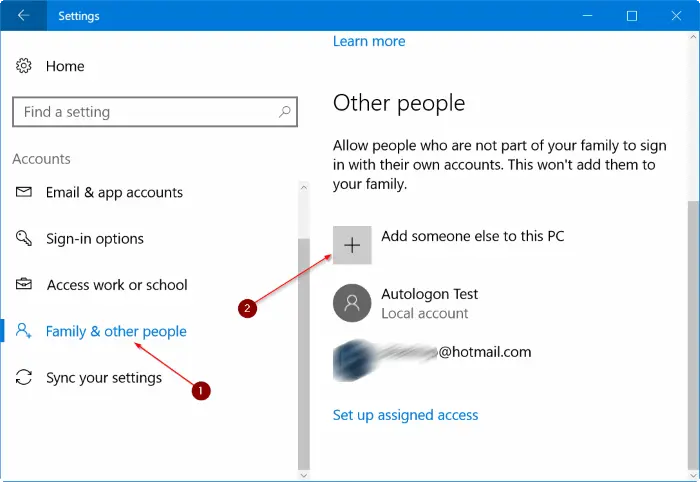
You need to first select Windows start and Settings.
Also in the accounts section, select Family and other users.
Followed by, selecting Add someone else on this system.
You are also required to select I don’t have this person’s sign in information and then hit a click on Add a user without Microsoft account.
Now type the User name and the password.
Also, hit a click on Finish and also select Account.
Moving ahead, you need to select Admin from the account type section and then hit OK key.
Windows 7 and 8:
The steps for Windows 7 and Windows 8 users are discussed as under:
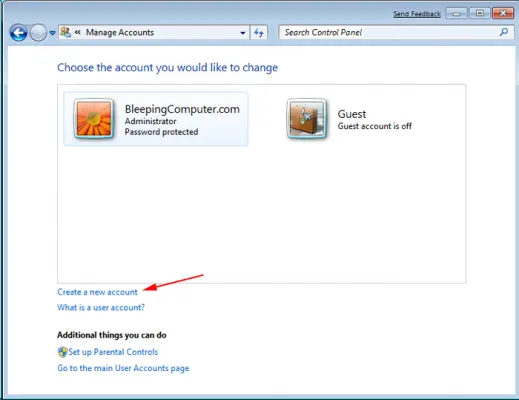
For this, you need to choose the Windows start option.
In the search programs box, you need to enter User accounts.
Also select User accounts, before that select Manage account.
Now assign a name to the New account and select Admin and click on Details.
Finally, install and launch the QuickBooks software.
Method 4: Download the QuickBooks installation file
At times, the CD drive fails to run the data on the CD as a consequence of scratches on the installation disc. This makes it necessary for you to download the setup file from the QuickBooks product download page.
Method 5: Installing the QuickBooks in selective startup
If none of the above-mentioned methods work out, then try logging in in the selective startup mode. Once that is done, again try installing QuickBooks.
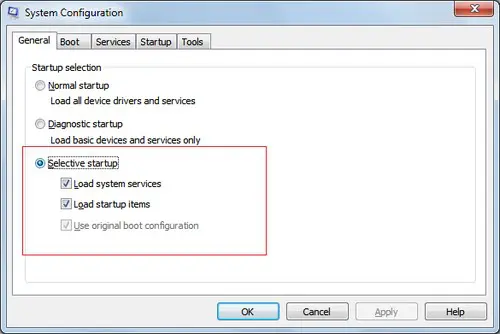
In this particular method, you need to first press the Win + R keys on the keyboard to open Run command.
And then, type in Msconfig and then select OK tab.
Also, move to the General tab and select the Selective startup option, followed by Load system services.
Followed by, in the services tab, and then choose the Hide all Microsoft services option.
And then, opt for Disable all icon.
Now you need to unmark the Hide all Microsoft services checkbox.
And also, verify the services list, and ensure that the Windows installer checkbox is selected. In case not, then mark it. Also, select the Ok icon.
The final step is to move to the system configuration window and click on Restart tab.
Method 6: Fixing any wrong registry subkey
The process is supposed to be followed by system admin. This process includes editing the registry, which, if not done correctly, could result in serious damage to the device.
Method 7: In case you are running QuickBooks desktop in Windows 7 installed in Parallels
At first, log out of your parallel and then log in again.
In the parallel Desktop, you need to choose Devices and then click Shared Folders.
Now select Disconnect All (you will be logged out of the parallel).
Lastly, sign-in and install QuickBooks desktop.
Final Words....!
We have tried to summarize some of the best possible solutions to the QuickBooks error code 1606 in this article. And we hope that after scrolling through the same, you might be able to get rid of this error successfully. But if by any chance, if you are unable to do so, then you need not to be worry, as our QuickBooks enterprise customer support team will be there to help you out. All you have to do is ring to us at 1-800-761-1787 and leave the rest to us.
FAQs
What is the error message associated with QuickBooks Error 1606?
The error notification that shows up in association with Error 1606 is "Error 1606: Could not access network location."
How can I prevent Error Code 1606 in the future?
Follow the directions given below: 1. The QuickBooks installation should be allowed to complete without any interruption, and the system requirements should be checked first. 2. QuickBooks should be updated frequently. 3. A seamless network connection is mandatory to prevent any network issues.
What should I do if the network location mentioned in the error message does not exist?
1. Revert to a previous backup. 2. Remove any remnants of the previous installation.
QuickBooks error 1706 is basically a point of sale error. QuickBooks point of sale is a trustworthy inventory and billing management solution. The QuickBooks error 1706 can be seen due to several causes and demands for immediate remediation. However, this error is termed as an installation error, which can be seen due to operating system issues, components similar to POS error 1304 and error code 1642 at the time of initializing or installing .net patches mandatory for better functioning of the software.
Specific issues encountered while installing essential .NET patches, may also lead to POS Errors. Simply explained, this error is seen when users makes an attempt for installation from a removable media, such as, a CD or DVD. You may see the following error message on your desktop screen:
Error
Description
Warning
Error: 1706 No valid source could be found when opening Point of Sale
If you are also facing QuickBooks POS error code 1706, then this article can be of great assistance to you. In this article, we will provide a deep insight into the various causes leading to the error, including the quick fixes for it. Moreover, if you need any help from the experts, then connect with us through our helpline 1-800-761-1787, our professionals will help you out in resolving the issue without any further mess..
What may cause the QuickBooks Point of Sale error 1706?
QuickBooks error code 1706 can be usually seen due to a couple of factors, a few of which are listed below:
Microsoft .NET framework 1.1 that is installed on the system that too in a beta version or the Microsoft .Net framework version installed on the system is not compatible, not properly installed, or is incompletely installed.
QuickBooks software is not installed correctly or may be partially installed.
The files are over-fragmented.
The source such as CD, DVD or Install Shield from which QB point of sale has been installed is damaged or corrupted, so important POS components could not be installed.
There might be some issues related to Windows registry files.
Another trigger can be if your RAM doesn’t have enough space.
If the Microsoft .NET Framework configuration may have some issues.
In case there are too many applications that start during the Windows startup.
Solutions to QuickBooks POS Installation Error 1706
There are various solutions for troubleshooting the QuickBooks error code 1706. This section contains tried and tested methods for resolving the error. We will be discussing each of them one by one:
Method 1: Update QuickBooks Desktop Point Of Sale to the latest release
You need to simply navigate to the Downloads and update web page drop down menu.
Furthermore, choose QB point of sale as the product in the product drop-down menu.
You now have to choose the Edition and select the Version or year.
You also have to click on Search tab.
Also, click on the link with the title Get the latest updates.
After that double click the POS executable file and also, overwrite the existing extracted files, in case it is prompted at the time through the installation process.
Next, choose All positive options on the installation wizard.
You are then required to choose the mode in which you are going to install and use QuickBooks point of sale.
Choose the Single user, in case you use the QuickBooks POS on a standalone system.
Also, choose Multi-user mode in QuickBooks POS for more than two computers. You need to be careful about selecting the system type server or workstation on which POS software is being installed.
In case of an incorrect selection of workstation type, then uninstall and then re-install again, as you cannot modify the installation type. Moreover, you can check by going back and forth to ensure the selection for QuickBooks POS installation.
The final step is to reboot the system after the POS installation to open and activate QuickBooks POS.
Method 3: Downloading the Microsoft Fixit tool or system file checker tool
Here you need to download the system file checker tool and install the same by selecting the scan now option.
You are supposed to click on the Start tab.
After that type Command prompt in the Search bar.
You now have to right click on Command prompt.
Go for Run as admin option. If needed enter the Admin password.
If your system is using Windows 11, 10, 8.1, 8 operating system, then you would have to run the DISM tool before running the system file checker tool.
You now have to type SFC/Scannow in the command prompt window.
Also, hit Enter tab.
The System file checker tool will scan and repair the corrupted system files.
The command prompt window shouldn't be closed till the verification process is complete fully.
Also, check if the issue got fixed.
This will surely repair the Windows operating system files comprising of Microsoft .NET Framework.
QuickBooks Desktop Point of sale (POS) Activation steps?
You need QuickBooks point of sale activation every time you installs QuickBooks POS to open or create company files. As soon as you open Point of sale, you will see an online registration form with boxes, wherein you are having to punch in the last 4 digits of the business phone number that you have used while purchasing QuickBooks point of sale and the zip code of business address and then click on Continue.
In case you see only the validation code appearing during the product registration process depicts that POS did not receive an active internet connection. If such a situation arises, the online registration form doesn’t come up, and only the validation code comes up.
This brings us towards to the end of this article, where we hope that the information shared in above might have helped you in resolving the QuickBooks POS error 1706. In case you continue to face the same issue even after carrying out the steps above, then, in that case, we recommend you to contact our QuickBooks support team by dialing 1-800-761-1787. We are a hub of tech savvy accounting professionals, who work round the clock to provide the best possible support services to all the users..
FAQs
Q.1. What does QuickBooks POS 1706 means?
Ans. Users of QuickBooks POS may stumble on the error message stating "Error: 1706 No valid source found when opening Point of Sale". This error means that you can't run QuickBooks program anymore.
Q.2. Why QuickBooks desktop Point of Sale installation errors occurs?
Ans. There can be several reasons why QuickBooks point of sale installation errors occur. Few are as: 1. System requirements not meting as expected. 2. Antivirus software interference 3. If there are some compatibility issues
Q.3. How can I fix POS Error 1706?
Ans. The error can be fix using the following methods: 1: You can fix this error by updating QuickBooks POS to latest. 2: Reinstalling QuickBooks Point of Sale can also troubleshoot such error. 3: A simple system restart can fix this issue.
Learn how to troubleshoot multi-user issues for QuickBooks Desktop for Mac:
Multi-user mode is one of the best features offered by the QuickBooks software. The QuickBooks desktop is designed in a way to make it accessible in the multi-user mode, which simply means multiple users can work on the software at a particular time. At times, there can be a situation that you might face issues related to multi-user mode in QuickBooks for Mac. This is usually seen when you try to share a company file. If you are also facing difficulty regarding the same, then this post will help you in resolving the multi-user issues in QuickBooks for Mac.
However if you are not good in technical aspects or looking for any technical assistance to resolve these errors quickly, then you can contact our U.S based certified professionals right away at 1-800-761-1787. Our experts will help you in rectifying the multi-user issues in QuickBooks for Mac in the best possible way.
Important points to consider
Before heading forward, it is important to keep certain things in mind. Let us have a look:
Did the system running QuickBooks server go on sleep mode?
In order to keep the system from going into sleep mode, then you simply need to change your preferences. This can be done as follows:
Choose System preferences, and then Energy saver.
You are then required to select the Energy preferences and also close the window.
Did any of the network settings on the system or the QuickBooks server computer change?
If that is the case, then you need to ascertain that the QuickBooks server is sharing the company file and also avoid changing the network settings. In order to check the settings, you need to perform the steps below:
Choose System preferences option, followed by selecting Network tab.
Furthermore, if the settings are correct, then make sure to Close the window. Just in case you need to make updates, then make your changes and choose Apply tab.
Is your system using WIFI?
The connection to the QuickBooks server might have been dropped due to a weak signal. You need to move to an area with a string WIFI signal or choose ethernet connection.
Steps involved in fixing multi-user issues in QuickBooks desktop for Mac
The steps involved in resolving the multi-user issues in QuickBooks for Mac are as follows:
Step 1: Verify if the QuickBooks server is running and the company file is shared or not
In this particular method, you need to first click on go from an application.
After that, you need to double click on the QuickBooks server app icon, that is used to you.
After that you need to Share that file is needed.
In case the file is listed under not shared, then you need to select the File or click on the Start sharing tab.
If the file is not listed, then hit a click on the + tab in the lower left corner to Add the file.
In case only the host system gets permission to install and then run the QuickBooks server app. It is also important that the company file is saved on the same system on which the QuickBooks server app got installed.
Step 2: Checking the Mac OS firewall settings
Firstly you need to first hit a click on the Apple menu to the desktop and also choose the System preferences.
After that, select the Security and privacy icon.
Followed by selecting the Firewall tab and then choosing the Firewall options tab.
In case you spot the button to be gray than you need to hit a click on Lock icon to unlock it.
Now you need to verify that the QuickBooks server app is set to allow incoming connections.
Step 3: Verifying file sharing permissions are set correctly on the host system or not
At times, incorrect setting of the permissions on the host system may also lead to a many of multi-user issues in QuickBooks for Mac.
Initially, you will now have to click on the Apple menu and opt for the System preferences.
After that choose the Sharing icon.
Next, tick the checkbox beside File sharing.
Also, add that folder where the company file is located in the share folder.
Go to the + tab to the shared folder column.
Select the Folder where the company file is located and then hit on Add option.
After that you enter in the users column, ensure that the permission to Read and write for everyone, or for the specific users who will be using QuickBooks desktop.
Step 4: Verifying that the Bonjour service is working properly on all systems or not
It is important to note that the windows multi-user fixing methods cannot be applied to the Mac networks. The process for Mac networks is:
You need to first select the File from the new finder window.
And then, be clear that the other systems using QuickBooks are seen is the shared section.
In case you are unable to see another system, then The software will not be able to share the file with those systems. Also, the bonjour needs the following ports to open 56565 TCP, 5297 TCP, 5298 TCP/UDP, and 5353 UDP.
If the QuickBooks and its server is already installed in the host system, then the you need to unplug the ethernet cable, turn off and also reboot the system. Once the reboot opens the QuickBooks desktop, you need to try enabling the multi-user mode.
In case it enables successfully, then it means that the problem is generated by the network hardware that provides the network access. At times, the hardware cannot work by blocking the communication between QuickBooks and the server.
Step 6: Setting up the peer-to-peer direct connection
You can also connect to systems together using a single ethernet cable.
Firstly, You need to log out both systems and Plug each end of the cable into a system’s ethernet port.
When the system starts then you need to permit Bonjour service to see both the systems to each other. In order to verify that the new finder window and then see if each system can see the other in the shared section.
Also you need to pick one system as a Host.
Now you will have to Open file or Enable the multi-user mode from a file or enable multi-user mode.
And then open QuickBooks in the second system from the shared files section or open the company file.
We end this article over here, with the hope that the information shared in above might be of some help in resolving the QuickBooks multi-user issue in QuickBooks for Mac. However, if the issue persists even after following the steps above, then we recommend you consult our QuickBooks enterprise technical support team at 1-800-761-1787. Our U.S based accounting experts and certified accounting professionals will be happy to help you.
Important questions to answer (FAQs)
Is the QuickBooks server running when the system goes into sleep mode?
This can be seen again by changing the system preferences: You need to select the application from energy saver. Also consider that setting the system sleep to never.
Is any of the network settings on your computer or QuickBooks server computer change?
You need to be clear that QuickBooks server is sharing the company file or avoid changing the network settings, when the file is shared.
Did the system use Wi-Fi?
The connection to the QuickBooks server might have been loose due to a weak signal. You are recommended to use a strong wi-fi signal or consider using an ethernet connection.
Learn how to resolve the data damage issues on your QuickBooks company file:
Corrupted QuickBooks company file is one of the major issues reported in recent times. Just like other databases, QuickBooks also faces certain issues. Fix Data Damage on QuickBooks Desktop Company Files becomes necessary when formatting one or more pages becomes damaged, or there are performance failures, disk failure, or power surges.
A corrupted QuickBooks company file is one of the issues that you might often come across. In case you identify any data issues, or if you have done the research and suspect data damage, then need not worry, as this post would be greatly helpful to you in learning how to fix QuickBooks file problems effectively.
In this article, we will be talking about the QuickBooks company file data damages and its fixation in detail, along with the factors causing such an error. On that note, let us buckle up and learn more about Fix Data Damage on QuickBooks Desktop Company Files. Although, if you want our team of experts with years of experience and expertise to resolve the error on your behalf, then you can connect with our team at 1-800-761-1787. We will be there to assist our users in a single call.
Identifying signs for data damage in QuickBooks company file
Identifying the data damage error in QuickBooks company file becomes easy, once you go thorough with the below listed signs. Let us check them out one by one:
Errors like “A data problem prevents QuickBooks from continuing” in the verify data utility or verify target: values in minor do not match major on the screen or in the Qbwin.log file.
If there is a negative balance in the transaction history
If any of the transaction and entry is missing from the lists
In case the paid bills or invoices are shown unpaid
When the user open the “Send feedback online” and while moving to the Bug report Window, they need to spot the HTML code in the Window.
In case, the account's name is preceded by an asterisk (*). This means that the software created these accounts due to the original accounts were missing.
Triggers to the data damage errors in QuickBooks Desktop
There can be certain factors that might trigger the QuickBooks company file data damage. Out of those factors, we have listed some of the common ones below:
In case there is any virus attack to the hard drive on which the database is stored, then such an error is probable to appear.
If the data file size has expanded beyond the prescribed limit.
If there is a sudden power surge or drop, then it might trash the entire hard drive leading to such an issue.
Along with that, if the system lacks certain resources, which include, RAM, virtual memory, network interface cards, routers, network cables, etc.
Inappropriate shutdown of the system might also end up in QuickBooks company file data damage, which requires you to fix QuickBooks file immediately.
Preventive actions
Before you jump on to the quick fixes to data damage in QuickBooks company file, there are certain preventive measures that can be implemented by the users. These preventive actions include the following:
Selecting a hard-wired network over wireless:
This is recommended, as in case you make use of a wireless network, it might enhance the risk of dropped connections, which in-turn create issues with the data file. These issues can be avoided by opting for a hard-wired network.
Creating a backup within QuickBooks:
Often the files are automatically backed up in QuickBooks, which helps a lot. However, when the log file is created and continues to increase in size, the performance starts getting hampered and this increases the risk of data corruption unless users take the backup of the data. This backup file is later used by Intuit for data recovery. So, it is recommended to make a verified backup within QuickBooks accounting software on a monthly basis to avoid having to Fix Data Damage on QuickBooks Desktop Company Files later.
Checking the file size:
QuickBooks Pro and Premier users can go for 250 MB file. Whereas, when the file size reaches 500 MB, it might turn down to sluggish performance. However, QuickBooks Enterprise users can go for 500 MB. But when this file reaches 750 MB, it might start creating issues. Thus, it is recommended to keep the file in the prescribed limit to avoid any sort of issues. Users can also condense and reduce the file size to help fix QuickBooks file performance problems.
Update patches:
Users can easily spot the release number in the first line of the product information Window. Using the latest patch might not create such an issue later.
Monitoring list size:
QuickBooks users will have to watch the list limits in QuickBooks Pro and Premier. The most important point to note here is that there will not be any warning sign, if the user reaches the upper limit. Moreover, the inactive list items don’t count in this list.
Keeping a check on the database file fragments monthly:
Users might encounter fragmentation, if the system gets filled up with the data over time. Also, if users are putting in the data without carrying out a clean-up in it. Users will also have to keep the number below 10,100 to have proper functioning.
Quick fixes to the data damage on QuickBooks desktop company file
Now that the users are well aware of the preventive actions, it is the right time to start with the fixes to QuickBooks company file data damage. Let us check out each of the methods progressively to Fix Data Damage on QuickBooks Desktop Company Files effectively.
Fix 1: Manually repair the company file by rebuilding the data
In case you are comfortable in fixing the error manually, then you can fix the issue from the verify results Window. Before carrying out the steps below, it is recommended to back up the company file. The steps to be followed for manually fixing the issue are:
Initially, you need to move to the file menu. And then moving on to the Utilities tab.
After that, choose verify data opt.
QuickBooks Verify Data Utility Screenshot
Followed by letting the tool check the file for any sort of data issues.
Next, select expand all to see the errors from the verify results screen.
Screenshot of the Verify Results screen in QuickBooks, displaying detected data issues and errors in the company file after running the Verify Data utility.
Now select see online article and carry out the steps to fix the issue.
These steps often help you fix QuickBooks file integrity problems caused by corrupted data.
Fix 2: Repairing the company file using the Rebuild Data Tool
You can make use of the rebuild data tool which is in-built to QuickBooks desktop and fixes the company file data issues in QuickBooks desktop easily. The steps to be followed here are:
At first, move to the file menu and then move to the utilities tab and also choose rebuild data.
Screenshot showing the QuickBooks Rebuild Data tool in action, used to repair company file data issues and restore file integrity.
After that, you need to select OK tab on the QuickBooks information Window. And follow the on-screen steps to save the backup.
Next step is to let the tool repair the file. This process might take some time. And it might seem that the software is stuck, but as long as you are is able to move the mouse, the tool is working.
Now hit a click on OK button after receiving the message stating “Rebuild has completed”, and move ahead to carry out the verify utility process.
Screenshot displaying the confirmation message in QuickBooks indicating that the Rebuild Data process has been successfully completed.
After it finishes, click on OK tab.
Also, move to the File menu and then hover over the Utilities tab and also choose Verify data.
Screenshot showing the QuickBooks Verify Data utility checking the company file for hosting and data integrity issues.
Last step is to let the tool check the file for data issues.
In case the software is unable to detect any issue, then click on ok tab. You can keep using the company file, as there is no data damage.
Screenshot displaying the message in QuickBooks confirming that no data damage or integrity issues were found in the company file.
If any issues persist, proceed to Fix Data Damage on QuickBooks Desktop Company Files using the next steps.
Screenshot displaying the message in QuickBooks confirming that no data damage or integrity issues were found in the company file.
Fix 3: Use QuickBooks file doctor form tool hub program
In case none of the above methods worked in fixing the error, then you can repair the file by using the QuickBooks file doctor tool. The steps to be followed here are:
Logo of the QuickBooks Tool Hub, a central utility for troubleshooting company file issues, network problems, and other QuickBooks errors.
And then, open the company file issues tab from there.
Screenshot of the Company File Issues tab in QuickBooks Tool Hub, used to diagnose and repair data damage in QuickBooks company files.
After that, you need to opt for run QuickBooks file doctor. This might take up to one minute for the tool to open up.
Screenshot showing the QuickBooks File Doctor within the Tool Hub, used to detect and automatically repair company file data issues.
Now, in the tool, choose the company file from the drop-down menu. And if the file is not identified, it needs to go for browse and search tabs to find the file.
Screenshot of the QuickBooks File Doctor in Tool Hub, showing the option to browse and select the company file for data damage diagnosis and repair.
Followed by selecting check the file option and hitting continue tab.
Screenshot showing the QuickBooks File Doctor tool checking a company file for data damage, allowing users to detect and repair integrity issues automatically.
The last step is to enter the admin password for QuickBooks and hit next.
Screenshot of the QuickBooks File Doctor in Tool Hub prompting the user to enter the QuickBooks admin password to begin repairing the company file.
This process can automatically fix QuickBooks file damage and restore stability to your data.
Fix 4: Deletion of Customer reports and memorized Transactions
Another effective method for resolving the data damage in QuickBooks involves a removal of the customer reports and memorized transactions, an easy process involving the following steps:
Steps for deleting Memorized Reports
To start the process, move to lists wherein you should move to Memorized transactions.
After that, proceed to the edit option wherein you need to choose delete the memorized transactions.
Finally, hit on Ok.
Steps for deleting Customer Reports
The first step requires you to navigate to the Reports and then proceed to Reports Center.
After that you need to click on reports to be deleted, followed by choosing X.
Finally, click on Ok.
These simple steps may also help you Fix Data Damage on QuickBooks Desktop Company Files efficiently.
DIY Steps to Fix Data Damage for QuickBooks Desktop For Mac
Before rebuilding the company file, you should make use of verify tool in QuickBooks for mac for scan the company file for errors or data damage.
Herein, you need to choose File menu, and select Utilities tab.
Furthermore, choose Verify data and also choose OK tab to Close all Windows.
In case you are able to see "Your data has failed the integrity check" you need to rebuild the file.
In case there are no issues with the data, then you are done with the process.
Steps to rebuild the company file data
After you have verified the data, then you can rebuild the company file to resolve issues related to data or data damage.
You need to first choose File and choose Utilities.
Further, choose Rebuild data, then select OK tab to close all Windows.
The QuickBooks software will ask to make a backup before rebuilding the company file, and choose OK tab. In case you don't want to backup, then choose Cancel to continue rebuilding the company file.
In case you haven't set up any Backup preferences, QuickBooks will ask to update them. Choose Backup preferences and edit as required, and hit OK tab.
After the backup is finished, then select Show in finder to locate the backup or select Ok.
Once done with that, click on OK tab, and the rebuild is finished.
In order to ensure that the file is free of errors, you simply need to verify the company file again. In case you still have issues, then rebuild the file again.
Whereas, if in case the error continues to trouble you again and again, then in that case, we recommend you to consult our U.S-based accounting professionals directly using our support line i.e., 1-800-761-1787. Our QuickBooks error support experts don’t leave any stone unturned to provide the best possible support services. So, do not think much and delay, just discuss the queries with our team immediately.
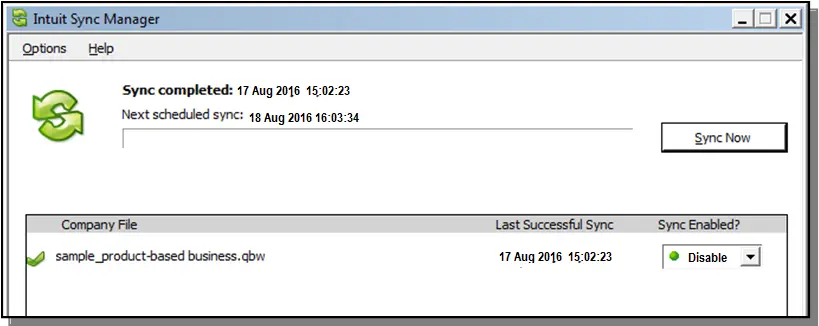
Learn how to Sync the QuickBooks desktop files between two computers:
Syncing your data between devices permits you to increase the productivity and also enhances the flexibility in accessing the data. When it comes to syncing the QuickBooks files between two computers, the majority of the QB users are unsure about the process to do so. In case you try to sync your data without having prior information, then you might face various issues. Thus, considering this fact, our team of certified professionals has summarized the entire information related to syncing QuickBooks files between two computers in this article. So, if you are interested in knowing the process of syncing and sharing the QuickBooks files between two computers, make sure to continue reading the post.
If the process seems too tedious, we also have an easy alternative for you. Get in touch with our technical support team at1-800-761-1787and ask them to carry out the process on your behalf. Our U.S based certified accounting professionals will ensure to complete the process without any kind of a mess.
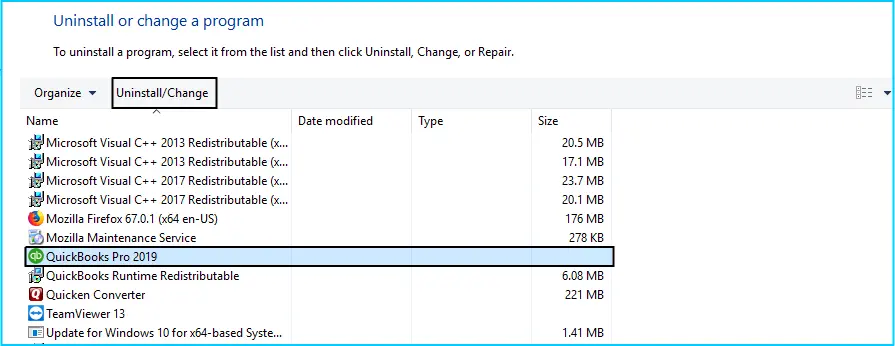
Before beginning with the process, you need to ensure that there is a correct installation option for each system. It is also important to check if both the systems are connected to the same network. Another option available for you is to uninstall and reinstall QuickBooks on both systems and then use QuickBooks on both computers with the right options.
When you re-install, the configuration gets completed on both desktop then the primary desktop will store the company file and also will allow you to sync the data to other systems on the network.
You can also opt for the Data transfer utility, which is known as a third-party commercial utility, if it contains two separate company files that need to be merged. Once you are done with these fact checks, it is the right time to jump on to the process to sync QuickBooks files between two computers.
Steps to sync QuickBooks desktop files on two computers
So, now that you are aware with all the above facts and information, it is the right time to begin with the process to sync QuickBooks files between two systems. The steps to be followed are:
To begin with, you need to install and download data transfer utility provided by Intuit. It needs to be installed on the primary system that hosts the company file.
You are then required to paste the company file to the primary system from a secondary system. And can also save the company file to disk or can also transfer it to the source computer over the network.
Now, launch the QuickBooks on the primary computer. For this, you need to select the file and open a company file from the secondary computer and also select open company option.
Now, in the data transfer utility, You will have to select open source company tab in the export data from the source company option.
Select Yes and permit access even if the QuickBooks software is not running.
You need to search for the opt to permit the application to access personal data. After which, click on continue, yes and done in QuickBooks.
You will have to select the close tab in the currently connected to tab, which will be there in the data transfer utility..
Followed by checking on the file menu and also selecting close company option in QuickBooks.
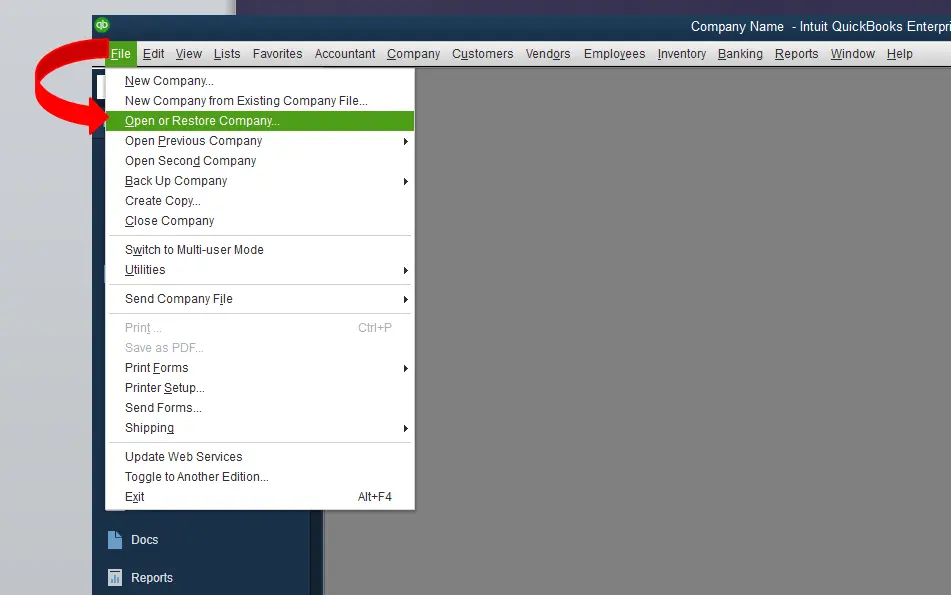
Click on the file option and then click on the open or restore company option. Along with that, hit on the open a company option in QuickBooks.
Now you are supposed to select open destination company of disk transfer utility from the import data into destination company.
Select Yes, always permit access even if QuickBooks is not running and also permit the application to access personal data. Further, click on continue, yes, and done options, respectively.
Proceed to close tab for the currently connected to field in the data transfer utility.
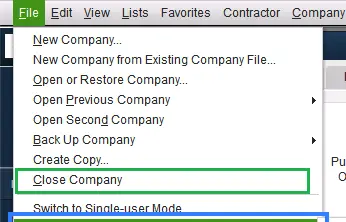
Followed by selecting the file menu and also selecting close company in QuickBooks.
Select type of data and change tabs respectively from data transfer utility. Along with that select an option that presents the information you wish to import to the destination file.
Lastly, navigate to the import data into destination, in the data transfer utility and also select the import data tab.
This would probably sync the files between two computers successfully.
Steps to share the desktop versions between two computers
It should be noted that the database file manager permits the software to interact with the QuickBooks desktop company file. You need to use this supported mode for setting the file, which means the recommended multi-user set is the company file stored on the host file. Below are effective steps to turn on the host. You should ensure that you are using a server to host the file, which you will not need to turn on hosting for workstations. Turning on hosting is only applicable to the host systems. Now, let us check out the steps involved:
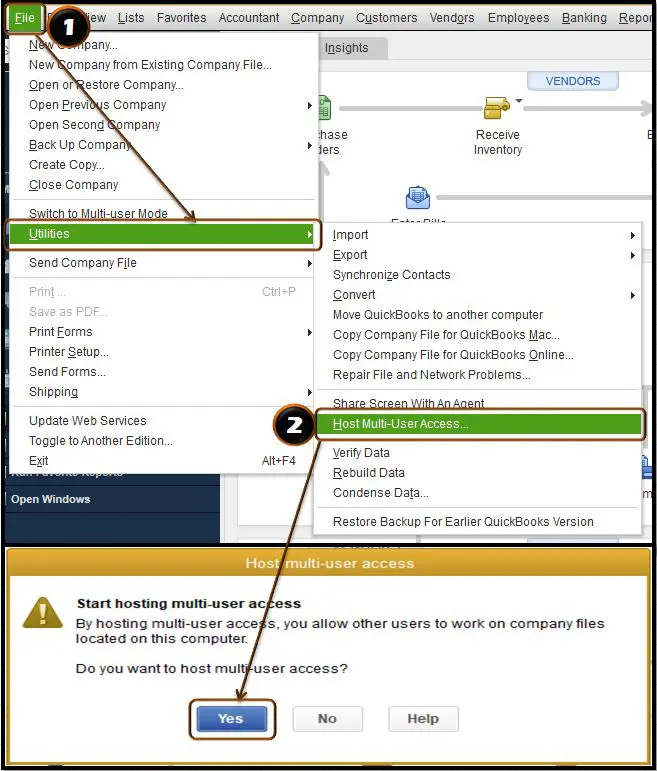
For this, you need to first navigate to the File menu and also select the Utilities tab.
Followed by selecting the Host multi-user access.
You need to select Yes to confirm.
And also, follow the steps laid down below:
Initially, navigate to the server system, which is the computer that stores the company file.
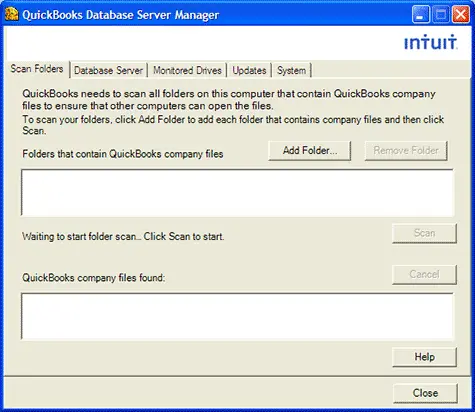
At the server system, you need to navigate to the Start menu and also search for the database server manager.
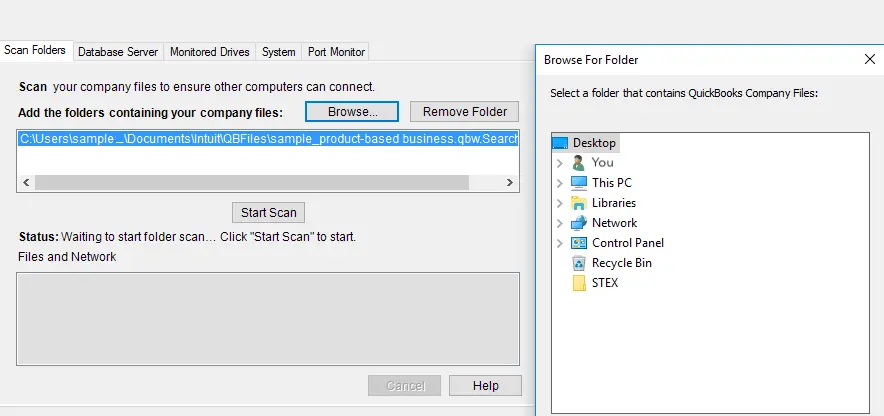
Followed by, clicking on Browse and browsing the folder where the company files are to be saved, in case the folder locations aren’t displayed in the previous step. Also, hit OK after that.
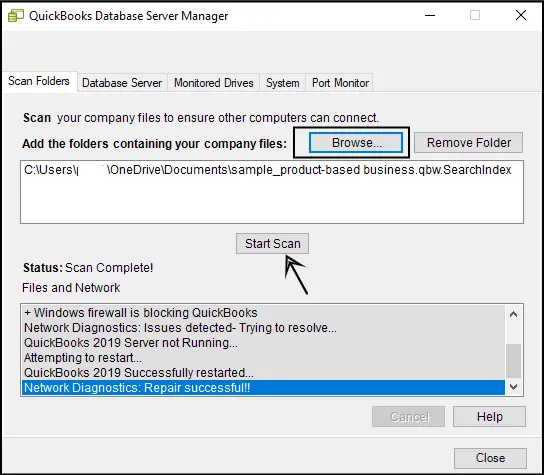
Select the Start Scan option. It will repair all the Firewall permissions to enable the QuickBooks to communicate over the network.
Close and try to open QB in multi-user mode on your workstations.
Database server setup for synchronization
You are suggested to store the company file or network sharing on the primary computer. Or select the option to use QuickBooks but not store the company’s file on the secondary computer and install QuickBooks. Perform the below steps after the completion of above steps:
Head to the scan folders tab, add folders, and scan, so as to scan the primary computer for the QuickBooks company file. Click on close once your verified company file has been found.
Hit a click on the company menu and move to the set up users and password and click on set up users tab within QuickBooks on primary system.
Click on add user tab in the system display and then assign the QuickBooks username and password.
Select the access options for the secondary computer and hit on Next tab.
Choose the changing or deleting transaction permissions and move to the next and finish tab.
Now, hit click on open or restore company and click on open a company in QuickBooks on the secondary computer system.
Search for the location on the network where the primary company file is stored.
Choose the file, then log in with the username or password created on the primary system.
The process to sync QuickBooks files between two computers become easy with the steps we have mentioned above. However, there can be a situation wherein you might face issues in carrying out the process, then in such a scenario, do not hesitate to call our QuickBooks enterprise support team at any point in time. Ring up at our dedicated helpline number, i.e. 1-800-761-1787, and discuss your query with our U.S-based certified accounting professionals and experts. Our expert will be happy to assist you.
Frequently Asked Questions
What is the need to sync and share QuickBooks files between two computers?
Syncing and sharing QB files between two computers allows multiple users to access and work on the same company file simultaneously.
What are the different methods to sync and share QuickBooks files between two computers?
The different methods to sync and share the QuickBooks files between the two systems are Network sharing, Cloud Sharing, QuickBooks Online, and Remote Access.
How do I set up network sharing to sync and share QuickBooks files between two computers?
The steps to set up network sharing between two computer systems are: 1. Ensure both computers are connected to the same local network. 2. On the computer hosting the company file, enable file sharing and set the access permissions. 3. Locate the QuickBooks company file and share its folder on the network. 4. On the other computer, map a network drive to the shared folder or access the file using the network path.