Importing credit card transactions into QuickBooks Desktop is one of the best ways to keep your books accurate without spending hours on manual data entry. If you want to import your credit card transactions into QuickBooks, then we have got you covered, this article will brief you with the entire process to import credit card transactions in QuickBooks. QuickBooks offers a great feature which helps in saving a lot of time as well as efforts.
One can easily download the business credit card transactions into QuickBooks. And after downloading the transactions successfully, one can also manage the transactions. To know more about importing credit card transactions into QuickBooks, make sure to read this article till the end, or you can also contact us using our customer support number. Our team of experts will ensure to provide you with immediate technical assistance.
Important point to remember
One can take into consideration the following points before performing the steps for importing credit card transactions into QuickBooks.
The most important point is you might see a column to add QuickBooks account number while downloading a file from credit card company. In case you have an account number, then it is suggested to provide the lowest sub account number.
Also, in case the users downloads transaction of more than 90 days, then they needs to import the transaction in excel format.
Another important thing is that to import credit card transactions into QuickBooks online, you will have to enter credit manually.
Or if there is a pay column in the file which gets downloaded from the credit card company containing extra details like merchant id, then one can change the column to match it with the vendor name.
Along with that there is no compulsion to add a new value to import file. There is an option to give a default value when importing credit card transactions into QuickBooks desktop.
How beneficial it is to connect credit card account to QuickBooks?
Credit card accounts should be connected to QuickBooks, due to the following perks namely:
When one downloads the transactions in QuickBooks, then it saves a lot of time.
Moreover, it is also possible to categorize the transactions when adding them to QuickBooks.
In case you do not have any business bank account, then you can get a separate bank account for your business to join QuickBooks. This helps in segregating business and personal activities.
Steps to import credit card transactions into QuickBooks online with CSV file
In order to import credit card transactions into QuickBooks online using CSV file, the below steps can be performed:
First step is to select Transaction and Banking.
After that upload the file or transactions by clicking on Upload a file option.
Next step is to select the QuickBooks account you wish to link with the credit card account.
Now Add account from the drop down menu, in case you don’t have an account in QuickBooks.
Followed by filling up the required fields to set up the account.
Moving ahead, you are required to Map QuickBooks online fields to the bank account.
And perform the steps to map QuickBooks online.
Choose the Date column and also the Date format.
After that, move to the description and click on the File.
In the next step, you will Positive and negative number in a single column.
Where, you are supposed to select column with Negative number.
Followed by ticking the Transactions that are to be imported into QuickBooks and choose Next.
Once done with that the software will confirm the transaction.
Where, you should click on yes to Confirm.
End the process after the transactions gets downloaded.
Steps to import credit card transactions into QuickBooks online
Herein, you will have to carry out the following steps:
First of all, select the Banking center.
And then, login the Business and credit card account.
The next step is to select the Credit card account.
You will see all the accounts you have at the bank. You are supposed to place a checkmark for each account that they wants to connect to QuickBooks.
Followed by entering the Bank account name.
You are then required to select QuickBooks account where the bank account is linked. In case you are not having any setup in QuickBooks, then it is suggested to select Add account from the drop down.
Followed by selecting the right Date range.
Now, click on Connect.
And the transactions would now get downloaded.
After that review the downloaded transactions.
Herein, you should see the Credit card account balance in the blinking center.
In case you want to track other credit card account in QuickBooks, then it is suggested to click on the add account tab and move back to step 1.
Tips for Accurate Imports
Always download transactions in the correct date range
Avoid importing duplicate entries
Reconcile your account after import
Backup your company file before importing
Use consistent naming for vendors and categories
Summing Up!
With this we come to the end of this post, where we expect that the above discussed steps would be more than enough to import credit card transactions into QuickBooks. However, if you have any query or if you get stuck at any point of time, then in that case get in touch with our QuickBooks desktop support team professionals and ask them to perform the necessary steps on your behalf.
Converting from QuickBooks desktop to QuickBooks online and stumbled upon any type of error? Well, need not to worry anymore, as here we are with this article to provide you with detailed information related to fixing errors when converting from QuickBooks desktop to online. QuickBooks conversion issues mainly occur due of damaged company files, large company files or internet connectivity issues. Once the error encounter, the migration process may fail completely or transfer incomplete data to QuickBooks Online.
QuickBooks online software comes with way more features and functionalities, which makes it compelling for the users to switch to QuickBooks online. Any kind of error in converting can lead to further inconvenience. To know more about fixing errors when converting from QuickBooks desktop to online, make sure to read this article carefully till the end. Or you can also consult our team professionals, in case you don’t want to tackle these errors on your own.
Important points to remember
Before proceeding further, the user is required to keep in mind the following pointers:
First update the QuickBooks desktop completely if it remains incomplete, then it is dangerous to import data as there are chances to a permanent data loss.
It is important to store the data file in QuickBooks desktop and maintain the transactions on both sets of books until you decide QBO is right for the business.
Also, it is important to ensure that you know the limitations of importing and then go for the right option.
Methods to fix the issues when converting from QuickBooks desktop to online
The user can perform the required to steps for the respected errors that can be seen when trying to resolve the errors that can appear when converting from QuickBooks desktop to online:
Error 1: Couldn’t connect to the database or could not load the database
Solution 1: Logging with admin credentials
These types of errors can be resolved by logging in with admin credentials:
The very first step is to visit the run window.
And then open control panel and select view tab from the drop down lost and select the small icons.
After that, select the user accounts tab.
And also select manage another account option.
The last step is to ensure that you have logged in as admin.
Solution 2: Checking out possible data issue
The user needs to first move to the file menu and then choose company operations.
After that the user needs to choose the create a new company and move to the next tab. Give this file a unique and different name.
In case the error doesn’t return in the test company file, and also open the original companies file directly:
The user is then required to select file menu and company operations.
After that select restore from backup and click on next tab.
And also select browse to an alternate backup file and select browse.
Now, move to the company name.
And also select the file qbpos.db and open it.
The last step is to register a new, unique name for the company file and then go for ok tab.
Error 2: We can’t export the data. It may be on a network drive
The user will see this issue if QuickBooks desktop company is located on a drive other than their local c-drive or it's open in multi-user mode.
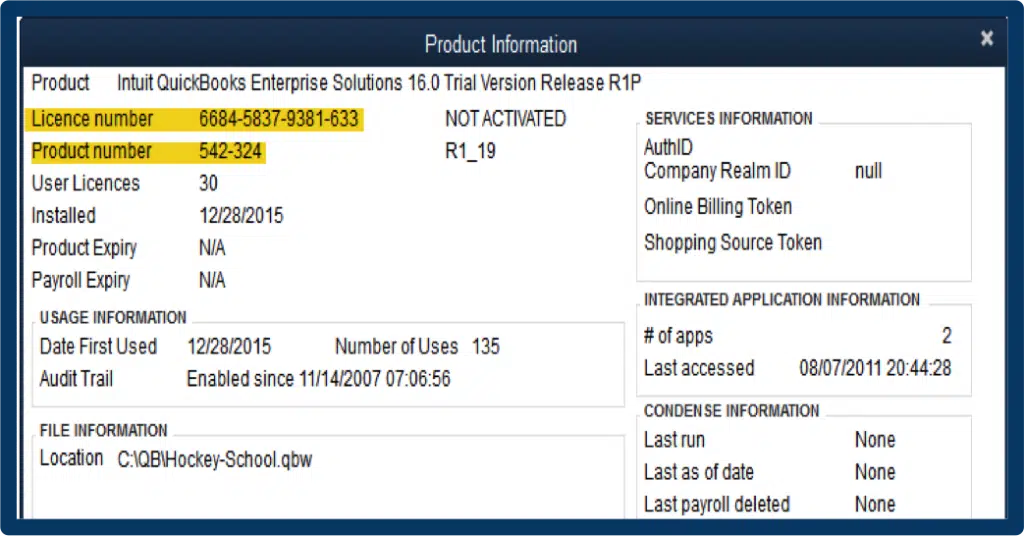
This can be resolved by pressing F2 key or Ctrl + 1 keys, to open the product information window and then check the file size.
The user is then required to close the QuickBooks desktop, and then copy the company file to C:\drive.
The next step is to open the company file in QuickBooks desktop.
Also, select the switch to single user mode, from the file menu.
End the process by exporting again and then from the file menu, the user has to pick the utilities tab, and also select the copy company file for QuickBooks online.
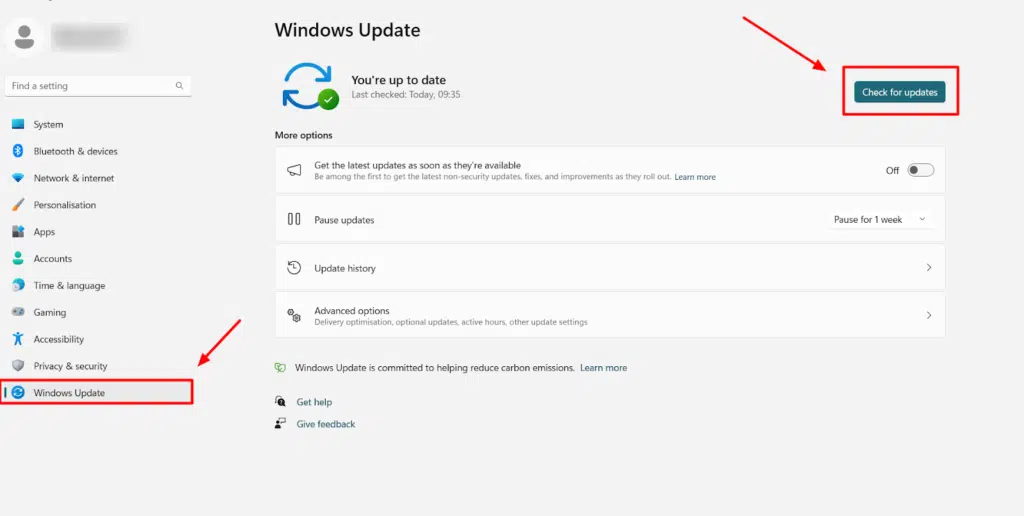
The very first step is to select the check for QuickBooks updates option from the QuickBooks menu.
Further, go for install updates.
And by the end, reboot the software.
Error 4: Problem in checking the company for import eligibility
This sort of error could be seen if the user is not the master admin, company admin or accountant user in QuickBooks online company file. Or if there is any issue with QuickBooks online payroll account services. The user can perform the below steps to fix this issue:
The user is recommended to ask the master admin to grant admin permissions, or have a company admin to perform the export process.
The next step is to ensure to login the online company before importing.
If the error continues, it is suggested to create a new online account.
Error 5: Exporting QBDT data to QBO
At times when the path of the company file is more than 4 folders deep, then this type of error could be witnessed. Just as in case of the file path C:\My Stuff\QuickBooks files\My Company\2016\Work Files\data.qbw. This can be resolved by performing the steps below:
The very first step is to press F2 or Ctrl + 1 keys in order to open the product information window and then verify the company file location.
The next step is to close the QuickBooks desktop.
Furthermore, the user should copy the company file to any folder in the C:\drive.
Also, open the QuickBooks desktop, and move to the file menu and choose the open or restore company.
End the process by opening the saved file from the new location, and then try to import the file once again.
Error 6: Please delete all employees already entered in QuickBooks Online
While transitioning data, QuickBooks Online can't replace employees as they're intricately tied to payroll items, year-to-date history, and other aspects of the payroll setup.
Solution:
QBO prohibits the deletion of employees with paychecks or pay history. In order to transfer your data, you'll have to create a new QuickBooks online company without a payroll setup to move your complete data.
Error 7: Your file is too big to export
Your QuickBooks Desktop file cannot have more targets than the following limits:
Once you have performed the above stated procedures, it is most probable to fix the issues successfully and convert from QuickBooks to online without any sort of further technical glitch. However, if you are still facing any sort of error, or if you want our technical geeks to work on your behalf, then feel free to consult our technical QuickBooks error support team at 1-800-761-1787, and we will ensure to provide you with immediate technical assistance.
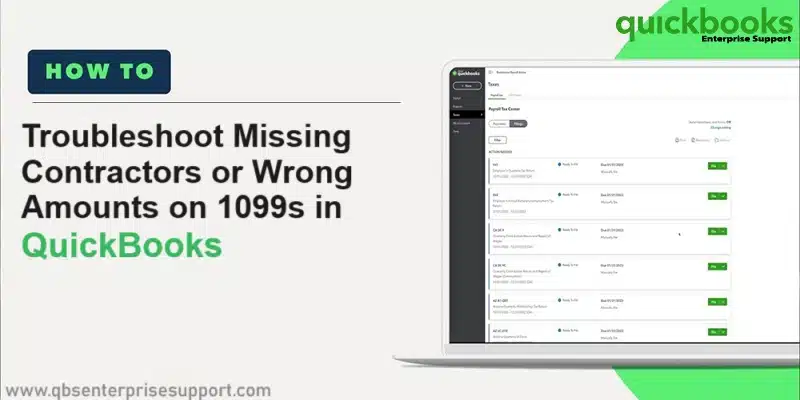
You created your 1099s in QuickBooks online or QuickBooks desktop, and are unable to spot any of the contractors or there is any incorrect amount, then you have landed on the right place. Today’s article will guide you through the process to fix missing contractors or wrong amounts on 1099s. There can be certain steps to fix missing contractors or incorrect amounts on 1099s, which are discussed later in this article. Thus, we would recommend you to keep reading to elevate the understanding of those fixes.
Additionally, if you want our QuickBooks professionals to the mend the error on your behalf. You can have a conversation with our professionals directly via our customer support number i.e., 1-800-761-1787. We are a team of professionals, who work round the clock to provide best possible support services on a single call. Thus, feel free to connect with us at any point of time, we will be happy to help you.
Steps to be followed to fix missing contractors or wrong amounts on 1099s
As mentioned earlier, there are certain steps that you can follow to get rid of missing contractors or wrong amounts on 1099s. These steps include the following:
Step 1: Ensuring that the contractor is active and set up for 1099 tracking
In case a 1099 contractor is missing from the list, at the time when you start to create the 1099s, then it could be if they are not active or marked as eligible for a 1099. You can check on that as follows:
QuickBooks online
In case you are in middle of crafting 1099s, on the review your contractor’s information windows, then it is recommended to choose the add from vendor list tab and also select the appropriate vendor.
In case you are not creating 1099s, then you can change your status by carrying the below steps:
First of all, you need to choose the Expenses tab and then Vendors or payroll. After that choose Contractors.
The next step is to choose the Contractor you want to convert and then click on Edit tab.
Lastly, you should mark the Track payments for 1099 checkbox and then choose Save tab.
QuickBooks desktop
Initially, you are supposed to move to the Reports tab and then, choose Vendors and payables.
After that, choose 1099 summary.
And also, select All vendors in the 1099s options dropdown menu.
In case you identifies any missing vendor, then it is recommended to make them a 1099 vendor.
This can be done by moving to the Vendors menu and then selecting Vendor center.
After that, double clicking the Vendor’s name.
And also, clicking on the Tax settings tab.
Followed by, selecting Vendor eligible for 1099 box to place a check mark.
Once done with that, you need to enter the Vendor’s tax ID in the Vendor tax ID field.
And then, hit OK tab.
The last step here is to repeat the steps 1 and 2. Followed by selecting the 1099 Vendors in the 1099 options drop-down menu.
Step 2: Ensuring that the payments to this contractor meet the threshold
It should be noted that the contractors whom you paid $600 and above cash threshold get a 1099. You can spot the contractors who doesn’t meet the threshold. Also, it should be taken into consideration that credit card payments are not included. And these payments will be reported by the financial institution and should not be included in the company’s 1099 values.
QuickBooks online
If you are a QuickBooks online user, then you need to continue with the steps below:
At first, choose the Expenses tab and then go for Vendors or payroll and then click on Contractors.
After that, choose the Prepare 1099 and then hit Continue tab until you get to the window called “check that the payments add up”.
The next step is to choose the arrow next to the filter tab at the top of the table and then change the type of contractors to 1099 Contractors below threshold.
QuickBooks desktop
For QuickBooks desktop, you need to navigate to Reports tab, and then click on Vendors and payables.
After that, move to the 1099 summary.
Followed by selecting Ignore thresholds in the 1099 options dropdown menu.
In the next step, if you spot the vendor, then this means that they have not met the threshold.
Whereas, if this 1099 vendor using 1099 accounts, then you need to enter more transactions or change the thresholds.
For this, you are supposed to move to Edit tab and then choose Preferences.
After that, choose Tax: 1099 on the preferences window. Also, choose the Company preferences tab.
Once done with that, go for the link “Click here” next to if you want to map your accounts to boxes on form 1099 MISC.
And then, the QuickBooks 1099 wizard page will come up. In the map accounts step, you need to choose Show IRS 1099-MISC filing thresholds link.
Followed by double clicking the thresholds column for the appropriate box in the 1099 MISC IRS.
The point to be noted here is that the screen will display “Your settings do not match the current IRS thresholds message in red”. In such a case, you need to select Reset to IRS thresholds, in order to follow the IRS-mandated threshold and then add more transactions.
Lastly, it is recommended to hit Save and Close tabs.
Step 3: Ensuring you are paying contractors from the right expense account
At the time of creating 1099s, the QuickBooks accounting software uses the expense accounts that has been mapped to report 1099 transactions. In case the amounts are off, you might want to review the contractor payment transactions and accounts related to them. You can carry out the steps below accordingly:
QuickBooks online
QuickBooks online users need to choose Reports tab.
Followed by typing Transaction list in the search bar, and also opting for Transaction list by vendor.
The next step is to select Customize tab.
And also, setting the report period to Last year.
Once done with that, you need to move to the Rows/columns section. And then, select the Change columns link and then put a checkmark on the Split tab.
Moving ahead, you need to move to Filter section.
After that, you will have to check the vendor box from the drop-down. And also selecting 1099 vendors who are in question.
The next step is to select run Report tab.
After that, you are recommended to look under the splits column for what accounts the vendor’s transactions were tied to. In case you spot the word SPLIT, then it is recommended to choose the transaction to see the details on what accounts were affected. In case this is a bill payment, access the bill to see what expense accounts were affected.
QuickBooks desktop
QuickBooks desktop users needs to first move to the Reports tab and then go for Vendor and payables.
After that choose 1099 summary.
And then, in the 1099 options dropdown menu, you need to choose All allowed accounts.
In case your find the missing vendor, then it is recommended to spot the account and make it a 1099 account.
This can be done by clicking twice the amount in the total column for the vendor.
And then in the 1099 detail report, you will have to make note of the accounts in the account column.
In order to show the transactions on 1099 reports and forms, the steps below should be carried out:
At first, move to Edit tab and also click on Preferences.
After that, select Tax: 1099 from the preferences window. Followed by selecting the Company preferences tab.
The next step is to select the link click here, which is next to If you want to map your accounts to boxes on form 1099 MISC.
Moving ahead, you will QuickBooks 1099 wizard page. And you will be directed to Map accounts. This window will display all the accounts used for payments to 1099 vendors.
After that select one of the 1099 MISC boxes from the apply payments to this 1099 box drop-down. And also note that contractor payments go to BOX 7.
The next step in this process is to close 1099 detail report.
And lastly, choose the second 1099 options drop-down and also select only 1099 accounts.
Towards the end, we expect that the information shared in above might help in fixing missing contractors or wrong amounts on 1099s. In case error continues to trouble you even after carrying out the steps above, then in that scenario, we would recommend you to consult our QuickBooks error support professionals at 1-800-761-1787, and they will guide you through the relevant measures to be taken to get rid of these errors instantly.
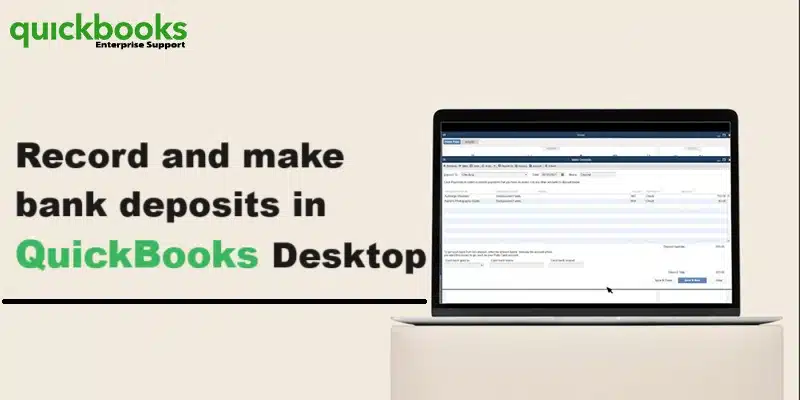
At the time of depositing in a bank, a user usually deposit payments from multiple sources at the same time. The bank records everything that is deposited as a single record. In case the user enters these payments as personal record in QuickBooks, then they do not meet the deposit. For such a scenario, QuickBooks carries its unique way of merging everything for the user, so that the users records match with the real-life bank deposit. The user should keep the transactions that the user has added to the undefined fund account. After recording a bank deposit to combine them.
In this article, we will be discussing the steps to record deposits in QuickBooks desktop. Thus, if you are interested in recording and making bank deposits in QuickBooks desktop, then make sure to read this article ahead, or else consult our technical support team and let our professionals will ensure to provide you with immediate assistance.
Recording and making banking deposits in QuickBooks can be possible by performing the steps discussed in above. However, if you are having any query or if the user isn’t able to record or making bank deposits in QuickBooks even after performing the steps above, then reach out to us at 1-800-761-1787. Our QuickBooks desktop support team is readily available round the clock and will be happy to assist you.
Are you looking for a guide to close your books in QuickBooks desktop? If yes, then you have stopped by the right article. This article will show how to close your accounting periods to ensure that old invoices from Invoice ASAP don’t accidentally update your old accounting periods in QuickBooks. You don’t need to worry about closing the books at the end of every fiscal year. It should be noted that QuickBooks creates automatic adjustments in preparation for the coming year.
Continue reading the post, to explore the step by step process to close books in QuickBooks desktop. Or if you want our experts to carry out the process for you, then in that case, you can get in touch with our accounting professionals and certified experts via our toll-free number i.e., 1-800-761-1787. Our team will ensure to provide you immediate assistance.
Year end adjustments QuickBooks desktop makes automatically
QuickBooks desktop usually performs certain year-end adjustments based on the fiscal year start month.
QuickBooks usually adjusts the income and expense accounts at year-end to zero them out, in order to let the user, start new fiscal year with zero net income.
Also, QuickBooks makes an adjusting entry to net income. Such as, if the profit for the year was $12000, the equity section of the balance sheet shows a line for a net income of $12000 on the last day of the fiscal year.
On the first day of the fiscal year, the QuickBooks increases the retained earning equity account by the previous year’s net income and decreases the net income by the same amount. This will start new fiscal year with a net income of Zero.
Important points
Before you close the books, make sure to check out the below points:
Advantages to closing the books
Restricted access: The user can create a closing date password to restrict access to data from the prior accounting period, which includes the details of every transaction. The user must know the closing date password and have the appropriate permissions to modify or delete transaction in a closed period.
Reporting: It should be noted that the changes made after the closing date to the transactions dated on or before the closing date will appear in the closing date exception report:
In order to run the Report, move to the Report’s menu.
And then select the Accountant and taxes and then opt for closing data exception report.
Also, the closing date history shows the current and past closing dates and the user who set the closing date.
Advantages to not closing the books
Detail: The user can easily access the last year’s data with every transaction’s details.
Reporting: The user can also create comparative reports between the current and previous year.
Details about closing entries
The closing entries are made after recording all the adjusting entries. After the books are closed, the user isn’t supposed to enter any entry for the fiscal year. Certain programs restrict the user from making any entry even if that entry corrects or makes the books accurate. QuickBooks desktop permits the user to enter transactions that affect the balance of the closed fiscal year. But it either tells the user that it isn’t recommended or it will ask for the closing date password if you set up one.
QuickBooks desktop doesn’t have an actual transaction for closing entries that it creates on its own. When the user runs a report, the program computes the adjustments, but the user can’t QuickZoom on these transactions. These adjustments are named as closing entry.
It should be noted that closing entries are the entries made at the end of the fiscal year to transfer the balance from the income and expense account to retained earnings. The user aims at zero out the income and expense accounts, and then add the fiscal year’s net income to retained earnings.
The user can carry out the below steps to close books in QuickBooks. Let us check out the steps one by one:
The user will first have to move to QuickBooks and click on Edit and Preferences tab.
After that, select Accounting tab and also the Company preferences tab. The user will then have to click on the Set date/password tab.
Now, enter the date you want the books to be closed and also Set the password and hit OK tab.
In the next step, the closing date will be set. And no invoices edited prior to this particular date will Sync into QuickBooks.
In case an invoice from the closing date or earlier syncs, the user will get a notice to let you know that the period is closed.
Now, the sync process is successful, even though the invoice did not get updated in QuickBooks.
Contact us for further assistance!
We have tried to summarize the process to close books in QuickBooks desktop. However, if you have any query unanswered or in case you need any sort of technical assistance, give us a call at our toll-free customer support number i.e., 1-800-761-1787. Our QuickBooks desktop support experts and certified accounting professionals will ensure to provide the best possible support services. Do not hesitate in calling us anytime, we will be happy to help you.