QuickBooks error code 3180 is a common error that is faced by many users while trying to save a sales receipt at the time of using QuickBooks. Due to this error users are unable to save the sales receipt. This error comes under the 3000 series of errors such as (3000, 3140, 3120 and 3170). It usually encounters when there is any sales tax problem relates to sales receipt. This error majorly encounters in QuickBooks, when there is financial exchange or transaction between the QuickBooks desktop Point of Sale (POS) application and QuickBooks desktop.
If you are also one of those users who are facing such an error, then this article is for you. You will get complete information related to QuickBooks Error code 3180 in this segment further. This error will display following description and warning messages.
Status code: 3180 Status message:
There was an error when saving an Employee list, element ‘Employee, Name’
Status Code 3180: QuickBooks error message: QuickBooks error message:
A/P or A/R detail line must have a vendor
Status Code 3180: Status Code 3180: Status message:
Sales tax detail line must have a vendor
Status Code 3180:
An error is occurring when trying to save a sales receipt
Status Code 3180:
A problem arose while saving the General Journal Transaction
Status Code 3180: QuickBooks error message:
The posting account is not valid
What leads to QuickBooks POS error 3180?
There is a large list of reasons that could be the root of error code 3180 in QuickBooks. Let's know them one by one:
The sales tax items in QuickBooks desktop might not linking with the vendor account.
Incorrect mapping of sales tax payable accounts.
You might mistakenly create a paid-out for the sales tax payable account.
Sales tax payable account is being used by the target account for more then one items on receipts.
The type of payment item may be damaged or incorrect.
The antivirus used in the system may cause this error.
Settings of the vendor expenses might be incorrect.
What are the early signs & symptoms of QuickBooks error 3180?
Whenever status error 3180 affects the system, following listed symptoms you can experience on your QuickBooks desktop.
You may find difficulty in saving the sales receipt.
Keyboard and mouse commands don’t give a timely response or it starts lacking.
Window will work slowly, commands will not responded by the system and it also affects the active program as well.
QuickBooks and QB (POS) might crash and close automatically.
Error Code 3180 keeps appearing on the screen in different forms.
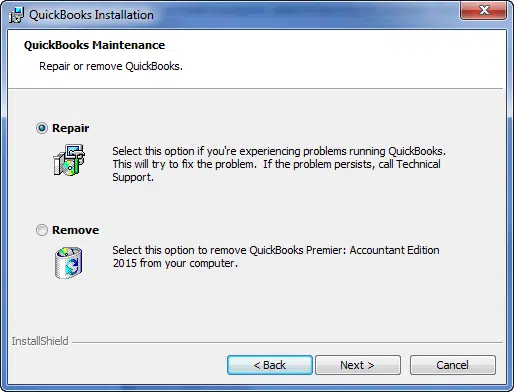
Methods to Resolve QuickBooks Error Code 3180 (The internals could not be locked)
As we know above the various reasons for QuickBooks error code 3180. Now let’s find the below solutions to troubleshoot the error.
Solution 1: Make sure that a Vendor is assigned to the sale tax item
First open your QuickBooks desktop.
After that move to Lists and tap on Item list.
Then select the Include inactive option.
Now you have to sort the list with help of Type header.
Lastly make sure that each sales tax item has a tax agency attached to it.
Solution 2: Checking the Tax Preference
Open QuickBooks Point of Sale (POS) then move to File Menu.
After that go to Preference tab and select Company.
Now from the Financial menu select Accounts.
You need to note basic and advanced settings. Also, verify that QuickBooks sales tax Payable is the only row listed in Seles Tax row. If it’s not, then change the scenario and run the financial Exchange.
In last check weather the QuickBooks error code 3180 has been resolved or not.
Solution 3: Ensure that the problem receipt is not paid with the Sales Tax Payable
The use of sales tax payable on receipts is one of the causes of this inaccuracy. Check out the following steps:
First open QuickBooks point of sale software.
Then select the Sales history from the options.
Moving ahead, you need to right click on any of the column to select the Customize column option.
Ensure to select the QuickBooks status.
Check out for the incomplete receipts, if found any of these receipt, Paid out to Sales Tax Payable, reverse the receipt by selecting that particular receipt.
In last use non-sales tax payable account, recreate a paid out and once again run the financial exchange.
Solution 4: Access the Point of Sale
Firstly you need to go to File menu and the select Company Preferences.
After that move to Financial and choose Accounts.
Check out for all the tabs including basic and advanced. And verify that all the accounts correctly mapped.
Now select Save option to secure all of your modifications.
Later in run the Financial exchange.
In the last step, rename or redesign every financial method.
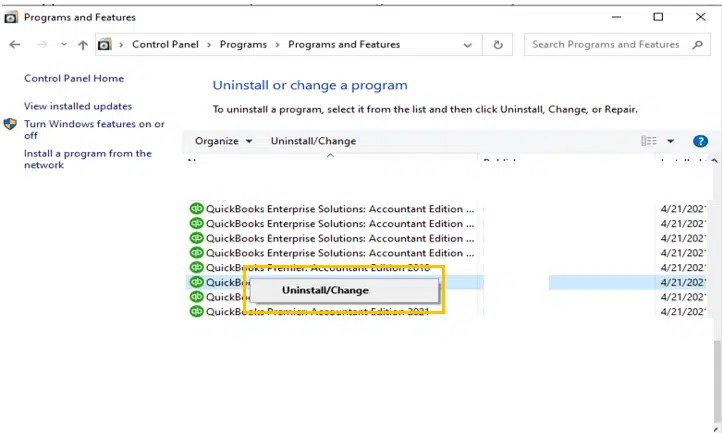
Solution 5: Fix damaged payment item (While saving a receipt facing an error)
Launch the QuickBooks application first.
After that go to List menu and select the Item from the drop-down menu.
Here, select the option that contains inactively by clicking the item section.
Choose the type Header option to sort the list.
Now, you need to rename the Point of Sale items.
Select the items to Edit and add .OLD to the end of the names they already have.
Use the point of sale system to manage the financial exchange.
In QuickBooks desktop, you need to merge the duplicate items.
Choose the Item option again for editing it.
Then, remove the OLD prefix or suffix from items you want to Edit.
The final step is to hit on OK tab then select Yes and OK to confirm the changes.
Conclusion
As you reach the end of this segment, we expect you to be able to troubleshoot the QuickBooks error code 3180. While this might include a bunch of steps and you might find it to be a bit complicated, you can seek assistance from our QuickBooks error support experts, and let them help you with your queries immediately.
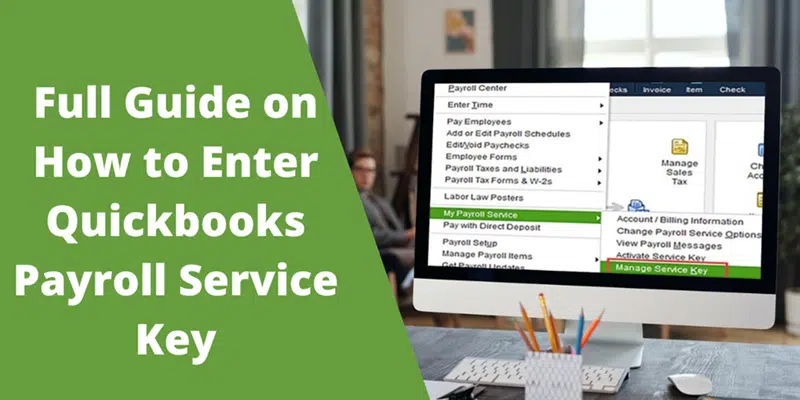
QuickBooks desktop has proven to be an marvelous accounting program that has facilitated in managing payroll effectively. But some QuickBooks desktop users are encountering different types of technical issues whenever performing specific payroll operations. One such common error is related to the payroll service key and show up 'Enter a Payroll Service key when running payroll'. The error is not specific to particular QuickBooks desktop version. It can be experienced in different QuickBooks versions. In order to get this error fixed, go through this segment till the end.
Important points to consider:
If you are using QuickBooks desktop 2022 or older versions, then it is important to download and install the QuickBooks 2023 version to continue using your payroll service.
If you are using QuickBooks desktop 2023 the follow the below steps:
You need to select the Cancel button to close the window.
Then restart your QuickBooks desktop. (This step should fix the issue.)
If you are facing this issue in QuickBooks Desktop 2023 then you need to manually synchronizing the license data. It can be an effective fix for the enter payroll service key. Follow the below given guidelines for this:
At first, open QuickBooks and navigate to the Help menu.
After that click on Manage My License option.
Then select Manage My License option and tap on Sync License Data Online… option.
In the next window you will get the license synchronization, and the process begins. The process should only take a few seconds to complete.
Once done with that select OK button.
At last, close and restart QuickBooks desktop. This should resolve the issue when running payroll.
As you reach the end of this segment, we expect you to be able to fix QuickBooks Payroll Service key error. However, this issue is not that much annoyed in nature and the methods provided in this article should be sufficient to fix it. If the error is still bothering you or you need any technical assistance then feel free to reach us at i.e., 1-800-761-1787. Our QuickBooks payroll support team will be more than happy to assist you.
In this article, we will be talking about the process to create a credit note or refund check in QuickBooks desktop for Windows. Thus, if you are seeking for the same process, then your search ends over here. QuickBooks accounting software makes it easy to give money back or credit to the customers. Read ahead to find out the process to giving your customer a credit or refund in QuickBooks desktop for Windows. Another option is to contact our team professionals at 1-800-761-1787, and let them perform the steps for you.
Steps to give the customer a credit or refund in QuickBooks desktop for Windows
The user can perform the below steps to give the customer a credit or refund in QuickBooks desktop for Windows.
Step 1: The very first step is to create a credit note
The users need to select Create credit notes/ refunds from the Customers menu.
And then, select the Customer from the customer: job drop down.
And also, enter the items that you are giving a credit for and also select Save and Close.
Step 2: Select how you wish to handle the credit
In the available credit window, select one of the following and also hit ok tab.
Retain as an available credit: QuickBooks enters a negative amount in the accounts receivable register for the credit note. The user can use this credit as payment for another transaction. In case the users chose to retain as available credit, then they will be able to see the available credits in the customer payment window.
Give a refund: The user can issue the refund in cash or a check. In case the customer used a credit card, then the steps for refunding a credit card payment can be different.
Apply to an invoice: QuickBooks accounting software opens the apply credit to invoices window. Choose an invoice you wish to apply this credit to.
Option 1: Retaining as an available credit
The user will see the receive payments window. And then would have to perform the steps below:
At first, the users should go for the Customers tab and then select Receive payments.
The next step is to select the Customer under the received from drop down.
After that, select the Discounts and credits icon.
Also check the credit you wish to apply and then done on the Credits tab.
The users should now select Yes tab, after they sees a prompt to confirm transfer. The amount will be applied automatically to the invoice.
The last step is to select Save and close.
Option 2: Apply a credit to an invoice
Make sure that you select Customer:job when creating the credit note. This will open the apply credit to invoice window.
The next step is to choose the Credit they wish to apply automatically and also select Done.
Option 3: Give a refund
The first step is to choose OK after the check is filled out automatically.
And then, link the check to the overpayment. And also move to the customers menu and select Receive payments.
The next step is to select Customer from the received from drop down.
And select the Discounts and credits icon.
Now, in the available credit section, select the check you created and then done.
Now, the users will see a prompt to confirm transfer.
In case you do, then choose Yes tab.
The amount will be applied automatically to the invoice.
By the end of this article, we believe that the information stated above might be of some help in giving the customer a credit or refund in QuickBooks desktop for Windows. However, if you are still unable to perform the required steps, then in that case contact our team professionals at 1-800-761-1787, and let our QuickBooks desktop support experts handle the situation for you.
Want to explore and analyze reports out of QuickBooks in Microsoft Excel? Well, this is possible, by exporting reports as excel workbooks in QuickBooks desktop. You can save the reports as excel workbooks, CSV spreadsheets, or PDF’s. QuickBooks allows users to export almost every financial report directly into Microsoft Excel with just a few simple steps. In case you are planning to export report in QuickBooks, then make sure to scroll down carefully. The process involves certain steps, which we will be discussing later in this article.
However, if you are a newbie and don’t want to invest your time in performing the steps manually, then in that case you can speak to a professional. The steps involved in the process to export a report in QuickBooks desktop are shared below:
Steps for Exporting reports as Excel workbooks in QuickBooks
Exporting reports from QuickBooks Desktop to Excel is pretty straightforward once you know where the option lives. Here’s a clean, step-by-step way to do it:
Move to the Reports menu in QuickBooks and select Reports center.
Once the report is open and showing the correct date range:
Locate the Excel button on the toolbar and select Print to save the report as a PDF.
It is required to create a new excel workbook and select Create new worksheet. If you wish to update an existing workbook with the data in the open report and select Update existing worksheet.
Also select browse and look for the workbook on the system. Keep in mind that this overwrites workbook.
In case the user wishes to format the data a specific way, then select Advanced.
Note that the reports must have less than 256 columns. In case you saw report has too many columns, and then select advanced tab. Choose and uncheck the space between columns checkbox and hit ok tab. You can save the report as a CSV instead of an excel workbook and have more columns.
Now choose OK tab when they are read to export.
To open the report in excel, select Export tab.
Steps for Exporting a Report in QuickBooks Desktop for Mac
Note that one can open the excel workbooks with apple number or Microsoft excel 2016 or later, which includes Mac office 365:
Head to the Reports menu and look for the reports to be exported.
After that select the Export.
Select file, when the file opens and select Save as to save the file.
QuickBooks software will open up excel workbooks with the default set by the user. This can be changed as:
Right click the file and select Get info.
After that from open with menu, choose Microsoft excel or Apple number.
Select Change all.
Steps for Getting Updated Reports while Working in Excel
After performing the steps above, the user can get the latest version of the report from QuickBooks being in excel. It is essential to note that the first time a report is updated from excel, you need to ensure that QuickBooks is open. This will set the preferences and permissions. The user update reports from excel even if QuickBooks is closed.
Move to QuickBooks tab in Microsoft excel. It will automatically add this the first-time report is exported.
Select Update report to get the latest version of the report from QuickBooks.
Generate Excel-based payroll reports
Excel-based payroll reports contain data that is only available in Excel. Following are the Excel-based payroll reports available in QuickBooks Desktop for Windows.
Summarize Payroll Data in Excel
Payroll by Department/Class
Certified Payroll Report
Deferred Compensation Report for 401(k) (& more)
Payroll Summary by Tax Tracking Type
Employee Time & Costs
Local Tax Summary
Employee Sick & Vacation History
Employee Direct Deposit Listing
Payroll Liability Accruals & Payments
Tax Form Worksheets
Create a Summarize Payroll Data report in Excel
The Summarize Payroll Data report has info about:
Employee Journal by Check
Deferred Compensation
YTD reports
Rates & Hours by Job
State Wage Listing
Effective Dates by Item & Employee
Quarterly Employee Summary
8846 Worksheet
Sum Up!
Exporting reports as excel workbooks in QuickBooks desktop might be possible using the steps that we have discussed earlier in this article. However, if you are still unable to export reports as excel workbooks in QuickBooks, then make sure to speak with our technical team and let them resolve your queries with utmost care. Our QuickBooks desktop support experts and professionals will ensure to come up with the most relevant steps to export reports as excel workbooks for you successfully.
Connecting your QuickBooks Payments account to QuickBooks Desktop is important if you want to accept credit card and bank payments directly within your accounting software. This process not only saves your time but also makes sure accurate financial tracking, reduces manual entry and improves cash flow management. If you are in a search of a step-by-step guide to connect QuickBooks payments account to QuickBooks desktop, then your search ends over here. This is a guide to connect an existing payments account to QuickBooks desktop, so that customers can easily pay for their invoices online.
This procedure can help, if you want to process customer payments in QuickBooks desktop. In case you sign up for QuickBooks payments from QuickBooks, then the accounts are connected automatically. However, if the user has signed up for QuickBooks payments from a different QuickBooks product, then no issues. We will help you with the process to connect the payments account so that you can process payments in QuickBooks desktop. To know further, make sure to read this article carefully till the end. Or if you need any sort of technical assistance, give us a call at our toll-free customer support number. Our experts and certified Proadvisors will provide you with immediate technical assistance.
Important note
It should be noted that the one can only make use of one QuickBooks payments account for one company file at a particular time in QuickBooks desktop. The user can follow the same steps to connect the payments account to a different company file.
Benefits of Connecting QuickBooks Payments
Once connected, you unlock several advantages:
Automatic Recording
Payments are automatically recorded in your books, eliminating manual entry errors.
Faster Payments
Customers can pay directly from invoices, improving your cash flow.
Easy Reconciliation
Transactions sync seamlessly, making bank reconciliation quicker.
Professional Invoicing
Send invoices with integrated payment links for a better customer experience.
Steps to Connect QuickBooks Payments Account to QuickBooks Desktop
The user can carry out the below steps to connect the QuickBooks payments account to QuickBooks desktop. Let us check out the steps one by one:
Step 1: Connect the payments account
The user is supposed to move to the Customers menu in QuickBooks desktop.
And then, choose Link payment service to company file. In case the message is seen about credit card protection, then fill out the fields and choose OK tab.
After that, the user is required to enter the User ID and password, that has been used to sign up for QuickBooks payments. Also, choose sign in tab.
The next step is to select Connect. Or in case the user is transferring payments account to another company file, then choose Transfer and then click on Yes, transfer.
Once the user connects the account, then the user will see an icon on the homepage. This will tell you that you are signed in and also connected to the QuickBooks payments.
Step 2: Change the account QuickBooks puts money into
The user can keep using the same account that has been used before, in order to deposit the customer payments. The user can also change the account, by carrying out the steps below:
The first step is to sign in to QuickBooks online in a web browser. It is recommended to not to use the mobile app or GoPayments.
And then move to the Settings tab and choose Account and settings.
After that, the user will have to select the Payments tab. And then in the deposits section next to standard deposits, the user needs to select Change bank.
The next step is to select Add new bank account.
Followed by entering the Routing number and account number of the bank account that you want to change to.
Note: A quick tip is that the user can also log in to the bank directly to save time and data entry.
After that the user needs to select Save.
And also, review the bank account information is opted and also hit Submit tab.
QuickBooks will start depositing the customer payments from online invoices and other sources into the new account.
Step 3: Turning on payment options and online invoices
The accounts will get connected by now. And the user can turn on payment options and process payments. This can be done by carrying out the steps below:
The user can sign up or connect an existing QuickBooks payments account.
Process payments in QuickBooks desktop.
Learning about deposit times for customer payments.
Wrap Up!
Connecting your QuickBooks Payments account to QuickBooks desktop is a smart move for any business looking to streamline payment processing and accounting. The integration not only saves time but also reduces errors and improves financial visibility. By now, we believe that the information stated above might help in connecting QuickBooks payments account to QuickBooks desktop. However, if you have any query, or in case you are stuck at any point of time, then in that case, give us a call at our toll-free support number i.e., 1-800-761-1787. And our experts and certified QuickBooks desktop professionals will ensure to provide you with immediate technical assistance.