Setting up QuickBooks workforce account for QuickBooks desktop might seem to be a tedious task to many users. QuickBooks workforce is basically a feature that permits the users to share paycheck details with the employees. The QuickBooks Workforce also allows an employer to invite their employees to View and Print their paychecks and W-2s from any system or smartphone browser over the internet.
With the workforce, the employees can access their paychecks, along with the timesheets, through TSheets. This also involves Skip printing and mailing stubs and forms to the employees. If you are in search of a comprehensive guide to set up QuickBooks workforce, then you have landed in the right place. In today’s article, we are going to help you with an easy process to set up QuickBooks workforce for QuickBooks desktop. So, keep reading!

Whereas, if you are having any related doubts regarding the QuickBooks workforce or for any further information, feel free to contact our experts. Our professionals and certified ProAdvisors will provide you with the best possible support services.
What is QuickBooks Workforce?
QuickBooks Workforce is basically an online portal tool in QuickBooks that helps maintain a clear connection between you and your employees. It allows employees to allow their payroll-related details anytime (24/7) without depending on manual updates.
It works as a part of QuickBooks payroll services, where employees simply need to enter their login credentials to view, download and print pay stubs and W-2 forms easily. Along with that, they also receive email notifications whenever their pay stubs are ready, which makes the whole process more convenient and automated. On the employer’s side, once the QuickBooks Workforce is installed, you can easily manage employee payments like salaries, bonuses, and overtime directly through the payroll feature.
One important thing to keep in mind is that QuickBooks Workforce is compatible with Intuit QuickBooks 2009 and later versions. So, before setting it up, it is important to Set up QuickBooks Workforce in updated QuickBooks version to avoid any compatibility issues.
Requirements to Setting up QuickBooks Workforce Account
There are certain requirements for setting up QuickBooks workforce account, which include the following:
- Updating QuickBooks to the latest release version is the very first requirement.
- An existing Intuit account (such as TurboTax or a previous QuickBooks Workforce account) or the information to create a new one.
- An invitation email from [email protected] is also required.
- Another important thing is to have updated tax tables.
- You should ensure that during the process, you are logged in as QuickBooks admin.
- Your Social Security Number for tax reporting purposes.
You might see also: What are the Solutions to Fix QuickBooks Error Code 81624?
Steps to Set up QuickBooks Workforce in QuickBooks Desktop
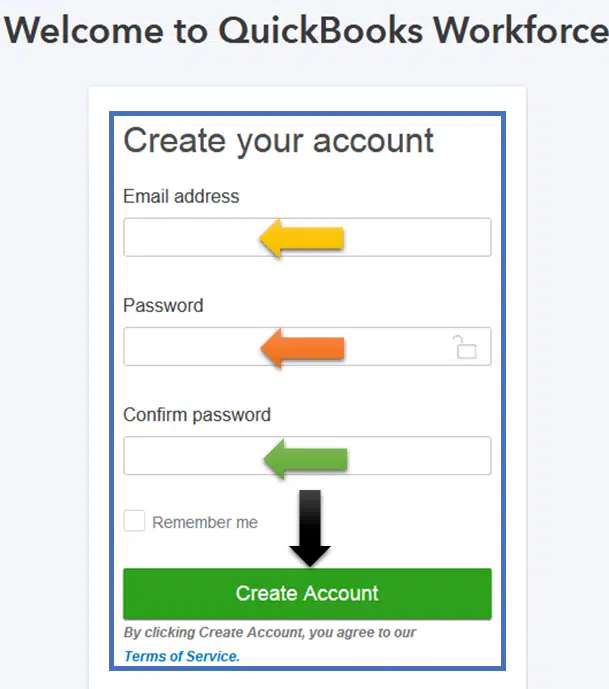
To set up your QuickBooks Workforce account, you simply need to use the invitation link sent by your employer. The setup process is quite simple and takes only a few steps to complete. Once your account is successfully set up, it allows payroll to be managed more smoothly in QuickBooks. Employees start receiving automatic notifications whenever their paychecks are generated, and they can easily log in to view their payroll details anytime without any hassle.
Following are the steps for setting up the QuickBooks Workforce:
Activating QuickBooks Workforce
QuickBooks users can easily access the Workforce feature after logging into their account, but it needs to be activated first before you start using it.
Before you begin, make sure you’re running the latest version of QuickBooks Desktop and that your payroll service is updated. If you’re using an outdated version, you or your employees may face issues while logging in or even encounter errors when accepting Workforce invitations. Once everything is up to date, you can move ahead with setting up Intuit Workforce in QuickBooks Desktop by following the required steps.
- Use the QuickBooks desktop latest maintenance release and also the latest payroll updates.
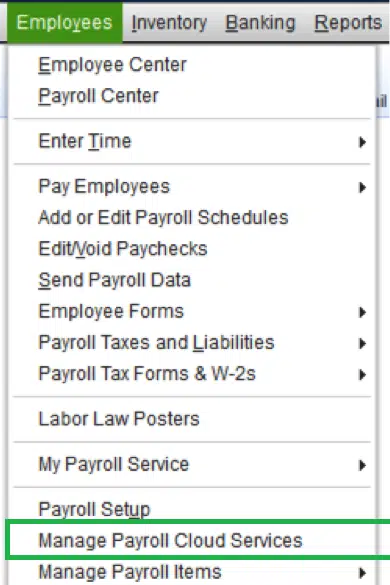
- In QuickBooks desktop company, choose Employees option and then Manage payroll cloud services. In case you don’t see the Manage payroll cloud services tab, you need not have the latest QuickBooks desktop.

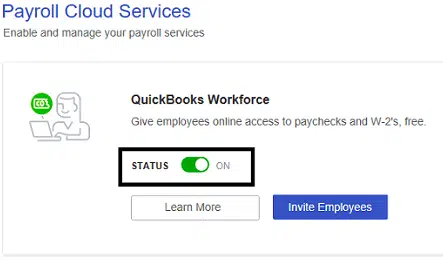
- You are then required to toggle the status to ''ON'' status in the Payroll cloud services window under the QuickBooks workforce.
- When asked to, create or confirm a PIN used for sending the payroll data,
- Next step is to choose the Save Changes option,
- And then opt for the return to QuickBooks in the confirmation window.
- When you runs payroll, it is important to Upload the paycheck info to Intuit when asked. It should be noted you need to upload the pay stubs. For uploading paycheck info after each payroll, you can carry the steps below:
- In QuickBooks Desktop company file, you need to create paychecks as it is done normally.
- Ensure to click on Send to Intuit on the confirmation and then next steps screen.
- Now on Send/receive data window, hit a click on Send.
- When asked, enter the Payroll service PIN.
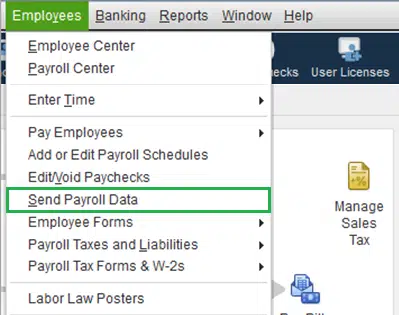
- The point to be noted here is that, if you ever forget to choose to Send to Intuit after creating paychecks, you can always visit the Employees and then choose to Send payroll data.
- In case this is your first time setting up the QuickBooks workforce, then you will have to upload Historical paychecks, for the employees to view their Pay Stubs issues prior to setting up the workforce.
Upload Historical Pay Data
If you are a first-time user and want your employees to access their payment details through QuickBooks Workforce, you may need to upload their historical payroll data. This step is optional and only required if Workforce is not already set up or if past payroll information hasn’t been shared earlier. Uploading historical paychecks is quite simple and can be done by following the instructions provided by Intuit on their official platform. Once the data is uploaded, employees will be able to view their previous pay stubs and payroll history directly from their Workforce account.
- Upload and send your payroll data to Intuit, and make sure to select the correct date range for the data you want to share.
- Before uploading and for future pay stubs, select current calendar year payroll data using your QuickBooks PIN. This ensures that the data gets properly linked to your employees info in Workforce.
Confirming your account information via a code
If asked to confirm the account information with a code, the below steps should be followed:
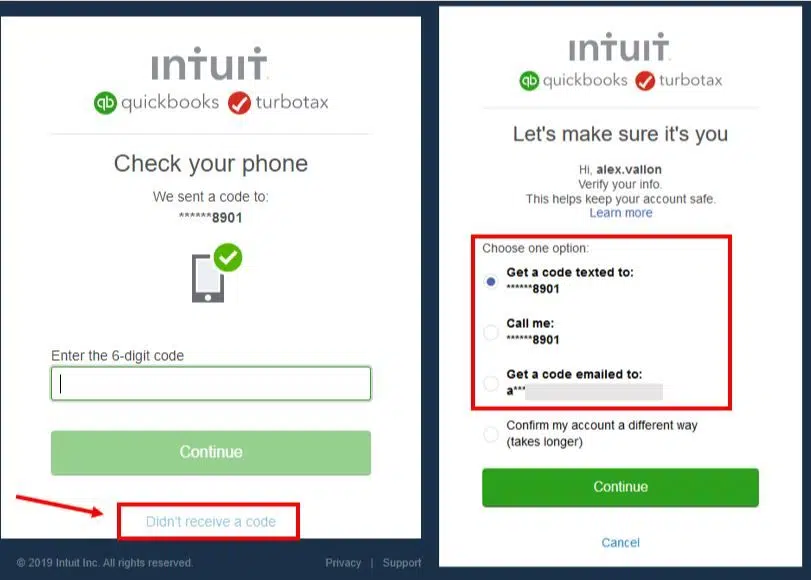
When you sign in to QuickBooks Workforce using the Intuit account login, you might be asked to confirm the account information with the help of a confirmation code.
- Choose How you would like to receive the code?
- And then select Continue, and the code will be sent to you.
- If you are not having access to the email listed, then you need to select the Confirm my account a different way for updating email.
- Also do not leave the screen before entering the confirmation code. You need to open another window if needed.
- After that Retrieve the confirmation code. This might take some time, and the code might arrive in the mailbox after a couple of minutes. You might also be required to check the Bulk/junk/spam mail folder to see if the code went there.
- And then, Enter the code and hit Continue.
- If you did not receive any code, then choose the Didn’t receive a code option.
- After you have been verified, you will be automatically signed in to the QuickBooks workforce.
Set up Intuit Workforce in QuickBooks Online Payroll
Before the date of October 31, 2019, Intuit online payroll used the paycheck record feature for sending paychecks to the employees. But now, the QuickBooks workforce is used for this purpose. The steps below can be used to set up workforce for QuickBooks online payroll.
- Access Intuit online payroll and then visit the Employees option to select the Employee’s name.
- And then, opt for the Employees site access section and then choose the Edit menu.
- Next step is to enter the Employee’s email ID registered with QuickBooks workforce in the online pay stubs access window.
- Followed by check-marking the box stated access their pay stubs online and then send the Email.
- Lastly, the employees can View the paycheck and W-2s after the email is received.
Related Post: How to Fix Internet Connection Problems in QuickBooks Payments?
Easy steps for inviting employees
Now that you know the process to set up workforce in QuickBooks, it is time to invite employees. The steps involved in this process are as follows:
Step 1: Logging in to Intuit account in QuickBooks
If you have already logged in to the Intuit account in QuickBooks, then directly jump on to the next step.
It should be noted that the Intuit account login is different from that of the company file login. The steps involved in here are:
- Opt for My company option after heading to the Company menu.
- And then select the Sign in on the top right corner.
- Now log in using the Intuit ID and password.
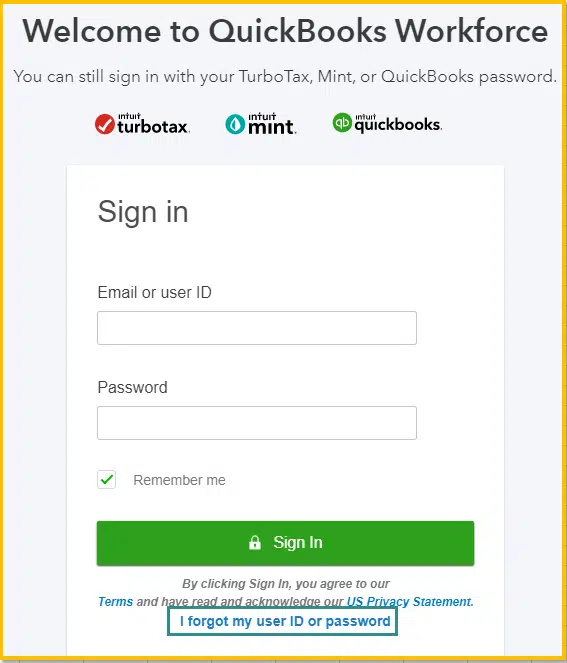
Facing issues while signing in?
Having issues in signing in? You can choose the I forgot my user ID or password.
- Entering incorrect password or user ID.
- Some technical glitches can also prevent you from signing into QuickBooks.
- You can choose the I forgot my user ID or password.
Step 2: Sending an invite
- For this, select the Manage payroll cloud services from the Employee’s menu. Also, note that if you do not see Manage payroll cloud services, you need to Update QuickBooks.
- Now under QuickBooks workforce, you need to toggle the status to ON and then choose Invite employees.

- After that the Employees list will appear on the screen. And you are then required to select the Employees to give access and then Add the email addresses. The point to be noted here is that if the Invite page doesn’t load, then you need to ensure to Turn on ActiveX controls in Internet Explorer.
- And lastly, choose the Send invite. After you have sent it, you should see “Invited” under the STATUS column.
Removing Employee access
When you can’t remove an employee’s access to your own paychecks, you can turn off the QuickBooks workforce’s access to the QuickBooks payroll. This is not recommended, as it can affect the employees. But if you still want to do that, then carry out the steps below:
- Select Manage payroll cloud services from the Employees menu.
- Under QuickBooks workforce, toggle the status to OFF and then hit Save.
Conditions and Solutions regarding the process to Set up Workforce for QuickBooks
In case you haven’t given paycheck access to the employees before, then here is further information that you might find helpful.
In case you remove or change an employee’s email
After the employee accepts the invite and logs in to the QuickBooks Workforce, then changing their email in QuickBooks desktop payroll will not affect the account or access.
If you deleted a Negative paycheck
- A negative check might display as a negative net amount, which would result in a net zero payroll.
- Also, deleted or voided checks get removed from the workforce.
In case you opt for disk delivery
Under such a circumstance, the QuickBooks workforce is not available for disk delivery. You need to sign up to payroll for QuickBooks desktop to let the employees access their paychecks and W-2s online.
Summing Up!
We have tried to sum up all possible information related to the process to set up workforce for QuickBooks desktop. And we hope this information might help you in some or the other way. If not, then need not worry, as we are there to help you. You can give us a call at our customer helpline number i.e., 1-800-761-1787, and our QuickBooks desktop support ProAdvisors will be there to rescue you.
FAQs
What is the function of QuickBooks Workforce?
Workforce connects an online portal for QuickBooks Desktop and Online Payroll. It's function is to let users get access to their payroll info and also review the same.
Is there any app for QuickBooks Workforce?
Yes! QuickBooks Workforce has an application which has been made available on Android and iOS platforms.
What is the pricing of QuickBooks Workforce?
There is no cost for setting up QuickBooks Workforce.
Any security related issue in QuickBooks Workforce?
No! QuickBooks Workforce is completely secure.
Related Posts:
How to Resolve QuickBooks Error Code 1317?
How To Fix QuickBooks Error Code 1612?
Fix QuickBooks cannot communicate with the company file error