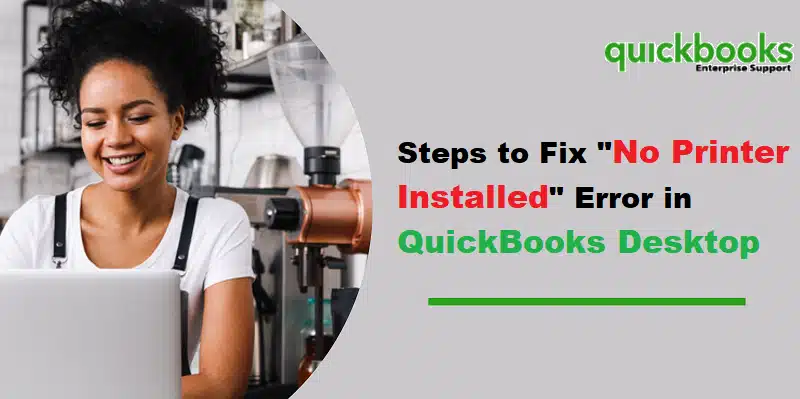
An efficient way to fix No Printer installer error in QuickBooks
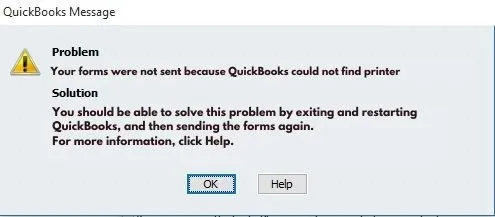
Interrupted by No Printer Installed error? Well, we have got you covered here. No Printer Installed error in QuickBooks is a major issue experienced by QuickBooks users interrupting them to print their transactions from QuickBooks. This particular error is accompanied with the following warning message:
Your forms were not sent because QuickBooks could not find printer.
To assist you in troubleshooting printing issues, we have tried to cover the entire set of steps to eliminate this error. Thus, make sure to stick around this segment till the end and get rid of the No printer installed issue in QuickBooks successfully.
What causes No printer installed error in QuickBooks?
You can land into QuickBooks no printer installed error due to the following factors:
- One of the core reasons can be if the qbprint file gets corrupted.
- Another reason can be if the driver for the printing device is incorrectly set.
- You can further end up in no printer installed error if the printer status may be offline.
- Or if the ancillary printing issues that might be sorted out by using QuickBooks tool hub.
You might like also: How to Use QuickBooks on Multiple Screens or in Multi-Monitor Mode?
Effective Methods to resolve No Printer Installed error in QuickBooks
A bunch of methods can be performed to eliminate QuickBooks No printer installed error. Let us elaborate each of the methods and find out the right fixes.
Method 1: Check Printer Connection
Well, one of the core reasons can be the printer connection being wobbly. You will have to check for the printer connection using the set of steps below:
- The very first step is to choose Start tab and further search for Notepad.
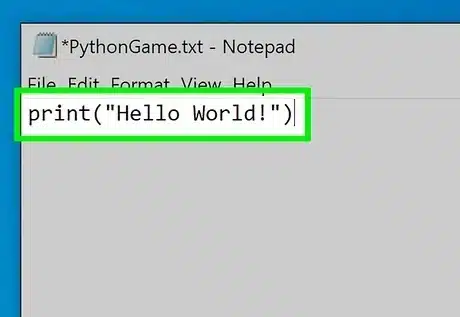
- You now have to enter certain text and further choose specific file and then go for Print command (CTRL+P).
- The next step is to choose the Correct printer and then click on Print tab.
Method 2: Renaming the QBPrint.qbp file
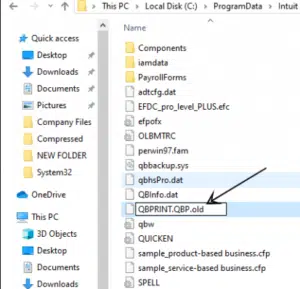
- At first, right click on QuickBooks icon and select Properties.
- After that, click on Open file location tab.
- It will open QuickBooks folder, now search QBPrint file here.
- Once done, right click on the file and select Rename.
- Lastly, open QuickBooks and try to print a report.
Read Also: What are the Solutions to Resolve QuickBooks Error 61686?
Method 3: Restart Desktop and printer
- Here you need to switch off the printer and further reboot the system.
- After this, you are supposed to reboot and then turn the printer back ON.
- Later, ensure that the printer paper is loaded properly.
- Now, you need to click on Windows start tab and then browse to the Control panel.
- After this, you will have to double click the Printers and faxes.
- In case the printer is showing OFFLINE status and then right click the printer and then choose the option of Use printer online.
- The user will then have to double click the printer in case there are Print jobs showing on the screen and then choose Printer and then cancel all documents.
- Now, close the window and right click the Printer and select Properties.
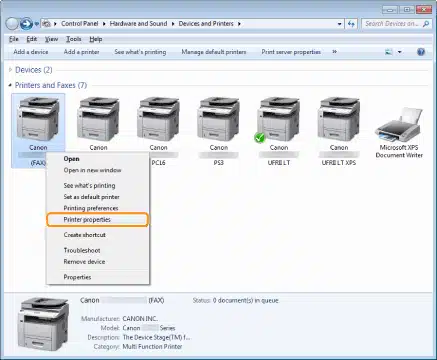
- Lastly, you need to choose the Print test page tab.
Method 4: Using QuickBooks tool hub
Another method that would work is to use QuickBooks tool hub and there you can go for print and pdf repair tool. At times when nothing could help you fix the issue, the tools offered by Intuit can definitely help you fix the error from its root cause.
- Initially, you need to download the QuickBooks Tool Hub program on your computer.
- After downloading double click on the downloaded file named with qbtoolhub.exe file.
- Let the tool install on your system.
- Once the installation completed, launch the tool on your system.
- And further, go to Program Problems and select QuickBooks Print and PDF repair tool.
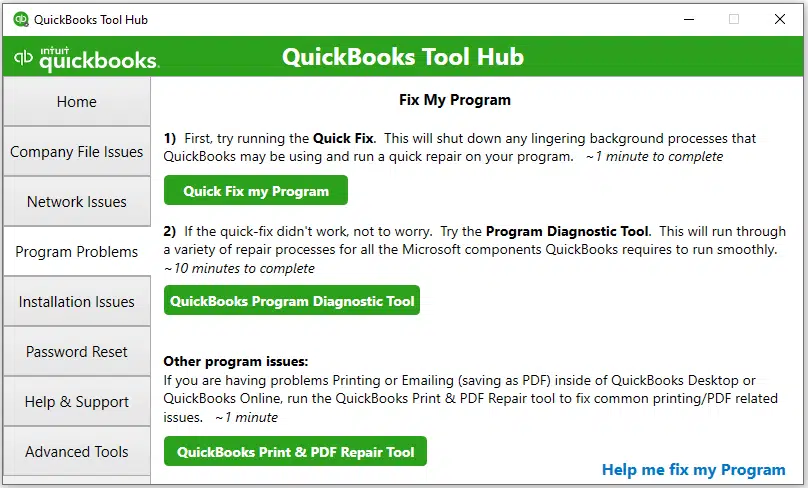
- Use the Tool to fix any issues within the printer device.
Check Also: How to Rectify QuickBooks Payroll Update Error PS033?
Method 5: Bypassing the Printer Spooler
- Under this method, press the Start button and click on Control panel.
- After that select XPS document writer option
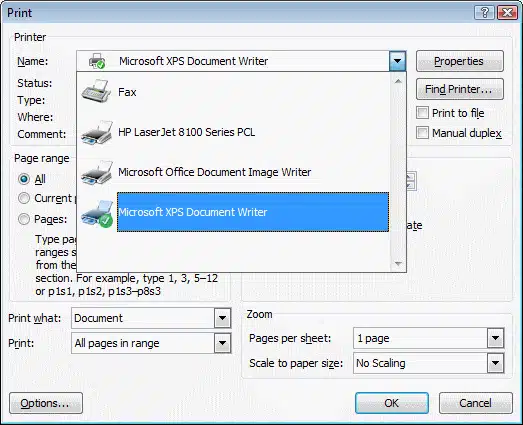
- Then go to the Printer properties.
- And proceed by clicking on Advanced.
- Now select Printer option and click on OK.
Method 6: Ensure that the command is going to printer
- Here you need to navigate to the File menu.
- Further, choose Printer setup.

- And then, go for the specific form you wish to Print.
- Followed by checking the correct setup within the system’s printer setup first.
- The next step is to head to the Help tab and further verify correct printer in QuickBooks.
Similar Article: How to Export Reports as Excel Workbooks in QuickBooks Desktop?
Summarizing!
Printer not installed or other printing related errors can be extremely frustrating, especially when you have something important to print in QuickBooks. However, we hope that the steps discussed above might have helped in getting rid of no printer installed error in QuickBooks in no time. If that isn’t the case, then you can give us a call at 1-800-761-1787, and share your queries with our QuickBooks error support professionals and they will answer all your queries immediately. We are readily available 24/7 through toll-free and live chat support services.
Other helpful topics:
How to Upgrade QuickBooks Desktop Pro, Premier, or Enterprise?