10 DIY solutions to Fix QuickBooks cannot switch to multi-user mode or QuickBooks multi-user mode not working problem:
QuickBooks multi-user mode allows multiple users to work on a QuickBooks company file simultaneously. But, switching from single-user mode to multi-user mode can cause technical issues sometimes. Users might not be able to use of the software at all in the multi-user mode, or errors like QuickBooks Error Code H202, -6000 series errors, etc. could show up on their computer screens. Not just that, such errors could also may be transferred to your server computer without showing up on your system. If that occurs, you might encounter the warning notice " QBDBMgrN was not running on this system." This issue relating to multi-user mode may slow down your productivity, keep you behind your business goals and cause monetary losses.
So, here question raise that what will you do while using your systems in multi-user mode and multi-user-related issues occur? Well, go through this article until the end to find the solutions to any QuickBooks multi-user mode issues that may pop up and stall your work. However, in case you are in a hurry, you can also call our 24x7 QuickBooks support team at our helpline, i.e., 1-800-761-1778, and sit back while we provide you with quick and precise solutions.
Related article: How to Troubleshoot "Unable to Print" Problem in QuickBooks?
What is QuickBooks Multi-User Mode Not Working Error?
A compelling feature offered to QuickBooks users, multi-user mode allows more than one user to work on the same company file at the same time. In order to make use of this software, each user must have the QuickBooks license on the workstation. Some technical glitches and having problems with the multi user mode error at times may not allow users to access company files simultaneously in multi-user mode. This error generally occurs when users try to launch a company file that is stored on a server. Another common issue faced by users is that QuickBooks continues to work in a single-user mode.
Note: To setup multi-user mode in QuickBooks desktop read the following article.
Possible causes that might lead to multi-user mode issues in QuickBooks?
One or more of the following causes may trigger QuickBooks multi-user mode not working error:
- QuickBooks not installed on the server can lead to this problem.
- Inappropriately configured hosting settings.
- System firewall or antivirus software may be obstructing communication between user computers.
- The database server doesn’t have the right to open the QuickBooks company file.
- Windows file permissions not set correctly.
- QuickBooks database server manager not installed on your server computer or it is unable to open the company file.
- There might be a corrupted, damaged or incorrect .ND file in your database.
- You might get this error if QuickBooksDBXX services not started yet.
Prerequisites Before Resolving the Multi-User Issues
You can follow the steps to fix the multi user errors in QuickBooks desktop, also you can check these prerequisites:
- Ensure to install the QuickBooks database server manager.
- Also, installing the same version of server manager, as of the QuickBooks version being used.
Read Also: How to Deposit Payments into the Undeposited Funds Account in QuickBooks Desktop?
Troubleshooting Steps for QuickBooks Multi-User Mode Not Working Error
It is the most frequently encountered error you will face when switching between single-user and multi-user modes, including H101, H202, H303, and H505. Here are 10 practical advanced steps recommended by our experts to assist you in getting rid of the QuickBooks multi-user mode not working issue.
Solution 1: Download and run QuickBooks tools hub program
- Initially, close your QuickBooks desktop.
- After that Download the recent version of the QuickBooks Tool Hub program and save the file somewhere you can easily find it.
- Open the downloaded file names with QuickBooksToolHub.exe.
- Now follow the on-screen commands to install & agree the Terms and Conditions of the tool.
- Once the installation done, you need to double-click the QuickBooks tool hub icon to open the tool hub program.
Step 1: Install and Run QuickBooks File Doctor tool
This is one of those steps that you can resort to upon receiving most of the QuickBooks issues. Once the tool hub program successfully installed and open, run the QuickBooks file doctor tool and see if the problem has been resolved.
- Open the tool hub program and navigate to Company file issues.
- After that choose Run QuickBooks File Doctor option form the listed options.
- It will take some time to download and run on your system.

Note: You can directly download the QB File Doctor tool (if not integrated with your QuickBooks) from the official website of Intuit. It will help you analyze if your computer system is aptly set-up for using QuickBooks multi-user mode.
Step 2: Use the QuickBooks Database Server Manager
- Open tool hub program and navigate to Network Issues tab.
- After that select QuickBooks database server manager option.

- In the next step, go to QuickBooks Database Server Manager on the server by typing the database in the Start menu.

- If you cannot locate folder locations, use Browse to find the folder where company file/files reside.
- Now tap on OK and select Start Scan button.

These steps should fix firewall permissions. Now, double-check if the multi-user mode not working issue resolved in QuickBooks.
Read this also: Steps to Install multiple QuickBooks Desktop versions on one computer
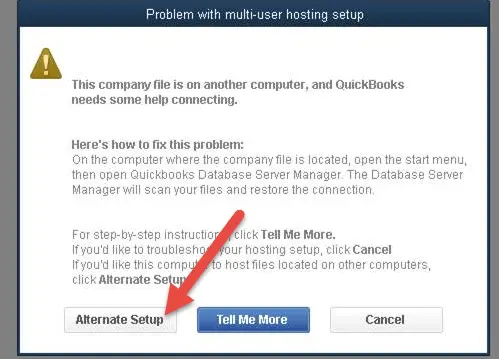
Solution 2: Verify host mode on all user computers
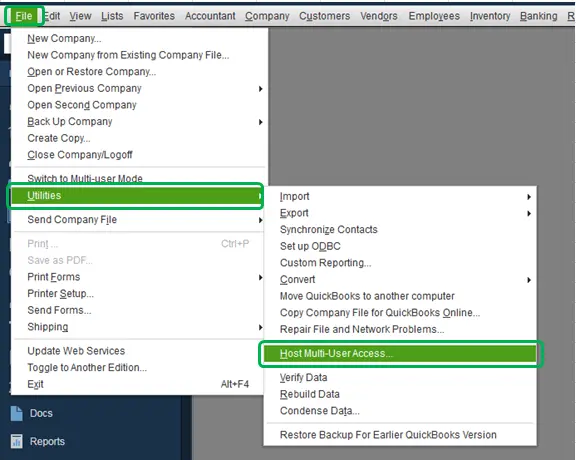
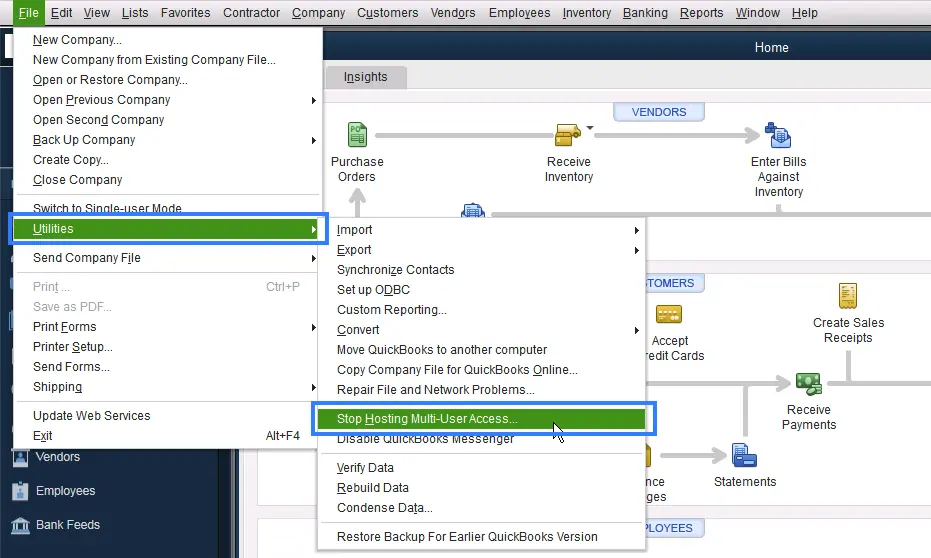
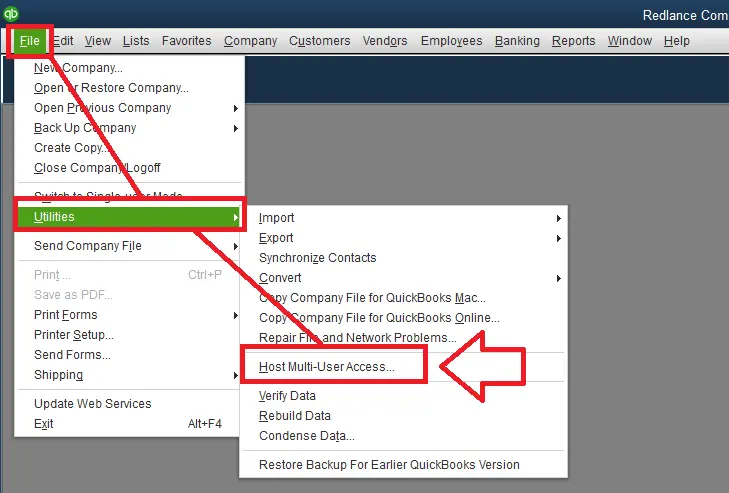
- Open QuickBooks and go to QuickBooks File menu.
- And then hover to Utilities. If you find Host Multi-User Access on the list, go to a different computer.
- If you spot Stop Hosting Multi-User Access on the list, choose that and Disable hosting to enable QuickBooks single-user mode.
- After it’s certain that the hosting mode is turned off on all user computers, check if the multi-user mode not working error has been fixed.
Solution 3: Ensure that the QuickBooks services are running properly
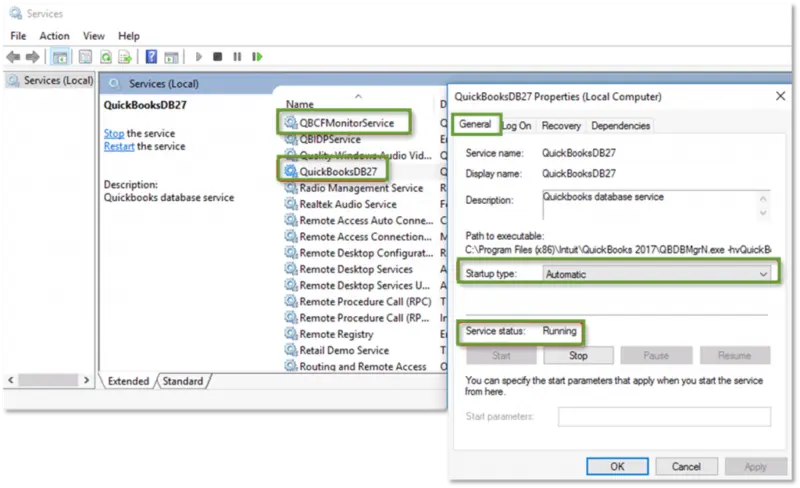
To utilize QuickBooks with multi-user mode, the services offered by the software, such as QuickBooksDBYY (YY is the year of QuickBooks) along with QBCFMonitorService, must have been running on the server computer.
- Under this methods, go to Windows search bar and search for Service. msc.
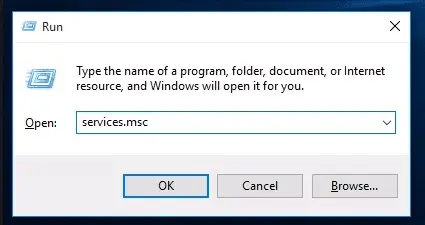
- After that, check if QuickBooksDBXX service is in the Services window list. If the service is unavailable, follow these steps –
- If you use the Database Server Manager, ensure that it is installed on the server. QuickBooks Desktop (for different years) installed on the computer- different corresponding Database Server Manager should be installed.
- If the complete program is run on the system, hosting must be enabled on the server.
- Next, double-click QuickBooksDBXX service, and the value should appear Automatic within the Startup type on the screen. Service started can be running or Start button.
- Now select restart the QuickBooksDBXX service for the first, second, and following failures under the Recovery tab.
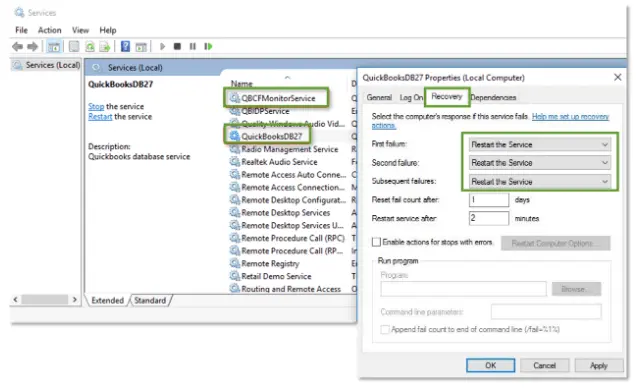
- Perform the same steps from 1 to 4 for the QBCFMonitorService.
Now, you need to open your computer and launch QuickBooks with multi-user mode and then determine if QuickBooks multi-user mode is not working error is resolved. If the issue is still there, then check the QuickBooksDBXX service. It must be a part in the administrator group. Also, it must have to contain all the necessary permissions.
Related Post: How to install QuickBooks Enterprise for the first time?
Solution 4: Check that QuickBooks must be able to send data
Perform the following two-steps solution to fix multi-user mode problem:
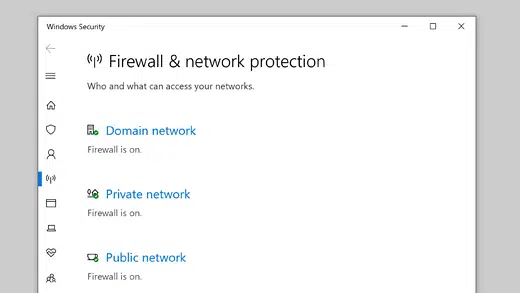
Step 1: Change the settings of firewall and antivirus
Firewall or antivirus may be the main cause of QuickBooks multi-user mode not working error. In case the issue is born out of firewall setting, you can set-up exceptions in the settings and allow QuickBooks for transmitting data. If your antivirus is causing the issue, configure it to fix the error.
- Hit a click on Windows key and then move to Control panel.
- Find and click on the Windows firewall option.
- Next, click on the prompt to allow “An app through Windows firewall option.”
- Now tap on Change settings and then click on checkbox under the public list for the QuickBooks application.
- Next, press OK and click on Public for the application.
- Finally, run the QuickBooks in the multi-user mode to check if the snag is fixed.
Step 2: Test path and ensure QuickBooks can communicate with the server
This step will require you to turn on Network Discovery.
- Press the Windows button and R key (Windows +R keys) to open the Run command.
- After this, type ping [servername] and hit on Enter key.
![type ping [servername] - Screenshot](https://qbsenterprisesupport.com/wp-content/uploads/2020/01/type-ping-servername-Screenshot.jpg.webp)
- On your computer, use UNC (Universal Naming Convention) to reach the shared folder in the server.
- Lastly, use UNC path to switch back to the company file of QuickBooks.
Step 3: Go to the company file following the UNC path
Step 4: Create a new company file folder
- Herein, you are supposed to Create a new folder for the company file. Ascertain to make it on the Host system.
- Then you need to Set up the folder and allow for Windows to access permissions for the new folder.
- It should be kept in mind that the company files can be shared across systems.
- You are now recommended to copy the .qbw file to the new folder and also check if the company file is in multi-user mode opening. If it opens up correctly, then the issue has now been resolved.
Final Step: Configure Firewall exception for QuickBooks Program and Port
- Hit on Windows button and move to search box.
- After that type Windows Firewall to open Windows firewall setting.
- Now select the Firewall advanced options.
- In the Advanced settings page you'll find the inbound and outbound rules.
- Later on, select Inbound rule and then click on New Rule.

- Then click on Port and select TCP.
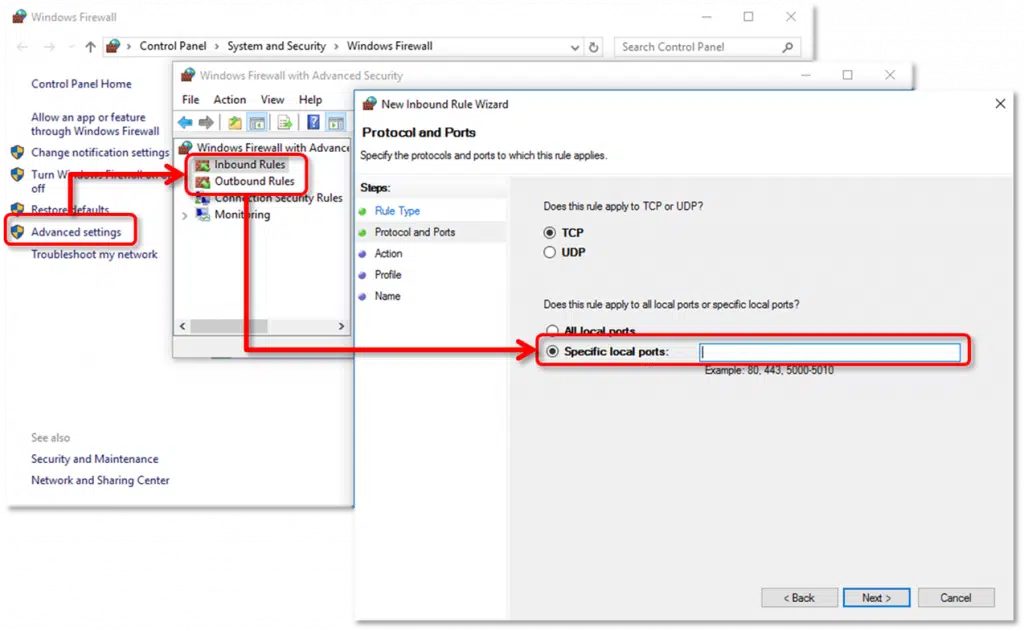
- Here you need to add the Port based on the version of QuickBooks you are using.
- For QuickBooks Desktop 2019, enter 8019, XXXX.
- For QuickBooks Desktop 2020, enter 8019, XXXX.
- Type port Numbers 8019, 56728, and 55378–55382 for QuickBooks Desktop 2018.
- Type port Numbers 8019, 56727, and 55373-55377 for QuickBooks Desktop 2017.
- Add QuickBooks to the Firewall.
- Now you need to opt for New Rule from the Advanced firewall configuration.
- This time around, select the application, then move to the directory where the software's executable file is located.
OnlineBackup.exe — IntuitSyncManager.exe — QBUpdate.exe — QBLaunch.exe —QBCFMonitorService.exe — QBServerUtilityMgr.exe — QBDBMgrN.exe — QBW32.exe QuickBooksMessaging.exe — FileMovementExe.exe — FileManagement.exe — DBManagerExe.exe Dbmlsync.exe — AutoBackupExe.exe
- Add each of the above-mentioned files to the Inbound Rules.
- Following that, follow the same steps to apply the outbound Rules.
Solution 5: Rename .QBW, .TLG and .QBW.ND
- In this method, you need to open the QuickBooks desktop company file.
- And then, press the F2 key.

- The product information window appears on the screen. And then, under the file information, you can spot the location of the company file. Also, the .TLG and .QBW.ND files can be located in the same folder.
- Now right-click on the files to Rename them.
Read it Also: Methods to fix Gmail couldn't sign you in from QuickBooks issue
Solution 6: Add your server to Windows host file

- The first step in this process is to use the notepad on the system facing the issue and access the Windows hosts file.
- After that, you can find the host file at (C:\Windows\System32\Drivers\Etc\).
- Next step is to access notepad as Admin if required.
- Then type in the Server's IP address.
- Moving ahead, use the Tab key and then type in the Server name.
- Now click on Save option from the file menu.
- In last step, make sure to hit Exit tab.
Here you need to lookout, if issue of multi-user mode not working is fixed.
Solution 7: Switch to multi-user hosting
- At first, you would have to launch the QuickBooks application and update the company file to the latest version.
- Pick the File menu and head to Utility tab.
- Followed by choosing the Host multi-user access option.
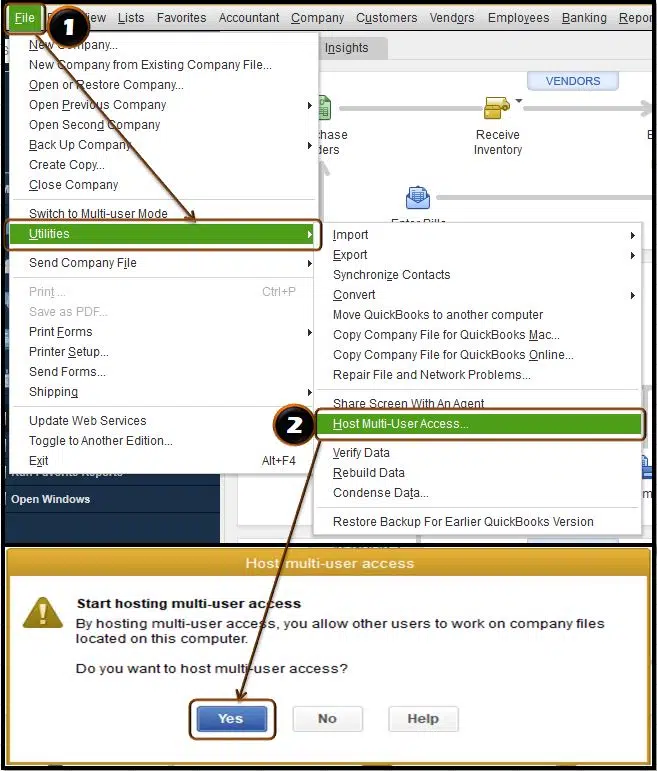
- Lastly, if the previously hosted multi-user setup is present then perform other related steps.
Read Also: How to Move fixed asset data to your new QuickBooks or another system?
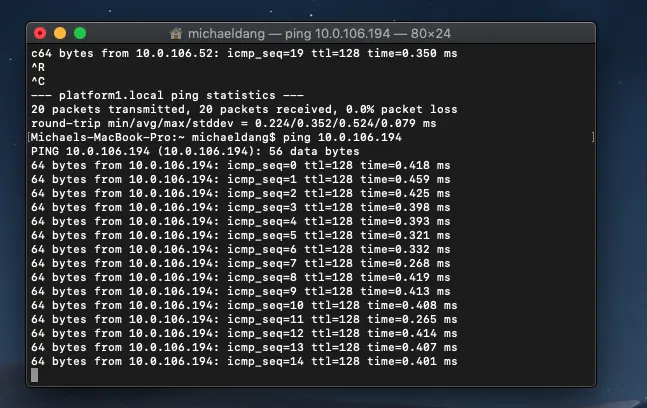
Solution 8: Ping the server from a workstation
- For this method, press the Start button on the server and workstations encountering the error.
- Now type in Network and then open Network and sharing center.

- It is supposed to click on Change advanced sharing, and from there, you should Turn on network discovery and file and printer sharing.
- The next step in the process is to get the name of the server.
- Moving ahead, type CMD in the Run window and then hit Enter key.

- In the CMD window, you need to enter Ipconfig/all text and hit Enter key.
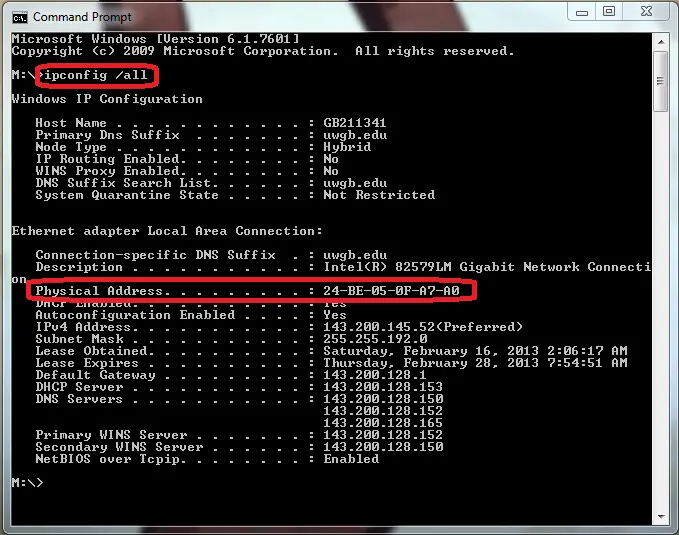
- Now you will see the server name next to the Hostname on the screen.
- Next step is to note down the Hostname and keep it safetly.
- In order to test the server, you need to move to the workstations.
- After that, click on Start menu and then open up the Run command window.
- Followed by, typing in the CMD in the Run window.
- Last step in the process is to type "ping_[your server name]" and then hit Enter key. And then type in the Server name without the brackets.
To store the company file, you must create a new folder on the hosting system. In addition, you'll need a folder and Windows access to share the company files. Now, you need to create an additional folder, then copy or transfer your .qbw file into the newly created location for storage. Try making use of QuickBooks in a multi-user to check if the issue has been solved.
Solution 9: Configuring the default setting
You can configure the default setting and can fix the issue. This will resolve the multi-user mode not working error. The steps to be followed over here are as follows:
- Initially, you need to open QuickBooks and click on File tab.
- After that, click on Utilities and also select Host multi-user access option.
- Now add the desired number of users with the company file.
- Followed by clicking on Cancel, if in case the Multi-user mode is already enabled, then then you will be asked to disable it.
- The final step is to create different login credentials for different users, and then then setup is complete to be used.
Solution 10: Reinstalling the QuickBooks software
You can reinstall QuickBooks software to fix the ongoing issue. The steps to be followed for this process are as follows:
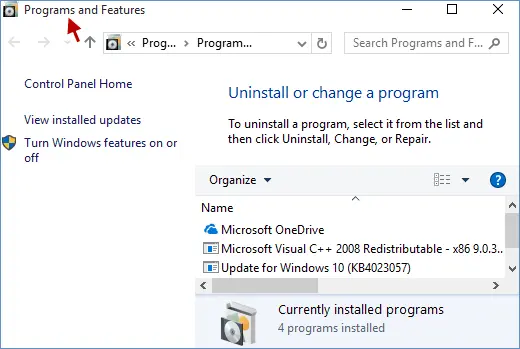
- Firstly you should hit a click on the Start tab and then move to the Control panel.
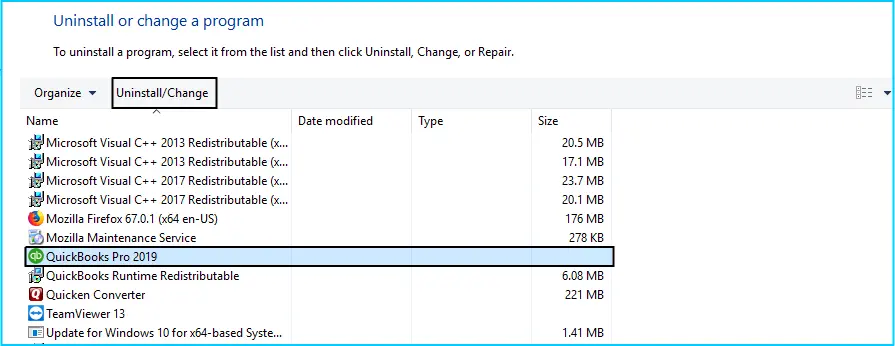
- After that, look for QuickBooks from Programs and features.
- Now you are required to, hit a click on QuickBooks and carry out the un-installation process.
- Once done with that, move to the official website of Intuit and then download the required version of QuickBooks.
- Finally, hit a click on Multi-user mode hosting and switch to it.
See Also: Fixation of QuickBooks Error Code 6190 or Unable to Open Company File
Final Note..!
We have written this article after consulting with our QuickBooks enterprise customer support team. Most of the procedures described herein are 10 DIY solutions, you should have no trouble performing them on your own. Nevertheless, if you require assistance with QuickBooks multi-user mode not working error, or the issue persists even after performing the troubleshooting instructions given above in this article, or the issue reoccurs repeatedly, then feel free to contact our 24x7 active assistance helpline via 1-800-761-1787. We'll happy to help you.
You might also like:
Fix Unable to create an accountant's copy error in QuickBooks
Fixation of Script error after opening QuickBooks Desktop Pro/Premier or Enterprise
Fix QuickBooks error 1723 - A Windows installer package problem