Did you know that you need to reauthorize QuickBooks desktop, in order to continue using Gmail? Well, this isn’t only for Gmail, you also have to do the same for Outlook. Reauthorizing simply means avoiding an error that might show up stating QuickBooks unable to send emails due to network connection failure. Not many of you might know, but Google and Outlook have recently made certain changes that lead to this particular error, especially when sending an email from QuickBooks desktop. In such a scenario, it become crucial to reauthorize the account, in order to continue using the webmail apps with QuickBooks without any glitch.
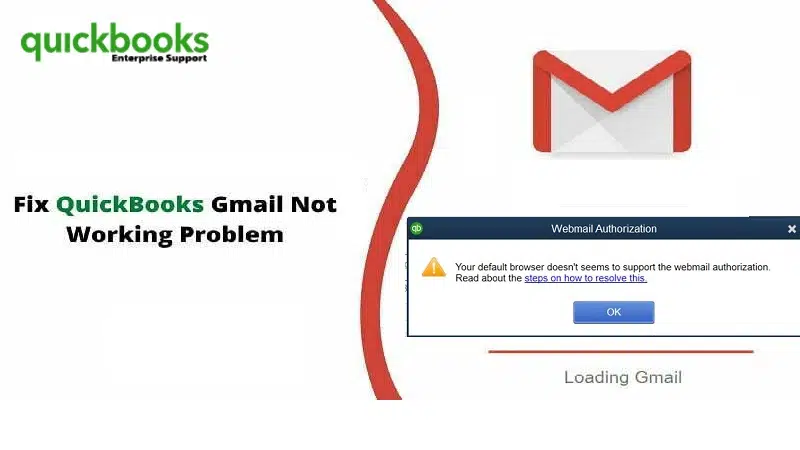
Google usually keeps rolling out with new updates and amends its policies occasionally. Lately, it has revised its privacy statement. By November 11, 2019, any software that makes use of the Google data must be authorized to ensure that it complies with Google’s policy. You’ll notice a message stating that “The app is not verified if it isn’t reauthorized” or “Webmail Authorization – The default browser doesn’t seems to support the webmail authorization”.

While this might seem to be a bit tricky, but it actually involves some basic steps. To help you figure out what reauthorization is all about, we are here with this segment sharing some quick steps. Although the procedure should be easy to implement for the majority of QuickBooks users, some might find it slightly technically difficult to perform. In such case, don’t hesitate to call the QuickBooks desktop experts team and let them perform the steps to make your work easier.
You may like also: How to Troubleshoot QuickBooks Error Code H202?
Steps to reauthorize QuickBooks to use Outlook and Gmail
To keep using Gmail, there are certain steps that you need to follow to reauthorize QuickBooks to keep using Outlook and Gmail. But before that, you need to update QuickBooks to the latest release, if you do not have one. Here is how you can download the latest QuickBooks update.
Solution 1: Check if you have the latest release of your QuickBooks desktop
- Open the software.
- And further, click on F2 key.
- This will open the Product information window for you.

- You now have to check your current version and release.
- And further see the latest release available.
Solution 2: Install the update
- You need to choose the update available and go for install now tab, in order to install the update.
- Once done with that, you need to wait for the update being installed.
- This might take sometime to get your update installed.
- After your update is installed, make sure to open QuickBooks and check for the same.
- Also, if you are using QuickBooks payroll, you are required to install the update for QuickBooks payroll tax table.
Steps to authorize or reauthorize QuickBooks to keep using Gmail
- After you have installed the update for QuickBooks, you need to proceed by opting for Email from any open transaction or report in QuickBooks.
- Once done with that, you simply need to opt for Send.
- You will be prompted to log in using the Intuit credentials, make sure to do that.
- After this, you need to choose the Continue tab, after the webmail authorization window opens up.
- The last step here is to choose Allow tab and you are done with the process.
Quick note: There isn’t any need to change any default permissions set by Microsoft.
After you perform the steps above, the reauthorization process comes to an end. While the process might sound a bit complicated, there aren’t much to perform in the process.
Troubleshooting Webmail Authorization Error in QuickBooks Desktop
Checkout the following DIY solution methods to fix webmail authorization errors in QuickBooks desktop:
Solution 1: Set your email preferences
- At first, select Email from a report or some open transaction in QuickBooks.
- After that, select Send Forms option then enter your Intuit login information.
- Now hit on Continue, on the Webmail Authorization window.

- Here you will need to Log in with your Gmail account information to continue.

- Next, click on Allow button once you have logged into your Gmail account.

- You need not to uncheck the Google default permissions.
Note: Once you’ve clicked on Allow, your QuickBooks will now able to send emails using your Gmail account. Close the Google Chrome window. You will also need to click on OK in the Preferences pop-up to save your all changes you have made.
Solution 2: Update QuickBooks desktop to the latest version
- Firstly, open QuickBooks and move to Help menu.
- After that click on Update QuickBooks desktop.

- The next step is to click on Update Now tab.
- Next, check-mark on the Reset Update option and then click on Get Updates. This will begin the download process.

- Once done with that, hit a click on OK and then restart QuickBooks desktop.
- If a dialogue box is prompted, select Yes to install the latest release.
After you have updated the software, open QuickBooks and navigate to the Web Mail Preferences. Now verify your email settings. Follow these steps:
- At first, select the Preferences tab from QuickBooks Edit Menu.
- After that click on Send forms.

- Next, move to My Preferences and then select Email account you are using, and then click on Edit option.
- Now go to Edit Email Information screen and select SMTP Server Details. Here you can set the Port and Server name for your email provider settings.

Facing issues while verifying the email settings?
- Press the Start button and click on the Internet Explorer browser top open it.
- After that click on Alt + T keys to open Tools menu.
- Now, tap on Internet Options.
- Next step is to click on Advanced tab and then Restore Advanced Settings.

- Hit on OK and close the browser.
Also see: How can We Get Rid of the QuickBooks Error 15270 Swiftly?
Solution 3: Change the current Gmail account to use the secure webmail
- It is recommended to enable the Google account’s 2-step verification.
- After that, open the QuickBooks software and click on Edit option.
- Followed by moving to Preferences tab.
- And then select Send Forms option and choose WebMail
- After that, hit on Edit option next to your Gmail User Id.
- You are now required to select the Enhanced security option.

- Now click on OK.
- Lastly login into your Intuit account.
- A page for signing into your Gmail account will appear on your screen. Log in using your credentials and provide access to Intuit.
Read Also: How to fix QuickBooks error code C=43?
Solution 4: Set Google Chrome as your default browser
- Under this solution, press the Start button and Programs folder.

- After then, double-click on Internet Explorer icon to launch it.
- Then click on the Settings icon and tap on Internet Options.

- In the next step, select the Programs tab and then choose Set Programs option under the Programs section.

- Here you need to click on Set your default programs.
- Next step is to choose Google Chrome from the list of programs.

- Also, click on Set this program as default and tap on OK.
Winding Up!
Reauthorization process isn’t that complicated to handle, especially when you have found the right steps that can work for you. With this segment, we have tried to provide you with the actual steps that you can perform to reauthorize QuickBooks desktop to keep using Gmail and fix Webmail authorization issues in QuickBooks desktop. The steps are valid for Outlook as well, and no separate steps are needed.
However, if this doesn’t work for you, then you definitely need assistance from certified QuickBooks error support experts, who will help you with the smooth reauthorization of QuickBooks. All you can do is to ring us up at 1-800-761-1787., and your queries will definitely be addressed by our technicians in no time.
FAQs
What is the need to reauthorize QuickBooks desktop to use Gmail?
QuickBooks should be reauthorized with Gmail since this enables email functionality in QuickBooks. Users can send invoices or reports directly via QuickBooks.
Will reauthorizing QuickBooks Desktop affect my existing Gmail settings or emails?
No! Reauthorizing QuickBooks Desktop to use Gmail has no effect on the Gmail settings or emails.
What should I do if the reauthorization process fails or encounters an error?
In case the reauthorization fails, follow the steps below:
1. Ensuring that the net connectivity is seamless.
2. Typing in the correct credentials when reauthorizing QuickBooks to Gmail.
3. Clear the web browser cache and cookies.
Other helpful posts:
How to Fix QuickBooks Error Code 6147, 0?


