Your internet connection isn’t working properly in QuickBooks payments? Well, we are here with all the information you need to change your internet connection settings so QuickBooks payments work properly for QuickBooks desktop for Windows. Often when you see blank pages, missing data, or errors when you sign, create invoices, or process payments, it indicates that there is some issue with the internet connection in QuickBooks payments.
You need to fix the internet connection problems in QuickBooks payments so that QuickBooks payments can connect to our services online. To learn the troubleshooting steps, stick to this segment till the end.
Quick Note: In case you find the same error in other areas of QuickBooks and not just the payments, then you need to check for other connection issues.
Effective Solutions to fix Internet Connection Problems in QuickBooks Payments
Fixing the internet connection problems while processing the payments in QuickBooks isn’t that tricky, all you need is to perform some quick solutions enumerated below. So, keep stick to the solution steps in the same order as discussed.
Method 1: Clear cookies and cache
You need to clear cache and cookies in the internet explorer to ensure that there isn’t any issue due to accumulated cache.
- Open the Internet explorer.
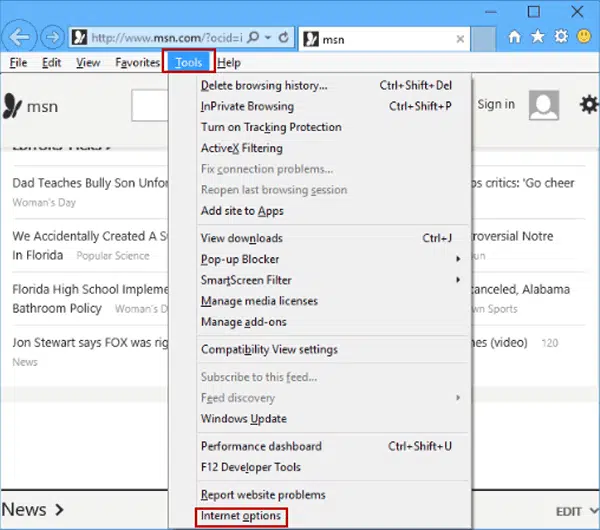
- Then go to the Tools icon.
- Next step is to press the Alt tab on the system to bring up the menu bar.
- And also, choose Tools menu.
- The next step is to go for the Internet options from the menu.
- Heading to the General tab and from the browsing history, select the Delete option.
- You also have to choose the following to delete:
- Choose temporary internet files and website files.
- Delete cookies and website data.
- Clear history
- Go for passwords
- Now choose Delete or Clear data tab.

- And then close the internet options window.
- You also have to close internet explorer.
- Try accessing QuickBooks payments again.
In case you do not see Internet Explorer in Windows 10:
You will have to perform the steps through Microsoft Edge.
- To start off with, open Microsoft Edge.
- Also choose the tab with Three dots.
- Choose open with Internet explorer.
- And perform the steps to Clear cookies and cache.
- Lastly, restart QuickBooks and try to process your payments once again.
Method 2: Changing compatibility view settings in Internet Explorer
Another option is to change the compatibility view settings in Internet Explorer, as the settings will help web pages to display properly. You can change the settings for internet explorer using the steps below:
- To begin with, you need to open Internet explorer.
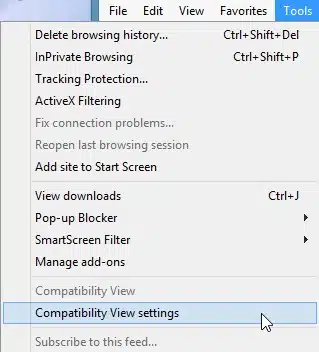
- Then go to the Tools icon.
- Press Alt key on the system to bring up the menu bar.
- Once done with that, go for the Tools menu.
- Also opt for the Compatibility view settings from the menu.
- Hit a click on Add this website.
- The next step is to enter *.intuit.com and choose Add tab
- Repeat the same steps for both intuit.net and quickbooks.com and click on Add.

- Now go for Close tab to save the changes.
- And find out if the error continues to trouble you.
Read Also: How to Resolve QuickBooks Error 6000 82?
Method 3: Add Intuit to the trusted sites list
- Start the process by opening QuickBooks desktop.
- After that, click on Help menu.
- Then click on Internet Connection Setup.
- Opt the option Use my computer's Internet connection settings.
- In next step, hit on Next tab.
- And further, move to Advanced Connection Settings option.
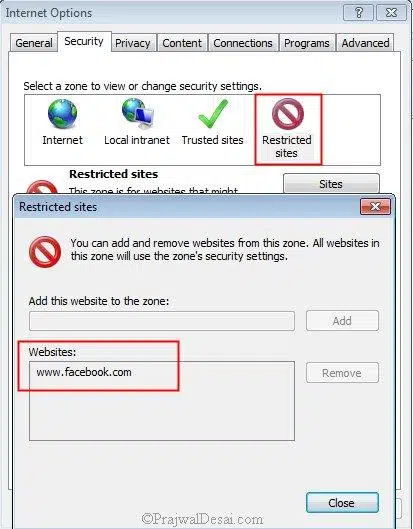
- Then click on Security and then go to Trusted sites.
- Hit a click on the Sites option, and add the following three sites:
- https://*.intuit.com
- https://*.intuit.net
- https://*.quickbooks.com
- Once done with that, hit Close.
- Now hit on Custom level and then click on Miscellaneous section.
- In this section, click on Enable option under Access data sources across domains option.
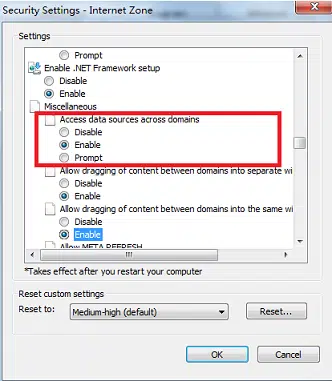
- Followed by click on Ok
Method 4: Make changes to cookies settings
- Under this method, firstly open Internet Options and go to Internet Connection Setup.
- After that move to Advanced Connection Setup.
- Then select Privacy and click on Advanced.
- Hit a click on Override automatic cookie handling.
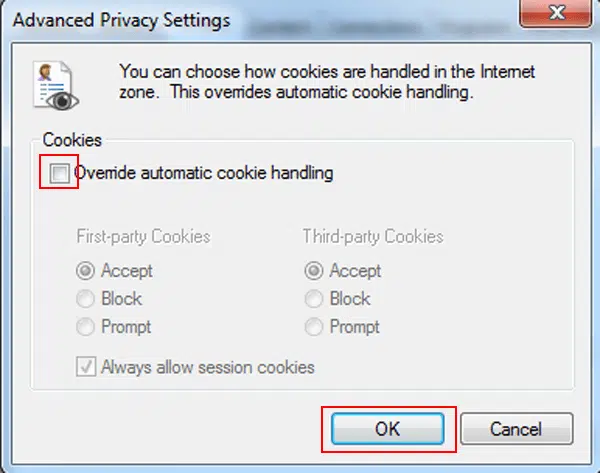
- Search the First party cookies opt and Third-party cookies.
- And further, select the Accept.
- Lastly click on Always allow session cookies and tap on Ok tab.
Method 5: Configure ActiveX Control
Well, you can change these settings directly in internet explorer, but it is often recommended to do it in QuickBooks desktop. This ensures that the new settings work properly in QuickBooks. The steps you have to follow to configure internet connection settings are as follows:
- To start off with, all you need is to open QuickBooks desktop.
- Furthermore, you will have to head to the Help menu.
- And then, you need to choose the Internet connection setup.
- Followed by, opting for Use my computer’s internet connection settings and further choose Next tab.
- You now have to go for Advanced connection settings and this will open the Internet options window where you can change the settings mentioned below:
- You need to add Intuit as a Trusted site.
- Furthermore, change Cookie settings.
- And then, change ActiveX control settings.
- Also, update Trusted sites settings.
- You also have to change the Advanced security settings.
- And further go for changing pop-up blocking settings.
- Lastly, choose restart.
Method 6: Change the settings related to Trusted Sites
- At first, go to Security tab and then move to Trusted Sites section.

- After that go to Security level and select Custom level option.
- Then hit on Reset and click on Yes.
- Finally, hit on Ok.
See Also: Steps to Fix custom email template issues in QuickBooks Desktop
Method 7: Enable TLS 1.2
- Open your browser and go to Internet Connection Setup from the Help menu.
- After then click on Advanced Connection Setup.
- Make sure to uncheck the opt to Do not save encrypted pages to disk box option.
- Now select Use TLS 1.2 box.

- Then hit on Apply and then Ok to save the changes.
Method 8: Disable the pop-up blocker
- Start the process by visiting to the Privacy tab and select Advanced Connection Setup.
- After that, click on Privacy.
- Now un-check the box net to Turn OFF the pop-up blocker.

- Lastly, click on Ok to save changes.
Method 9: Change firewall and security software settings
You are required to changing the settings for firewall or security. And similar to other web-based credit card processing software, QuickBooks payments will need a secure, uninterrupted connection to send and receive data.
Related Post: Methods to Fix Error Code: 80029c4a for QuickBooks Desktop
Winding Up!
Fixing to the internet connection problems in QuickBooks payments can be a bit challenging, especially if you aren’t that versed with QuickBooks technicalities. Therefore, it becomes crucial for you to get through the issue by simply connecting with the technical professionals. You can connect with the experts and your issue will be resolved by QuickBooks error support experts within a few minutes. For more information, dial our toll-free and directly connect with the professionals.
FAQs
What are some common internet connection problems that can affect QuickBooks Payments?
QuickBooks payments can be severely impacted due to the following reasons:
1. Slow internet connectivity
2. Network-related disruptions.
3. Firewall or antivirus may be preventing QuickBooks Payments
Are there any specific ports or protocols that need to be allowed for QuickBooks Payments?
Yes! QuickBooks Payments requires port 443 (HTTPS) corresponding to outbound connections.
Can temporary network disruptions or maintenance affect internet connectivity in QuickBooks Payments?
Yes! Temporary network disruptions can instigate internet connectivity issues in QuickBooks Payments.
How can I check if my internet connection is causing the issue?
1. Open a web browser and try visiting several websites.
2. If you can't access other sites, the problem is likely with your internet connection.
3. Restart your router or modem and reconnect to the internet.
Are there specific ports or settings QuickBooks Payments needs to access the internet?
1. Yes, QuickBooks requires access to certain ports and websites. Make sure the following ports are open:
80 (HTTP)
443 (HTTPS)
2. Add QuickBooks and its components as exceptions in your firewall and antivirus settings.
Can browser settings affect QuickBooks Payments?
Yes, if you are using QuickBooks Online, browser settings, cache, or extensions can interfere.
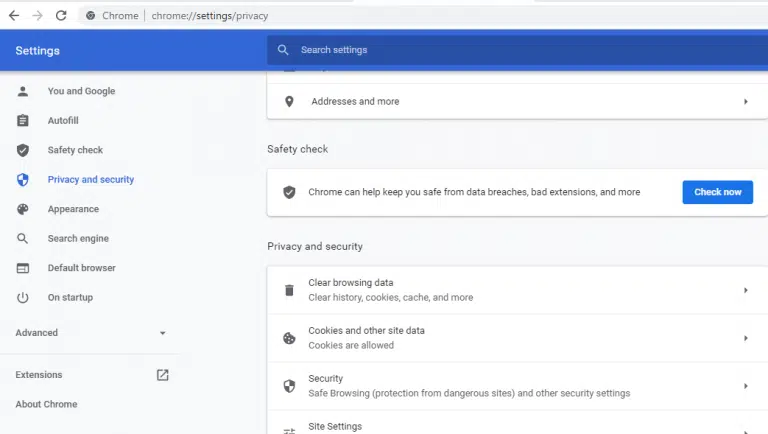
1. Clear your browser’s cache and cookies.
2. Try accessing QuickBooks Payments in a private/incognito window or a different browser.
Related Articles:
Fix license, validation, and registration errors in QuickBooks desktop
How to Troubleshoot QuickBooks Error 6073 and 99001?
Steps to fix Fix data damage on your QuickBooks Desktop company file