Learn how to setup, install updates for Intuit Data Protect:
Are you in search of the process to setup, install and update Intuit data protect? If yes, then you have landed at the right place. In this segment, we are going to talk about the Intuit data protect, its set up process, its install and update process, and a few other associated facts. Intuit Data Protect is a backup service that works in conjunction with QuickBooks. You can set it up, in order to back up the data every day.
We will be exploring the process to set up, install, and update the Intuit data protect one by one. So, without wasting time, let us quickly jump on to the article. But if in case you are seeking for effective strategies to setup, install and update intuit, proceed to the related piece of information. Or discuss regarding the same with our accounting professionals. They will assist you round the clock.
You may also like: How to Fix backup company file issues in QuickBooks Desktop?
Brief into Intuit data protect

Before we learn the processes of setting up, installing and updating Intuit data protect, it is very much important to unleash a few facts about this service. Intuit data protect is basically a subscription-based back-up providing service from Intuit. You can make use of this service for creating backups for the data files and folders stored on QuickBooks. Intuit data protect basically safeguards the data against data loss, theft, file corruption, and other dangers.
It is very important to keep the QuickBooks data files and system secured to ensure that the data is safe. With this service, you can either go for creating backup for the QuickBooks files only or create a backup for the entire system. It is compatible with QuickBooks 2011 and later versions of the software.
System configuration for installing Intuit Data protect
- Operating system – Windows 7, Windows 8.1, Windows 10, Windows 11, Windows Server 2008 R2 SP1, Windows Server 2011, Windows server 2012 R2, Windows Server 2016, Standard and essentials.
- Browser- Internet Explorer 11, Microsoft Edge, Google Chrome, Mozilla Firefox, Safari browser.
- System Hardware- 4 GB RAM, 4 GHz Processor, at least 5 GB of free disk space, 4X DVD-ROM drive (in case installing from a CD), 1280 x 1024 screen resolution.
Steps to set up Intuit data protect
The steps involved in setting up Intuit data protect are as follows:
- To begin with, you need to open the QuickBooks on the system or server that is having the QuickBooks company file. Or press F2 key in QuickBooks to find out.
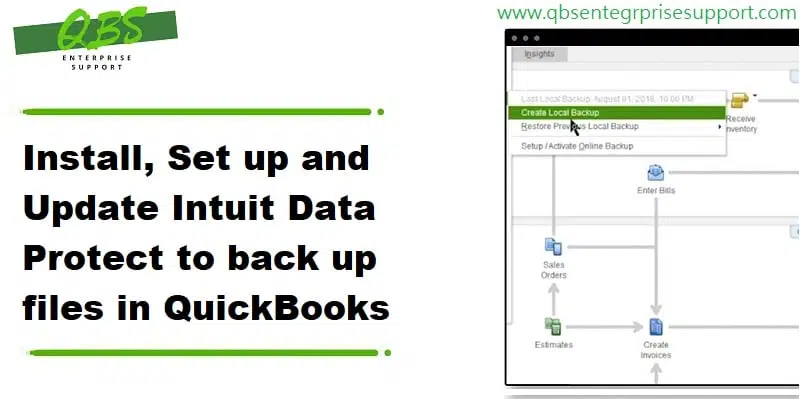
- After that visit the File menu and then select the Back up company and then set up/activate online backup.
- Now sign in with the Email address you used when you signed up. It is a bit different for the QuickBooks login.
- And then, after the setup is complete hit Continue.
- Also, select the QuickBooks company file, followed by choosing Continue. In case you have the entire system plan, then choose the folder you want to back up and then hit on Continue.
- Next step is to select the checkbox for back up local selected documents and then hit Continue.
- Now you need to select the Files and folders you want to backup and then click on Continue.
- Also, schedule the Daily backup and then tap on Continue again.
- To end the process, ensure that you Setup the notification settings and hit Continue.
It should be noted that the first backup might take several hours. It actually depends on the number of files and also the file size. You need not to worry, as the backups after the first one would hardly take a couple of minutes. You can also see the below given video in order to setup the intuit data protect.
Also Read: Methods to Fix OL and OLSU Bank Feeds errors in QuickBooks Desktop
Why is it important to update Intuit data protect?
Updating an application ensures to keep you from a wide range of online threats. It further ensures improved security, better and faster performance and security of information.
- You should keep the Intuit data protect up to date, as it offers advanced security to safeguard critical information and prevent data theft.
- Moreover, you can avail improved performance of web application and tools.
- Another option is of enhanced stability on other operating systems.
- Complete data safety and protection from data loss is another perk of updating Intuit data protect.
Steps to Update Intuit data protect in QuickBooks
It is recommended to update Intuit data protect occasionally for improvements. If you are having automatic updates turned on, then the software itself will download the update for you. Or you can also check for updates manually at any time. The steps involved in this process are as follows:

- First of all, download the latest update for Intuit data protect, by selecting update QuickBooks from the Help menu.
- And then select the Update now tab.
- Ensure that you have selected the Data protect from the list, and then choose the Get updates option.
- After that Install update and select the up arrow on the desktop toolbar.
- The next step is to right click the Intuit Data protect icon and then choose About Intuit data protect.

- Now, select the Update option.
- And also select OK once finished.
Process to make a backup with Intuit data protect
Now that you have learnt the steps to set up and update Intuit data protect, it is time to find out the process to make a backup with Intuit data protect. It backs up the files and folders automatically once a day. You can also backup manually at any point of time. Let us explorer the steps involved in backing up.
- First step is to right click the Intuit data protect icon and then choose the Open Intuit data protect. The icon might look like a green padlock on the windows toolbar.
- And then choose the Back up now option.
- Followed by selecting the Files and folders that you want to back up. Also, hit Continue.
- Now choose the Backup now. Also, you will receive a message stating that the backup is successful.

- The final step is to select OK button.
See Also: QuickBooks Unable To Locate PDF Viewer – How to Resolve this error?
Conclusion!
Intuit data protect can be of great assistance, if installed and updated properly. If you want further assistance related to Intuit data protect, you are invited to schedule a call with our U.S based CPA’s and accounting personnel at our dedicated support line at 1-800-761-1787 and let our QuickBooks enterprise technical support team handle the situation on your behalf. They will carry out the process smoothly, ensuring no further mess.
FAQ’s related to Intuit Data Protect
What is Intuit Data Protect?
Intuit Data Protect is a cloud-based backup and recovery service. It can assist in the protection of the accounting data in QuickBooks as well as other crucial files related to the QuickBooks program.
How do I set up Intuit Data Protect?
Setting up the IDP requires signing up for the service and then downloading and installing the tool on the system.
How do I update Intuit Data Protect?
For updating Intuit Data Protect, you need to download and install the tool from Intuit website. You can also enable the automatic update feature.
Can I use Intuit Data Protect with other software besides QuickBooks?
Yes! Intuit Data Protect can be employed to back up crucial accounting files and documents in addition to the QuickBooks data.
Other helpful articles:
Upgrade to QuickBooks Enterprise from Desktop Pro/Premier


