Table of Contents
ToggleLast updated on January 23rd, 2026
All that QuickBooks users need to know about setting up Charts of Accounts in QuickBooks.
It is a known fact, that QuickBooks is one of the best accounting software available now. It is considered a boon for small and medium sized businesses as this software helps in managing their finances and accounting tasks, thereby streamlining their business operations. QuickBooks has various features and every year when Intuit launches a new version of the application it comes with new and improved features. In this segment, we will discuss about QuickBooks chart of accounts and it’s uses.
The QuickBooks Chart of Accounts (COA) is a list of accounts that assist in categorizing assets, owner’s equity amount, liabilities, and income. In simple words, it is basically a list of balances and accounts of the company. This basically helps in understanding how much money the firm has, how much it owns, how much it owes etc., by providing a full-proof financial report. The organized chart of accounts gives an insight into how the organization is performing. In fact, it is considered a very crucial aspect of the accounting system. So, it is important to know the procedure to set up a chart of accounts in QuickBooks. Thus, make sure to read this post till the end, or you can also get in touch with our QuickBooks support team anytime. Help is available 24/7.
What is chart of accounts (COA)?
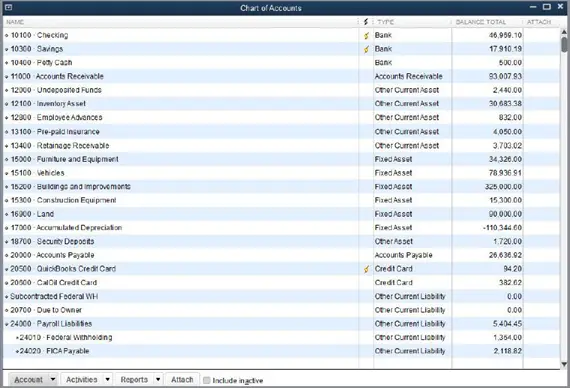
The Chart of Accounts is basically a list of account numbers and names that are relevant to the company. In general, the chart of accounts will have four categories. The four groups in a standard chart of accounts are as follows:
- Asset accounts
- Liability accounts
- Income accounts
- Expense accounts
These were the four basic categories, and within each of the categories, the line items will distinguish the specific accounts. Each line item represents an account within each category. A few charts of accounts might also display the equity accounts, which is a representation of anything that remains after accounting for all operating expenses and revenue accounts.
You might also see: How to Troubleshoot QuickBooks Payroll Error 15203?
Type of Chart of Accounts
There are four types of chart of accounts that helps in business accounting error and hassle-free:
1. Asset Accounts
Asset accounts basically contain everything that has some value, such as buildings, vehicles, land, inventory, valuables, etc. So, this type of Chart of Accounts helps in tracking how much the user paid for a property and also other factors like depreciation. Items that are in liquid forms, like cheques and other bank accounts, are also included in this Chart of Accounts.
The asset accounts also include the things like liquid, such as checking accounts and other bank accounts. Other asset accounts can be the accounts receivables and notes receivable. The charts of accounts streamline various asset accounts by organizing them into line items so that one can track various components with much ease.
2. Liability Accounts
The Liability Accounts consist of things like mortgages, payroll taxes, promissory notes, credit card balances, bank loans, personal loans, and income tax payables. When users add a loan to this account, do ensure that users have also added the sum of the loan.
Users will have to log just the principal amount and forgo the interest owed. When one reaches each monthly payment and enter the payment in the account system, users will split the payment into an amount subtracted from what is owed and an amount of interest paid, which will go into an expense account.
3. Income Accounts
Income Accounts mostly has expenses, revenues, additional incomes or expenses, and cost of sales. Some of the accounts are the same for all businesses, while some accounts are definite to a particular business type. Few of the types of income are simple and economical to generate, while few others require time, expenses, and effort.
Creating separate line items in the chart of accounts is recommended for different types of income. Users are recommended to consider what various profitable activities may be and sort them by income type instead of limping all the income into one account. After the user is able to identify the locations or events bringing the most cash flow, then it is possible to manage things more properly.
4. Expense Accounts
This account keeps users informed about the amount of money that they have spent. In fact, it allows them to track the cash that is not with them. It is always suggested to break up the expenses into separate accounts, and users even get the opportunity to create sub-categories for their expenses.
Tips for organizing the chart of accounts
Before users begin with the steps to organize the chart of accounts, the following pointers or tips should be considered.
- Many accounting systems are preset with a chart of accounts. The lines of preset accounts include numbered headers like 1430.2 and 530.8. These numbers can be effective for huge firms, but are usually a waste for entrepreneurs and small firms.
- Users should keep the line items simple in the first go. And also, ensure that the line items have titles that make sense to the accountant and also to them. Using straightforward titles is recommended.
- Another point that users should consider is to avoid creating a new line item for each transaction, as it would litter the entire chart of accounts. Instead of that, users should make use of the accounting software’s subheadings.
- For example, while creating a new account for PayPal fees, in such a case, instead of creating a new line, users can simply create a sub-account under the bank fees.
Read Also: How to perform a clean installation of QuickBooks desktop?
How to access QuickBooks chart of accounts?
On QuickBooks Desktop:
- Start off by picking up the Chart of accounts from any of the following QuickBooks menu:
- Go to the Company and then click on Lists, or Accountant.

On QuickBooks Online:
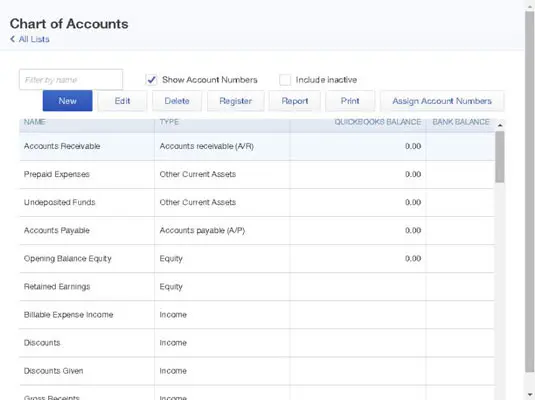
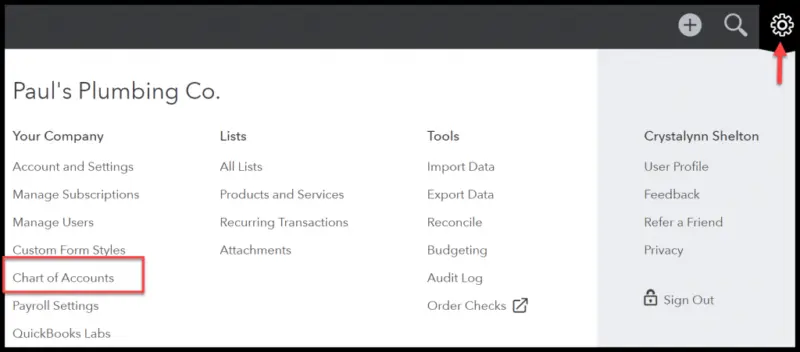
Herein, hit a click on the Settings ⚙ icon, and then choose Chart of accounts.
Easy Steps to Set up a Chart of Accounts in QuickBooks
Below are the steps to set up the chart of accounts that will help in making business health better:
Step 1: Select the Lists – Charts of Accounts Command
- QuickBooks displays the Charts of Accounts window on the computer screen.
Step 2: Click on the Account Button
- On the screen, QuickBooks will display the Account Menu. When users hit a click on the tab ‘Account menu option New’ will be pop up on their system’s screen.
Step 3: Add New Account by selecting Account and then New
- QuickBooks will showcase the Add New Account window on the screen.

Read this also: How to Resolve QuickBooks Bank Error 106?
Step 4: Use the Account Type buttons
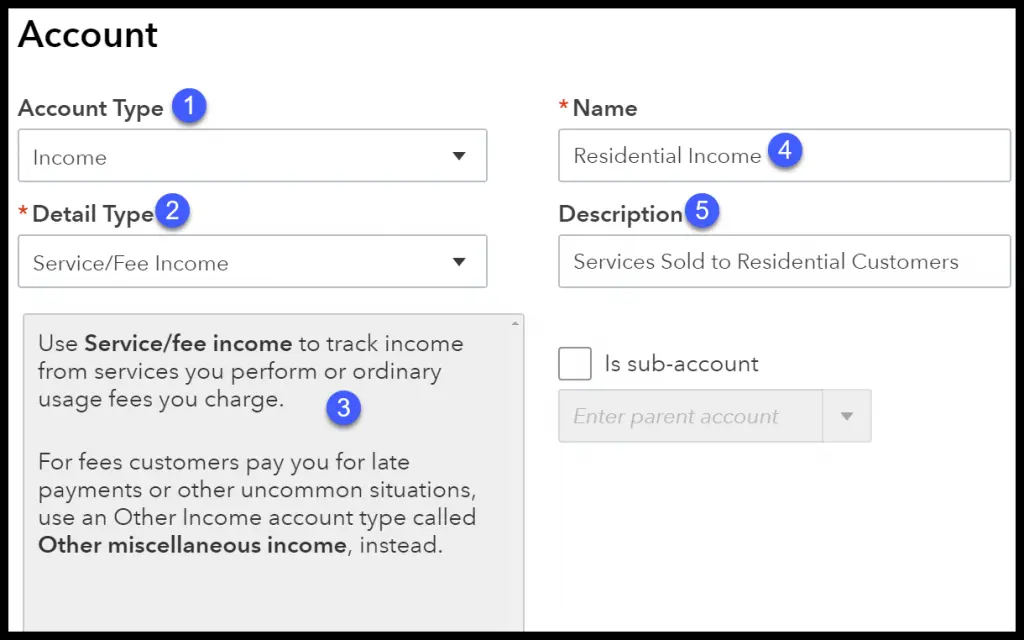
- QuickBooks provides different account types like Income, loan, Fixed Asset, Expenses, Credit Card, equity, Accounts Payable, Other Income, Costs of Good Sold, Accounts Receivable, Other Assets, Long Term Liability, Other Expenses, and more.
- Moreover, through the Accounts, users will come to know about the location where their data is getting reported.
Step 5: Click on Continue

- Once users click on Continue, QuickBooks will show the second Add Account window on the computer screen. Note that the name of the account will appear in the financial statements. So, users have to use the Account Name Box to give a very distinctive name to the new account.
Step 6: Check the Sub-account
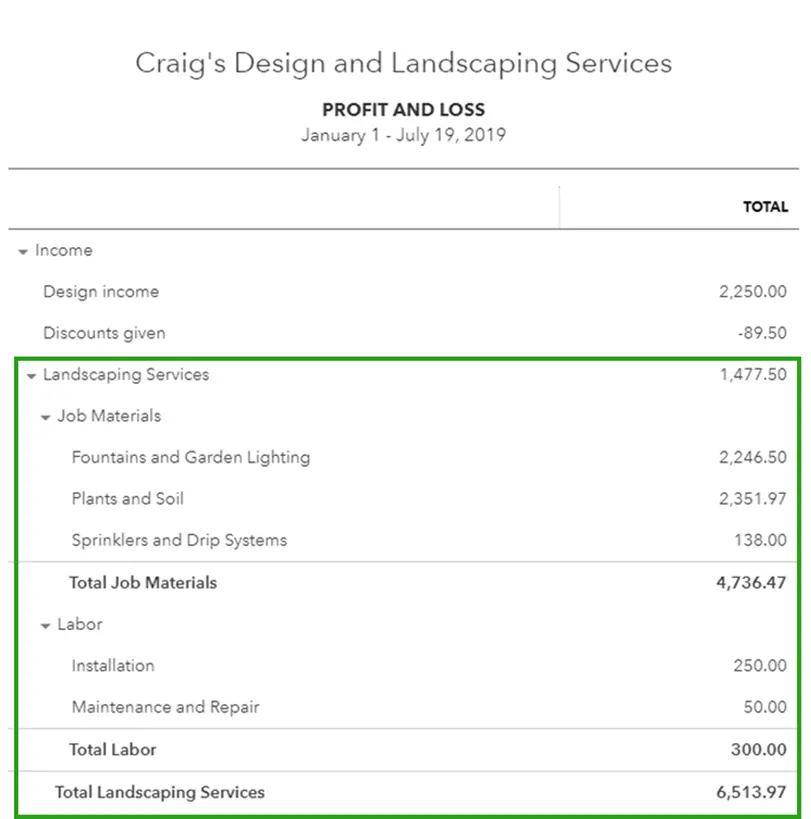
- Once users have selected the sub-account of the check box, they have to give a name to the Parent account.
Step 7: Bank Account
- If QuickBooks understands that users work in different currencies, then it will prompt the users to look for all those customers, bank accounts, vendors, etc., who use different currencies.
See Also: Fix Unable to Find or Open QuickBooks Desktop 2022 After Installation
Step 8: Description of the New Account
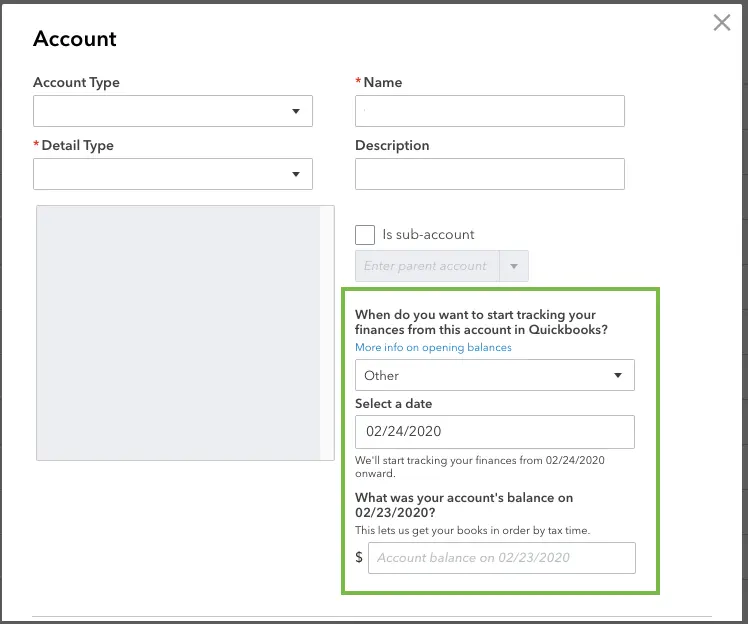
- Actually, there is no need to describe the new account. QuickBooks uses only the account name in the financial statements and so no description is required as such.
Step 9: Get Account Info
- The credit card account type version of the Add New Account window will help in storing all the card details.
Step 10: Recognize the Tax Line
- On the corporation’s Tax return, the cash account balances will be recorded. If users still want to add a bank account, then they can make use of the Tax-Line Mapping drop-down list.
Step 11: Save the New Account
- The last step requires the user to hit click on the Next tab in order to save the account information and then head to the Add New Account Window.
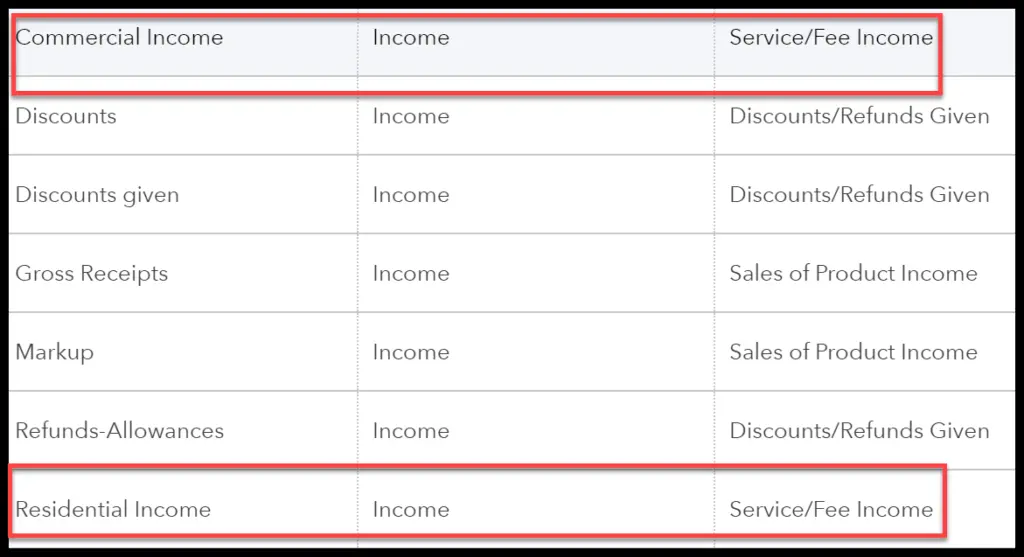
- Once both accounts have been set up, the new accounts will appear on the chart of accounts list, as indicated below:
Read Also: Steps to Fix QuickBooks Cannot Verify Payroll Subscription Error PS036
How to Modify an Account from the Chart of Accounts List?
The steps to modify an account from the chart of accounts are illustrated below:
Selecting the Account
- The initial step is to choose the account which is to be modified. In QuickBooks, one can modify the accounts regardless of the time. From the chart of accounts, users should scroll down to the account that is to be modified and then click on the drop arrow, which is situated next to Run Report, and then select the Edit option.

Making modifications to the account
- Users will then be guided to the window shown below, where they can make changes to the Account Name and Account Description fields. The point to be noted here is that users should not change the category type in case they have already entered transactions using the account. Doing so can lay a serious impact on the financial statements.

Save and Close
- Users should not miss out on saving the changes before exiting the account, or else the work will be lost.
Final Words..!
All the above steps will allow users to track your business activities on a daily basis, and you are now able to set up the chart of accounts in QuickBooks. However, if you get stuck anywhere while performing these actions or have any questions, then you can always connect with our U.S. based QuickBooks customer support team using our dedicated support line, i.e., 1-800-761-1787, which is available all through the day to assist you.
Other articles to read:
How to Fix QuickBooks error code 185?
Steps to fix QuickBooks Payroll Error “Failed to send usage data”
