Fix QuickBooks Error 1920: Database Manager failed to start problem immediately at your own:
No matter how hard you try, due to some or the other reason you might bump into various QuickBooks errors. This article is written with an intent to cater the fixation procedures for QuickBooks error 1920. Often while opening the QuickBooks database server manager, you might bump into the error code 1920 stating as:
| Problem | “Error 1920: Service QuickBooks Database Manager (QBCFMonitorService) failed to start”. |
It happens when the QuickBooks Database Manager Service (QBDBMgrN) fails to start during installation, often due to permission issues, leftover files from older versions, or interference from security software. Since this service is vital for QuickBooks to connect with company files, the error can completely halt your setup. There are a variety of facts related to this error that we will discuss later in this post. This article contains a full details about fixing QuickBooks error code 1920. So, Stay tuned until the end to find out numerous facts related to this error. However, if you feel the need to consult a accounting and bookkeeping professional, do not be hesitate to call us at any time. Contact us using our helpline, i.e., 1-800-761-1787 and you will be connected with our QuickBooks error support experts who are readily available to help you.
What is QuickBooks error code 1920 and it’s causes?
Install Error 1920 (QBCFMonitorService) failed to start error indicates failure in opening the QuickBooks database server manager. This error is often seen when the database server manager is unable to access a hard drive on the desktop in order to create a connection to company files. When the QBDBMS tried to access a drive on the desktop and was unable to, as a consequence of which the service would not start properly.
What leads to the QuickBooks error message 1920?
There can be a couple of causes that would end up in database server manager failed to start error. A few of the common causes of this error are as follows:
- You can end up in this error if a malfunction in the operating system occurs.
- If the installation or un-installation of QuickBooks failed.
- Invalid entries in the registry of the Windows can end up in this issue.
- Any sort of virus or malware attack.
- You might also face similar issue, due to power failure or improper shut down of the system.
- If the important files of QuickBooks got deleted mistakenly for some reason, then it could end up in this error.
You might also read: Fix QuickBooks unable to create accountant's copy error
Troubleshooting of QuickBooks Error Code 1920
QuickBooks installation error 1920 is observed as the database server manager isn't connected with the your company file. If you're trying to install QuickBooks onto your computer to the first time and you encounter this problem In that instance, you should install it as a Windows user with administrator rights. Additionally you can perform the steps listed below to fix this issue quickly.
CASE 1: When you are trying to install or update QuickBooks
You can make use of the steps below, if you are trying to install a new version of QuickBooks or update QuickBooks to latest release one.
Step 1: Uninstalling QuickBooks desktop
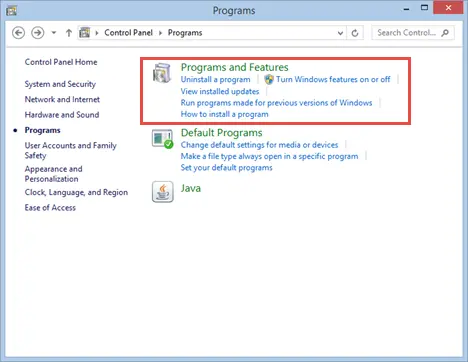
- Press Windows key + R keys and then look for and open the control panel.
- Choose the programs and features or uninstall a program.
- Opt for QuickBooks desktop form the list of installed programs.
- Go for uninstall or change option and follow the onscreen instructions.

Step 2: Renaming the installation folders
In case you do not see the application data or program data folder, then you need to display the hidden files and folders or look for files using Windows. Also, if you are having other intuit apps installed on the system, then make sure to only uninstall and rename the QuickBooks version folder found in the Intuit folder.
- Navigate to the installation folders and then refer to the chart below:
| Windows 10/8/7 | Windows Vista |
| C:\Program Data\Intuit C:\Program Data\Common Files\Intuit C:\Users\[Username]\AppData\Local\Intuit C:\Program Files\Intuit C:\Program Files\Common Files\Intuit | C:\Program Data\Intuit C:\Program Data\Common Files\Intuit C:\Users\\AppData\Local\Intuit C:\Program Files\Intuit C:\Program Files\Common Files\Intuit |
- Press the Windows key and R key simultaneously to open run command.
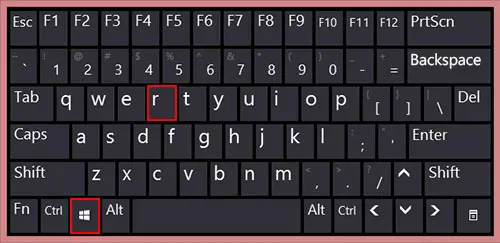
- Enter the location of the folder, also hit on Enter key.
- Right click the folder and select rename.
- Finally rename the folder to .OLD.
Step 3: Installing QuickBooks desktop
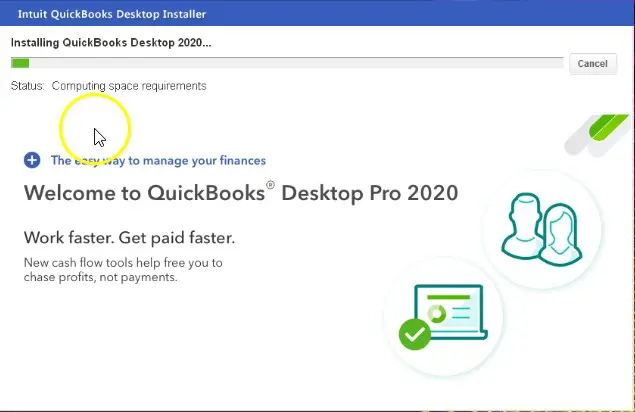
You will now have to install the QuickBooks desktop, after carrying out the above two steps successfully.
- First of all, Prepare for the installation of your software.
- Install your QuickBooks Desktop.
- Open the downloaded file (QuickBooks.exe)
- Pay heed to the onscreen instructions and accept the software license agreement
- Choose Next option
- Enter your Product and License numbers of your software and then choose Next option.
- Decide which install type is right for you.
- Express the install
- Custom and Network install
- Lastly, activate your QuickBooks Desktop.
Step 4: Setting up QuickBooks desktop to use the new company file name
- For this, you are supposed to open QuickBooks.
- Move to the QB file menu and from there click on open or restore an existing company.
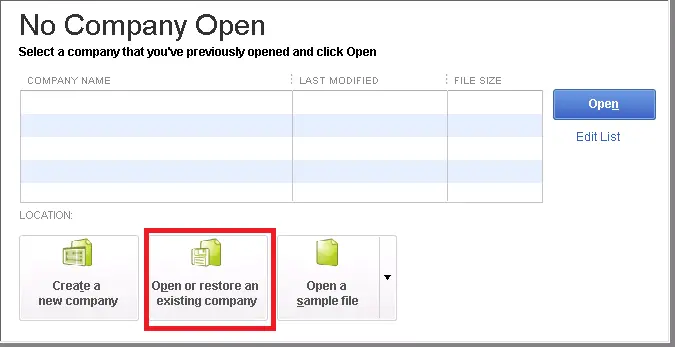
- Open a company file followed by hitting next tab.
- Once done with that, choose a new name for the company file.
- Hit a click on open tab.
Step 5: Manually resolving the issue
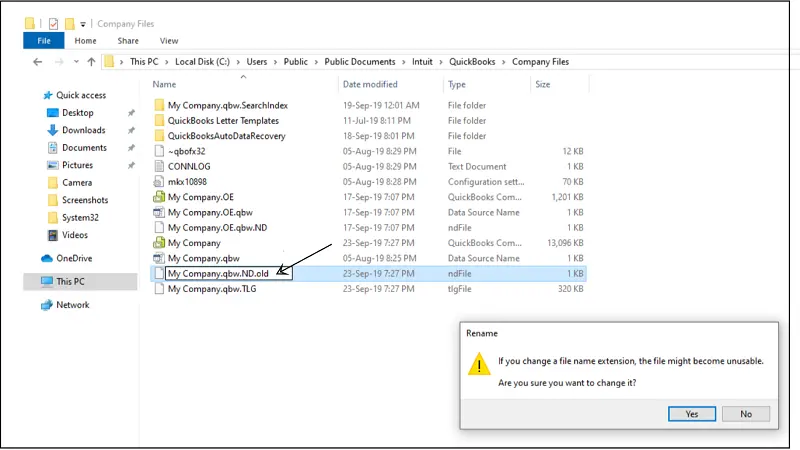
- Firstly rename the QuickBooks company file.
- Open the QuickBooks desktop and also open the company file.
- Press the F2 key or Ctrl +1 keys so as to open the product information.
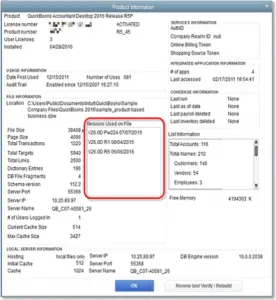
- Followed by, tracking the location of the company file listed in the file information.
- Close QuickBooks desktop.
- Move to the company file location.
- Windows 10, 8.1, and 8 users will have to right-click Windows Start tab and then select file explorer.
- And the Windows 7 and Vista users will have to right-click on the Windows start tab and choose to open Windows Explorer.
- Right-click the file and then select the Rename tab.
- Now type the new name of the company files and hit Enter key. If Windows asks to confirm the action, then you need to click on Yes.
You may also read: How to Troubleshoot QuickBooks Error H505?
CASE 2: When you are trying to update QuickBooks database server manager on the server system
You can carry out the steps below if you don’t have the QuickBooks on the server, but share the file over the network using the database server manager.
Step 1: Uninstalling QuickBooks database server manager
- In this process, press Windows key + R keys.
- Enter the appwiz.cpl and hit OK after the run dialog box appears.

- Go for the QuickBooks database server manager.
- At last, select uninstall/change and then carry out the on-screen instructions.
Step 2: Renaming the installation folders
This step is similar to that in the above process. If you are unable to see the application data or program data, then you need to display the hidden files and folders. Also, if you have other Intuit apps installed on the system, you should only uninstall or rename the QuickBooks version folder found in the Intuit folder.
- Visit the installation folders and refer to the chart below:
| Windows 10/8/7 | Windows Vista |
| C:\Program Data\Intuit C:\Program Data\Common Files\Intuit C:\Users\[Username]\AppData\Local\Intuit C:\Program Files\Intuit C:\Program Files\Common Files\Intuit | C:\Program Data\Intuit C:\Program Data\Common Files\Intuit C:\Users\\AppData\Local\Intuit C:\Program Files\Intuit C:\Program Files\Common Files\Intuit |
- Now press the Windows key and R key to open the Run command.
- Enter the location of the folder, and hit Enter key.
- Right-click the folder and select rename.
- End the process by renaming the folder to .OLD.
Step 3: Reinstalling QuickBooks database server manager
The last step in this process is to reinstall the QuickBooks database server manager and set up file sharing. The database server manager is usually used to run the multi-user access in QuickBooks desktop. This server manager assists in working with the same company file at the same time. The steps to download and install the database server manager are as follows:
- At first, you will have to download and install the database server manager on the server system. The server system is the computer where the company file is hosted.
Note: If you are a professional accountant, bookkeeper or host more than one version of QuickBooks desktop on the network, then it is recommended to install them in order. This means to install the oldest version first and the recent one at the end.
- You are then required to terminate all the open programs on the server device, also QuickBooks.
- Now open the downloaded file Setup_QuickBooks.exe file and install it.
- Follow all the onscreen instructions one by one.
- QuickBooks will recommend choosing an install type, and then select of any of custom or network options. And then, move to the next tab. Also, ensure not to choose express.
- Next steps is to click on preferred option for the network setup and click on next. Both options will install the database server manager.
- If you want to have to both QuickBooks desktop and database server manager on the server system, then we will advise you to click on I'll be using as well as storing QuickBooks desktop on this device.
- In case you want only database server manager on your server system, then make sure to click on I will not be using QuickBooks desktop.
- And move ahead with the onscreen prompts, and when you are all set, then click on install. And Windows might ask for permission.
Similar Article: QuickBooks Multi-user Mode not working - How to troubleshoot it?
To Wrap Up!
We wrap up the post over here, with the hope that the methods and the information we have discussed in above might have aided you in tackling the QuickBooks error message 1920. However, if by any chance the error persists or continues to bother you, then make sure to consult a QuickBooks enterprise support team right away. Feel free to ring us up at our 24X7 support helpline i.e. 1-800-761-1787.
QuickBooks Error 1920 - FAQs
What is QuickBooks installation error code 1920?
QuickBooks error code 1920 belongs to the subset of installation errors that are associated with the non-functioning of QuickBooks database manager server when the QuickBooks installation is commenced.
How do I manually start the QuickBooks Database Manager Service?
The manual procedure to start QuickBooks Database Manager Service is discussed below:
1. Start by tapping on the Windows + R keys so as to open the Run box.
2. The next step requires typing "services.msc" and hitting Enter.
3. Proceed by searching for the QB Database Manager Service in the Services window.
4. Followed by right-clicking on the QuickBooks Database Manager Service.
5. Later on, tap on Properties and then move to change the Startup type to Automatic.
7. Now hit on Start button. This action will manually start the service.
8. Finally, tap on Ok.
Other Articles to read:
How to fix Intuit data protect (IDP) backup failed problem?