Get the latest steps to Install, delete and troubleshoot the QuickBooks PDF convertor issues
QuickBooks software is a bliss, when it comes to features and functionalities. One such built-in feature is QuickBooks PDF converter, which converts QuickBooks reports and forms into Adobe portable document format files. Having QuickBooks reports in PDF form, makes it easier to share the financial reports to personnel who don’t have QuickBooks installed in their systems. However, situations might arise when you might bump into QuickBooks issues related to printing, emailing, or saving as a PDF file from QuickBooks desktop. There is a lot more about PDF converter, its installation, and troubleshooting of errors.
Thus, to know more, make sure that you stick around this space till the end. And unleash some of the most important information related to QuickBooks PDF converter. You can also connect with the QuickBooks experts for quick and precise solutions. We are available round the clock and offer you the best services that your business deserves.
Table of Contents
TogglePerks of using QuickBooks PDF tool
QuickBooks PDF converter tool rolls in with some great advantages, some of which are listed below:
- Easy data sharing is one of the major benefits of using QuickBooks PDF tool. This can help in making the well-informed decisions and also boost the business profits.
- Another benefit can be that the PDF file is supported across various platforms and can be opened with the help of Adobe reader, Foxit reader, PDF-Xchange viewer, or perfect PDF reader.
- Moreover, once you converts the company’s data in the PDF format, you can email it to the clients and associates. You might also upload the PDF file to a web browser, intranet, or computer server, so that others can also see it.
- You can also convert various QuickBooks reports such as reconciliation statements, balance sheets, company invoices, and various others.
Read Also: How to Troubleshoot the QuickBooks Error Code 6105?
Steps for installing QuickBooks PDF converter
So as to install the QuickBooks PDF converter, the below steps can surely work. Let us dive in deep and further explore the steps involved:
- To start off with, you need to right click the QuickBooks desktop icon and select the properties tab.
- Head forward by clicking on to the find target tab or open the file location.
- Next, you should double click the install application, or install.exe to install the PDF converter alternatively.
- Now click on OK tab when the installation gets complete.
- Hit a click on Windows Start tab and also hit a click on Search tab.
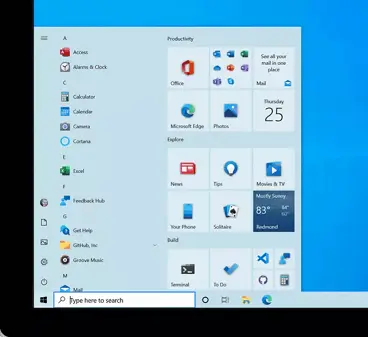
- Type in the control printers in the open field and click on the OK tab. This will also open the printers and scanners window.

- You should then right click the document converter and opt for the rename option.
- The last step is to enter the QuickBooks PDF converter and hit Enter key, and also ensure typing the name accurately as shown here, including spaces.
Steps to delete the QuickBooks PDF converter
Now that you have learnt the steps involved in installing QuickBooks PDF converter let us explore the steps that can be implemented in order to delete the same.
- Kick start the process by logging in to the Windows using the admin credentials.

- In case you are using Microsoft Windows XP, then open the printers and faces window and head forward using these steps:
- You should first move to the Windows Start tab on the bottom left of the screen and also click on it. Moreover, choose the Run tab.
- Type in the words stating control printers in the run window.
- And also, click on Ok tab.
- If you are using newer version of Microsoft Windows, including Windows 10, then in that case, you are supposed to open the printers and faxes/ devices and printers window and follow the steps ahead:
- You will have to first head to the Windows logo tab and click on the same. Also, hit the run tab, if not available, then use the start search bar to find run.
- Now, in the run window, enter the words control printers.
- Hit a click on OK tab.
- In case the printers and faxes window opens up, we suggest you to right click the QuickBooks PDF converter icon.
- And from the list that appears, right click to get the delete option.
- Click on Yes, in the confirmation window.
And you are good to go …
How can QuickBooks PDF converter be reinstalled?
If you want to get back the PDF converter after deleting it, then carry out the steps listed below related to reinstalling QuickBooks PDF converter.
- Start the process by seeking for QuickBooks icon on the desktop.
- Furthermore, right click the QuickBooks icon.
- Moreover, from the list that is seen on the screen after right clicking, pick the properties option.
- In the properties window, hit a click on the find target option or open file location.
- You will be driven to a Windows Explorer window.
- There, you have to double click the install.exe file or install application.
- This will install the PDF converter.
- Later, tap on ok tab.
- Head to the Windows Start tab and also select Run.
- Type in control printers in the open field.
- Followed by hitting ok tab to open printers and faxes.
- Furthermore, you should right click on the Amyuni document converter and choose rename tab.
- Followed by entering the correct name according to the QuickBooks version being installed in the system and hit enter tab.
- QuickBooks 2006-2009 R8: QuickBooks PDF converter
- QuickBooks 2009 R9 and later: PDF converter 3.0
- QuickBooks 2010 R1 and R2: PDF converter 2.0 QuickBooks
- After that, select NO for the default printer and then hit a click on the Next tab.
- Now choose Do not share this printer and then hit a click on Next opt.
- Next, you will see a prompt to print a test page and you have to choose the option NO and finally hit a click on Next.
You may also like: How to Fix Webmail Password Issues in QuickBooks Desktop?
Troubleshooting PDF Converter Issues (PDF and print issues in QuickBooks desktop)
While converting PDF, you might bump into certain errors, which can be resolved using the rectification methods listed below. Let us explore further:
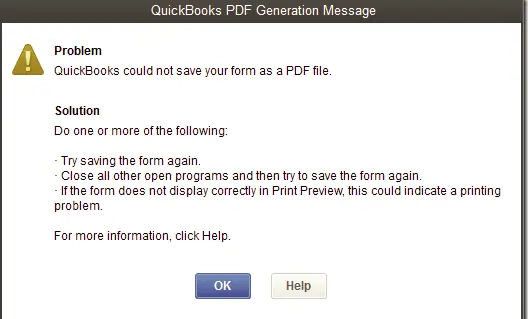
Solution 1: Running QuickBooks Print and PDF repair tool from QuickBooks tool hub
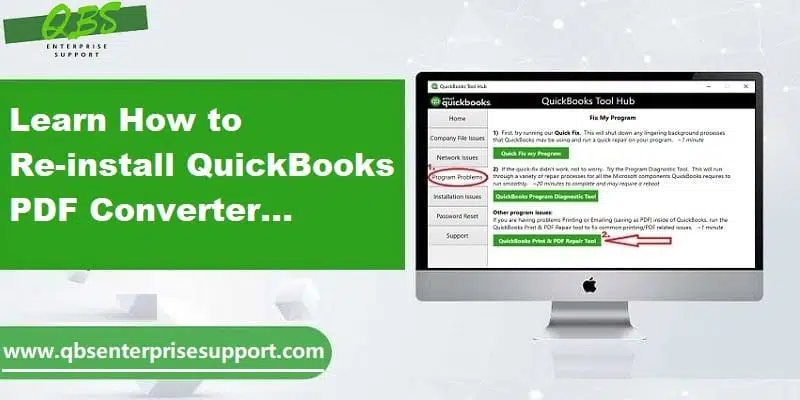
In order to get rid of the PDF and print issues, one can make use of the QuickBooks print and pdf repair tool. This can be accessed using tool hub. We have jotted down the steps involved in this process, let us have a look:
Step 1: Download and install Tool hub
- Start with closing QuickBooks.
- It is highly recommended to download the most recent version of QuickBooks tool hub. You can save the file somewhere that it can be accessed without any hassle. In case you have already installed the tool hub earlier, then you can find out the version being used by clicking on to the home tab or selecting the about to view the version.
- Furthermore, open the file downloaded in the above step.
- And pay heed to the onscreen steps to install and agree to the terms and conditions.
- Head forward by double clicking the icon on the Windows desktop for opening the QuickBooks tool hub.

Step 2: Run PDF and print repair tool
- Now that you have installed the tool hub, it is time to select program problems inside the tool.
- Click on the option stating QuickBooks PDF and print repair tool. This would take about a minute to run.
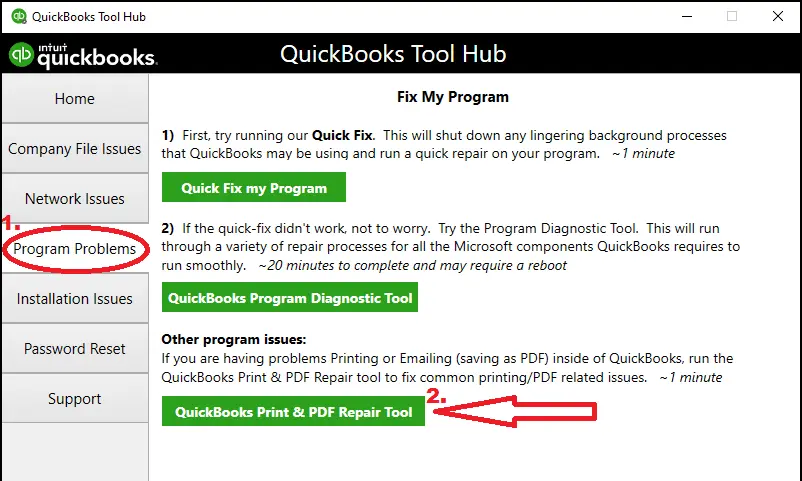
- And then try to print, email, or save as PDF from QuickBooks desktop again.
Read Also: Methods to Fix QuickBooks Payroll Error Code 30159 Like a Pro
Solution 2: Resetting temp folder permissions
In case the first method didn’t work for you, then try resetting the temp folder permissions.
Step 1: Reset the temp folder permissions
You need to check the folder permissions to the TEMP folder:
- Press Windows + R to open the Run command.
- Head forward by typing in %TEMP% and hit enter.

- Right click the empty area of the temp folder and pick the properties tab.
- Choose the security tab as well.
- Also, make sure that all the users names and groups showing on the security tab have full control.
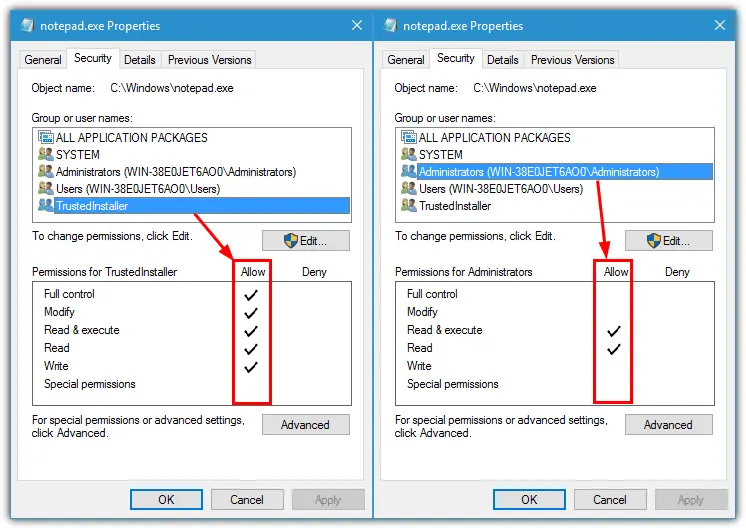
- After the permissions are set to full control, make sure to save as a PDF again within QuickBooks.
Step 2: Confirming that you can print XPS
You should confirm that you can print to the XPS document writer, as QuickBooks makes use of the XPS document writer for saving as a PDF.
- Here, you should first open Notepad.
- Followed by typing in test. Also, tapping on to the file and print options, respectively.
- Furthermore, choose the XPS document writer and hit the print tab.
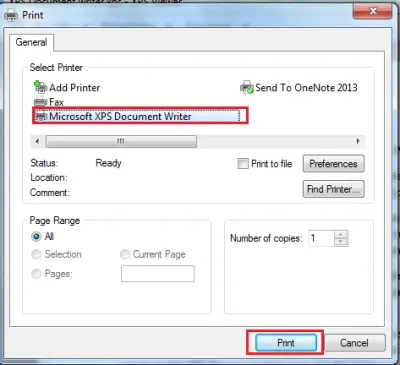
- Moreover, type a filename and also save it to the desktop.
- Head towards the desktop and view the document printed from notepad.
Important points to consider
There are certain factors that should be kept in mind, before heading forward:
- In order to test the print issues, you should print to the printer and check if you can print successfully outside QuickBooks.
- In case you are unable to print to the XPS printer outside of QuickBooks, then consulting an IT professional is recommended.
See Also: How to Setup, Install and Update Intuit Data Protect?
Solution 3: Testing, reinstalling, and adjusting permissions for XPS document writer
If none of the above solutions worked, you can give a try to the below steps for fixing the issue successfully. But before that, it is important to be kept in mind:
- Keep it mind that intuit doesn’t support Microsoft apps and isn’t responsible for the tools as well.
- Moreover, if you are uncomfortable with the tasks, it is suggested to reach out to IT professional.
Steps under this process:
- At first required to test the XPS document writer and print outside QuickBooks.
- Later verify the XPS services and check if they are enabled or not.
- Head forward by reinstalling Microsoft XPS document writer.
- And adjust windows user permissions for XPS document writer.
- Furthermore, edit the security software settings.
- And install or repair MSXML 6.0.
- Moreover, create a new template for the form.
- And bypass the print spooler.
To wrap it up!
There is a lot of learn about QuickBooks PDF converter, and we have tried to summarize some of the most important information related to it in this piece of writing. For some reason, if any of your query remained unanswered, or if you find anything confusing at any stage, do not think twice in consulting our U.S based support team.
You can also contact our QuickBooks enterprise technical support team for quick and precise solution using the cutting-edge tools and technologies. Reach out to us at 1-800-761-1787, and we would be more than happy to help you.
FAQs
What types of documents can be converted to PDF using the QuickBooks PDF Converter tool?
PDF converter tool can convert reports, invoices, purchase orders, sales receipts, checks, estimates, vendor bills, credit memos, tax forms, and other documents to PDF format.
Is QuickBooks PDF Converter free to use?
Yes! It is a free-to-use tool that comes along with QuickBooks.
Can I convert pdf files to other formats by using QuickBooks PDF converter?
No! This tool can only convert other extensions to PDF format. A file once created in the PDF format cannot be converted to other formats by using this feature.
People also searched for:
Methods to Fix QuickBooks Runtime Error QBW32.exe
