The process of creating and filing 1099s with QuickBooks desktop isn’t that tricky. When you pay your contractors in cash, check, or direct deposit, you simply have to file 1099s with the IRS. QuickBooks lets you prepare 1099s from the information that is present already in your account. A quick point to be considered here is that you can prepare 1099s in QuickBooks contractor payments.
To help you easily create and file 1099s with QuickBooks desktop, we have tried to summarize the set of steps that would work in this case. And once you prepare your forms, you will have to opt for the option to file them online or print and mail them to the IRS. To find out the detailed process, make sure to scroll through the segment till the end. Moreover, you can also get in touch with our certified professionals who will help the user in making the best use of 1099 wizard, as well as repairing and filing 1099s with QuickBooks.
Table of Contents
ToggleWhat needs to be reported?
In case users pay the vendor more than $600 in a year, then users would have to fill out a 1099 MISC form.
It should be noted that the IRS does not permit electronic payments to be reported on 1099 MISC forms. We can take an example to understand the situation in a better way in case the user has paid via credit card, debit card, PayPal payments, gift card, etc., then he/she would not require to report those on a 1099 MISC. The reason behind this can be that the QuickBooks desktop software automatically excludes the above-mentioned modes of payment. And the payment companies will report those payments, so the user need not worry.
For whom is the creation and filing of 1099s mandatory?
The creation and filing of 1099s are very important for the following:
- Filing 1099s is indispensable when the user makes payments to contractors in different forms like cash, direct deposit, and checks.
- If the user is an employer and has hired vendors or freelancers, then in that case, also the filing of 1099 is essential.
- Also, under the withholding rules, if you have withheld the federal income tax, then filing 1099s is important.
Steps to create and file 1099s with QuickBooks desktop
While the process involves a handful of steps, performing each steps one by one is a must.
Step 1: Update QuickBooks Desktop
Using an outdated version of QuickBooks wont work, you need an updated QuickBooks version to process your 1099-NEC and 1099-MISC forms. Thus, ensure that you have the latest QuickBooks update available and choose reset update checkbox.
Step 2: Create 1099s in QuickBooks desktop
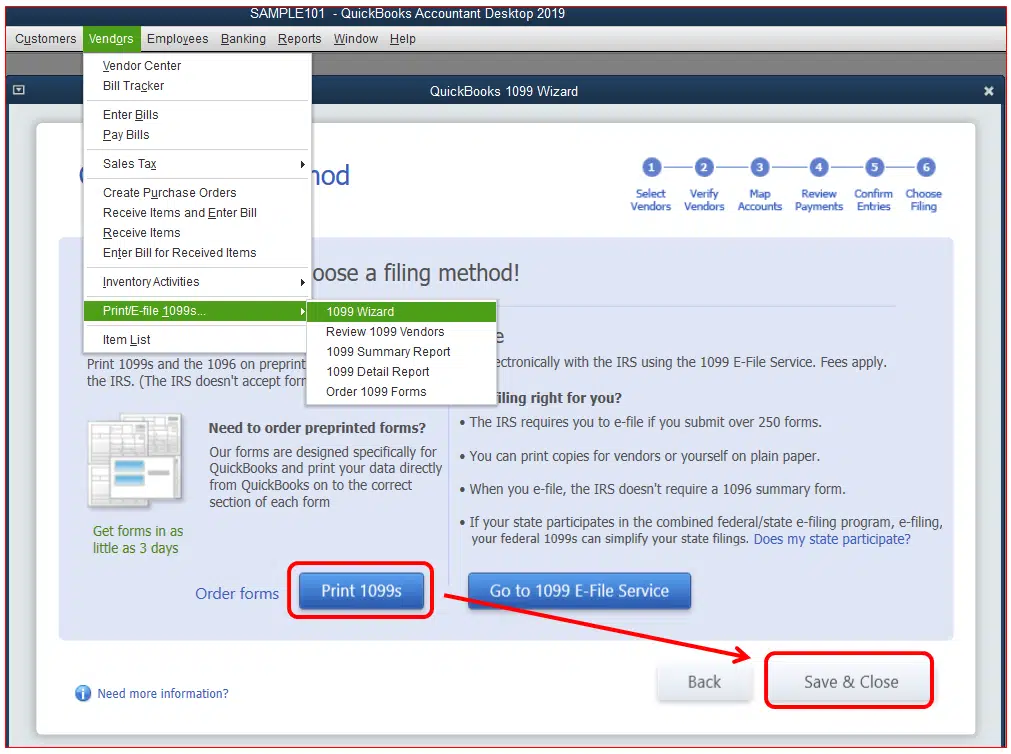
- The first step is to head to the Vendors tab.
- Choose the 1099 forms and then Print/e-file 1099 forms.
- Now, create a backup.
- Also, choose Get started for 1099 form you wish to create.
- In case you require to create both 1099-NEC and 1099-MISC, then you will have to perform the steps for both the forms individually.
- In majority of the cases, businesses opt for Nonemployee compensation, box 1 on the 1099-NEC, but you need to discuss with your accountant first.
- In case you are filing for New jersey, then 1099 forms filed in these states require special rules for boxes 16 and 17. You can see how to file your state 1099 forms.
- You are required to opt for Vendors that need a 1099 form and then click on Continue tab.
- Once done with that, verify the Vendor information and edit any Incorrect information and click on continue tab.
- Also, Map the vendor payment accounts.
- Head to the drop-down menu in the apply payments to this 1099 box.
- Choose the account you wish to Link the payment to.
- In case the boxes are gray, then they are mapped other form.
- After that click on Continue tab.
- Also, Review the payment information.
- And choose View included payments or View excluded payments and hit the Continue tab.
- You further have to Review the vendors and the amounts that you are going to report.
- After this, click on Continue tab.
- And choose whether to Print the form or e-file it.
- In case you choose to Continue to e-file the form, then perform the necessary steps.
Step 3: Importing the data into Tax1099
Once you have prepared 1099s in QuickBooks, then choose the e-file button to carry out the onscreen steps to import the data into the Tax1099 account.
Step 4: E-file 1099s in Tax1099
- To start with this, you need to choose the Vendor name or the edit tab.
- After which, you need to choose the update tab.
- Also note that changes you make in Tax1099 don’t flow back to your QuickBooks company file.
- Now, enter the information under the right state boxes.
- And choose the Vendors you wish to update to e-file by clicking on the box.
- Now, hit the Next tab.
- And in case there are any issues, you will see a message on your screen, after corrected, make sure to choose Vendors again.
- Also, click on Next tab.
- You need to choose the Vendors by checking the box next to the Date column.
- After that, select How you wish to send copies to the vendors.
- Now, choose Download multiple PDFs to provide vendors their copies.
- In case you need to file with your state, then opt for them.
- Now, click on Next tab and calculate Tax1099.com fee.
- After you are done with that, choose Forms page.
- Enter the needed information and choose Pay and submit to e-file.
- In case you need to create both 1099-NEC and 1099-MISC, then perform the steps for the other form as well.
Step 5: Check for filing status
Once done with the submission, you need to head back to the account and check for the status.
Easy Steps on How to Create 1099 in QuickBooks Wizard
In order to open the wizard, you are supposed to choose vendor option and then click on print/e file 1099s, followed by clicking the 1099 wizard. After that, click the Get Started tab and carry out the steps below:
Step 1: (Choose Vendors) Opting for the vendors needing 1099 MISC forms

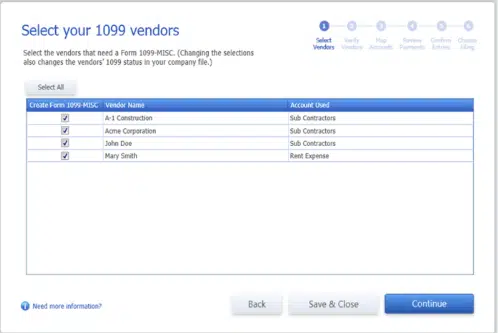
- In this step, the QuickBooks 1099 wizard will show a list of vendors.
- You are supposed to select these vendors that require 1099 MISC forms.
- Once done with the selections, tap on Continue tab.
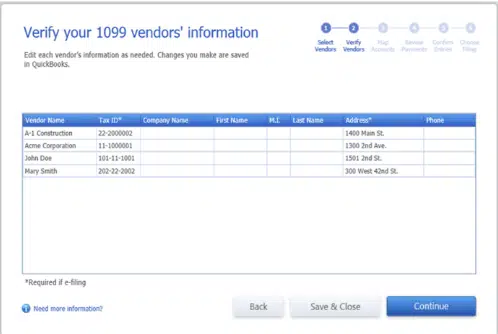
Step 2: (Verification) The vendor information needs to be verified
- Now in this step, a table will appear on the screen, which allows you to Edit and Verify each of vendor’s info.
- The information that you will verify in this step will further be used in the forms.
- Now edit the values by double-clicking on Cells in the table.
- In last step, move to next step by pressing the Continue tab.
Step 3: (Mapping) Map the vendor payment account
- Moving to this step, you have to ask QuickBooks where the amount paid from each account will appear in the form.
- In order to map accounts or omit payment from 1099 MISC forms, you need to select from Apply payments to the 1099 box drop-down list.
- Also you can select Report all payments in the box 7 checkbox, only if applicable.

In case a red-colored message box appears on the QuickBooks wizard screen, stating that the settings do not tell me the current IRS threshold, then you have to follow the below given steps:
- Click on the hyperlink showing IRS 1099 MISC filing thresholds.
- And then select Reset to IRS threshold.
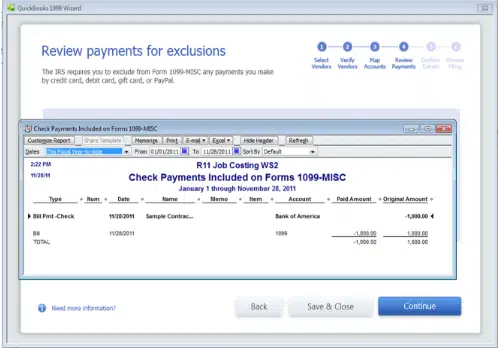
Step 4: (Reviewing) Check the payments for exclusions
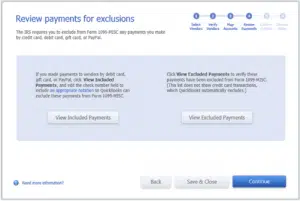
As per the rules of IRS, it is supposed to exclude from form 1099, the payments just like a credit card, debit card, PayPal payments or gift card, etc.
If you have made any kind of payments via debit cards, gift card, or papers, then you will have follow the following steps:
- Click on View included payment button.
- Then Edit the cheque number field.
- In order to include the proper notation for ensuring that the QuickBooks can exclude the payments from form 1099 misc.
- For verifying the payments that have been excluded clicking the View excluded payment button will be helpful.
Step 5: (Confirmation) The 1099 entries should then be confirmed
Now comes the fifth step in the process, you will see a table on the screen that will permit reviewing the summary of vendors, for whom the 1099 MISC forms are created, and also the amount being reported for the provided calendar year. After that, you can easily review transaction details by simply double-clicking the Amount.
Step 6: Selecting a filing method
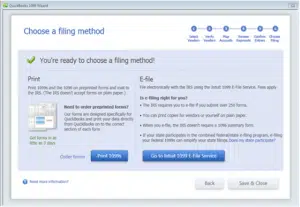
Here you need to select the preferred Filing method. There will be two available options you can see on screen:
- Printed
- E-filed
By selecting Print, you can easily Print 1099 MISC and also 1096 on pre-printed forms and mail them to IRS. However, in order to file electronically, another option of E-filing can be chosen.
Step 7: (Verification) The status of filing 1099 needs to be verified
Now, this brings us to the end of this process and final step. The following actions should be followed to check the status of the 1099s’ filing:
- To begin with, access the Tax1099 account and log in.
- After that, tap the Plus sign.
- Now check the Status check box
- The reference number has nine digits.
- You need to hit on Check Status.
Conclusion!
Filing the form is crucial part of your financial routine. Thus, ensuring that you create and file 1099s with QuickBooks desktop perfectly is essential. Hopefully, the steps above might have helped you in successfully creating and filing the form. In case of queries, we suggest you to reach out to our QuickBooks desktop support experts at 1-800-761-1787, and let them carry out the necessary steps for you and they will surely help you with your 1099s creation and submission successfully.
Related Posts:
How to Fix QuickBooks Won’t Open Portable Company File?
Steps to Fix Issue when QuickBooks keeps Opening in Single-user Mode
