Last updated on February 4th, 2026
Learn how to set up and access between QuickBooks desktop and connected Intuit services
Your QuickBooks company file user ID offers you access to basic features such as creating an invoice or paying a bill. But when you make use of an Intuit account, then you can take advantage of additional Intuit services, which include QuickBooks payments, payroll direct deposit, payroll workforce, QuickBooks time, and receipt management.
In order to use the connected services of your company file, your Intuit account primary admin must approve the request. After your primary admin accepts the request, you will be able to use all the connected services using your Intuit account. Certain businesses share their QuickBooks desktop admin credentials with people working therein, which isn’t recommended as such. There is a better way to access, which Intuit account linked to the company file.
Table of Contents
ToggleBasic difference between Intuit account roles and QuickBooks roles
QuickBooks company roles
- Company file admin- You can sign in using admin credentials, and therein will own the company file.
- QuickBooks company file user ID- You can use this to access the company file.
Intuit QuickBooks account roles
- Intuit® account primary admin- Primary admin can add or remove users, edit roles, etc.
- Intuit® account user ID- You can use this to access the connected Intuit services.
You may like: How to Resolve QuickBooks Banking Error 185?
Steps to Set up Access Between QuickBooks Desktop and Connected Intuit Services
You can perform the below steps to set up access between QuickBooks desktop and connected Intuit services.
Step 1: Sending a request to primary admin for accessing to the Intuit account
- Sign in to the company file using the QuickBooks desktop user ID. You should note that currently, the requests for access to the Intuit account linked to the QuickBooks company file are available for the users logging in as the QuickBooks company file admin.
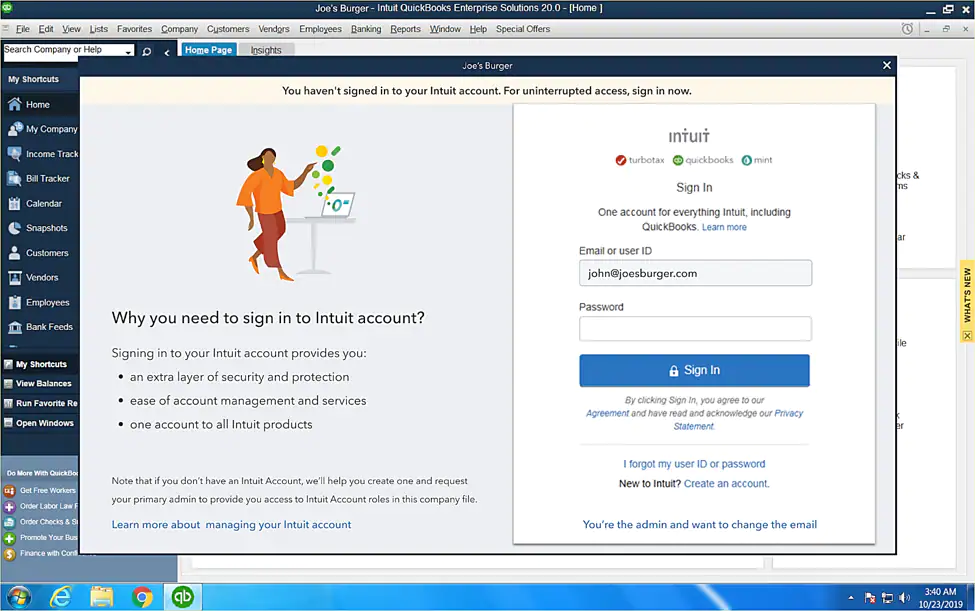
- Now sign in to the Intuit account. The Intuit account admin user ID field is prefilled, which you have to replace with your own User ID. Sign in to the Intuit account of the company file. If you don’t have an Intuit account, you can create one.
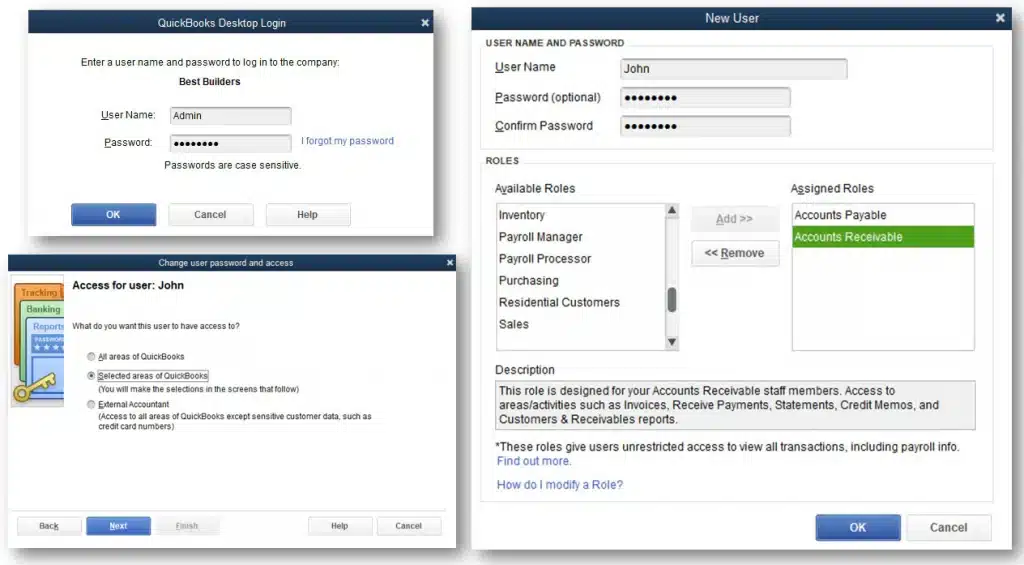
- Just in case you are already a part of the Intuit account, and your Intuit account login session is active, then start using the connected services.
- Whereas, if your User ID isn’t part of the Intuit account of the company file, a request for access email is sent to the Intuit account primary admin. This will also happen if you try to access my company or any of the Intuit services like QuickBooks desktop payroll direct deposit or QuickBooks time.
- After the email is sent, a screen confirming the request will be seen. When your primary admin approves, you will get an email confirmation, and you will be able to sign in to the Intuit account with user ID. You can stay signed in to the Intuit account only for a single session, but not more than 24 hours.
- If you want to gain Intuit account access for 180 day, sign in with the non-admin QuickBooks company file user ID to send a request to the primary admin for access to Intuit account.
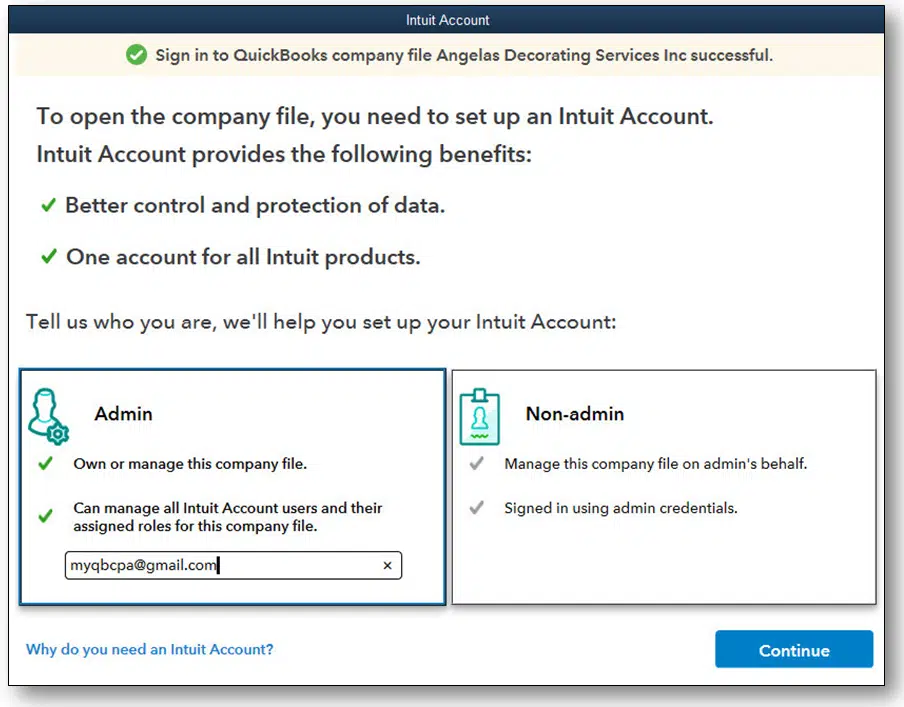
- Now hit a click on OK to acknowledge the message. And you will get an acknowledgement email ensuring that a request for access is sent to the primary admin for approval.
Step 2: Your primary admin will accept the request
- Now that you have sent the Access request, your primary admin has 30 days to accept the request. You can accept or Reject the request from the email.
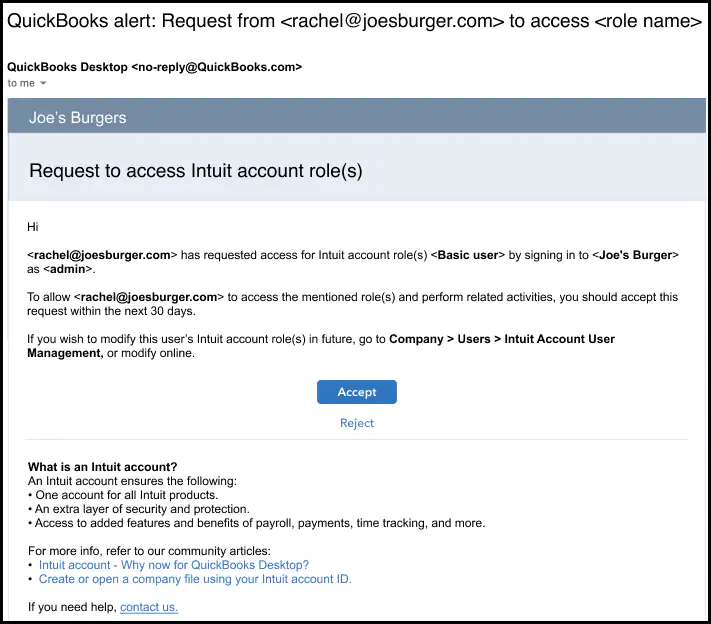
- After the primary admin chooses the accept option, a browse window opens, and QuickBooks prompts them to sign into their Intuit account.
- After signing in, the primary admin will see the Intuit account user management dashboard, prefilled with the email and current role. The primary admin can change the role or give additional ones. The primary admin will select Save to add you to the Intuit account.
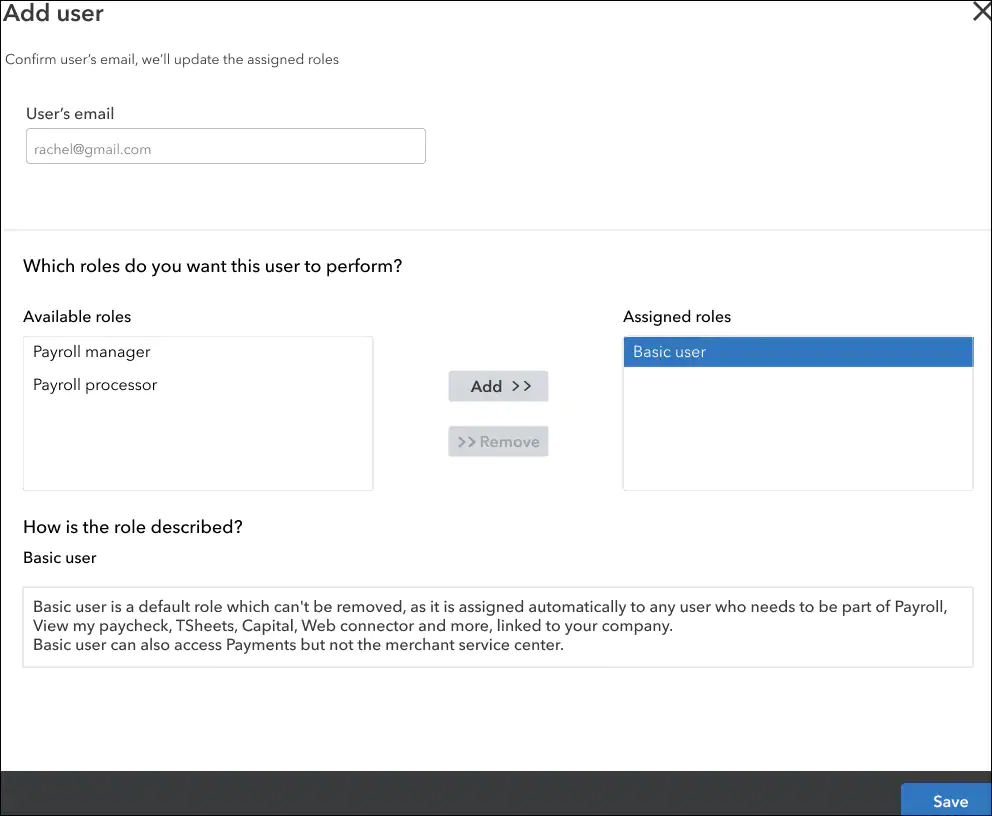
Now you are successfully added to the Intuit account for the company. You can start with the Intuit services connected to the QuickBooks desktop company file. Just in case the primary admin doesn’t respond to the request within the period of time mentioned, it will expire. And you would have to start a new request by performing the above steps once again.
See Also: How to Fix QuickBooks Online Display Issues on Windows 10?
Winding up!
This was the entire process to set up access between QuickBooks desktop and connected Intuit services. However, if you want to learn more about our other QuickBooks accounting services. Give us a call today at our QuickBooks desktop helpline i.e., 1-800-761-1787, and schedule your free initial consultation.
FAQs
Can I link multiple Intuit accounts to a single QuickBooks company file?
No! There can only be one Intuit account for a single QuickBooks company file.
Can I unlink an Intuit account from my QuickBooks company file?
Yes! You’ve the option to unlink your Intuit account from the QuickBooks company file.
How can I recover a forgotten password for my Intuit account linked to QuickBooks?
If you forgotten the password to your Intuit account, go through the following steps:
1. Initially, you need to navigate to the Intuit account login page.
2. After that click on Forgot your password tab.
3. Now enter the email address on which the Intuit account is registered.
4. Follow the on-screen commands sent over the Email and then click on the Reset password link.
5. Finally, type a new password for your Intuit account.
Related Articles:
What are the Solutions to Resolve QuickBooks Error 61686?
Steps to Upload or Download a QuickBooks Desktop Company File to Intuit
Fixing QuickBooks unable to create an accountant’s copy error
