Learn how to turn on advanced inventory in QuickBooks enterprise solutions:
QuickBooks Enterprise is loaded with features, one of which is advanced inventory. Advanced inventory helps in the long run in optimizing the economic order of quantities that helps in maintaining the stock. Advanced inventory in QuickBooks Enterprise is basically an add-on option for tracking inventory. Turning on advanced inventory in QuickBooks enterprise is a must, which demands a step-by-step procedure. If you are also looking for the process to turn on advanced inventory, then here is a comprehensive guide for you.
In this segment, we will be talking about the procedure to turn on QuickBooks enterprise advanced inventory in depth. Thus, make sure that you go through the procedure carefully. Moreover, if you require any technical assistance, our experts and certified accounting professionals will assist you with the process. Give us a ring right away at 1-800-761-1787, and we will be there to assist you immediately.
You may also see: How to Fix Error Message – There is not Enough Space on Drive C?
What is advanced inventory in QuickBooks enterprise?

The advanced inventory system was directly integrated by Intuit with the QuickBooks account, which saves the time of users. In simple words, this is an inbuilt tool that can easily compete with other inventory management software for small businesses. This feature helps users in maintaining and tracking the stock and also virtually moving the products. It can be integrated with much ease and can also be subscribed with new software in various ways. This program can be bought online, or it can be availed in a package under the platinum subscription of Intuit. You just need a license key with the advanced inventory feature, and the inventory can be tracked from site or locations.
What are the benefits of tracking inventory?
Tracking inventory can be extremely beneficial for you. We have listed below some of the common benefits that this feature offers:
- This makes tracking stock in different locations easy
- You can easily scan the barcode
- This feature allows you for tracking the serial number or lot numbers
- Tracking bin location also becomes easy
- Advanced inventory feature permits you to transfer the items between the inventory sites
- This makes possible for you to track inventory data in one place
- And the list is huge….
Moreover, in the case of QuickBooks desktop enterprise, you can purchase or subscribe to advanced inventory, which enables you to use:
- FIFO costing
- Multiple location inventory
- Bar-code scanning
- Bin or lot tracking
- Serial or lot numbers
Features of QuickBooks Enterprise for Advanced Inventory
You can purchase or subscribe to advanced inventory, which enables you to make use of it, if you are using QuickBooks desktop enterprise. Below is the list of features:
- Mobile inventory barcode scanning
- Multiple location inventory
- Customizable inventory reports
- Bin location tracking
- Real-time inventory picking
- Barcode scanning
- Using FIFO costing
- Serial or lot numbers
- Transferring inventory from one location to another
What is the need of tracking inventory?
The most common question is the need to track inventory. Well, the advanced inventory in QuickBooks enterprise tracks either inventory store from different sites or different locations. To understand this easily, we can take this example, if you store the inventory from different warehouses, either in the multiple tracks or in the different areas within a warehouse at the consignment locations, or from the outside manufacturer, it can easily manage the inventory in the business. In case you are willing to make use of this feature, then you are required to buy advanced inventory, or you have the license that includes these advanced features in the subscription.
Read Also: How to Open QBB, QBW and QBX File without QuickBooks?
Procedure to turn on advanced inventory in QuickBooks enterprise
In order to turn on the advanced inventory, you can carry out the below steps:
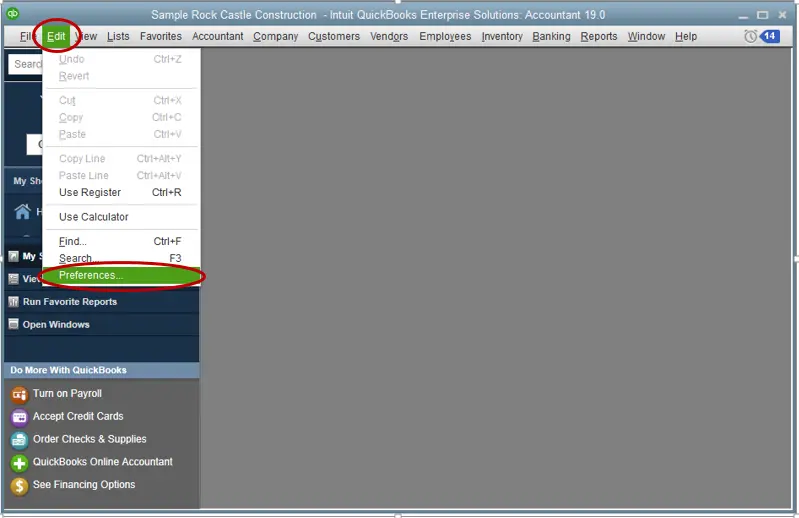
- When you try to operate the QuickBooks enterprise, you will see the Edit menu. And then, hit a click and spot Preferences under the same. Then you required to hit a left-click on it to select that option.
- Next step is to move the cursor to the left panel to choose the Items and inventory. This will change the right panel.

- Once done with that, you will see two divided sections named My preferences and company preferences. After which, you are needed to hit a click on the Company Preferences.
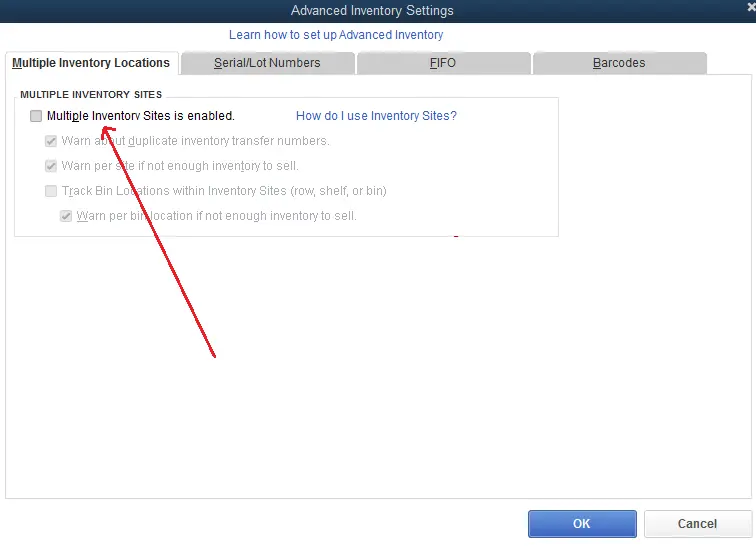
- Now the window after selecting Company Preferences will show four sections. At the bottom of the first section, you will have to click on Advanced Inventory Settings tab.

- And a new window will pop up, after which enable the option of Multiple inventory sites is enabled under the heading of multiple inventory sites.
- Moving ahead, hit a click on OK at the bottom of the Advanced inventory settings Windows pane.
- And lastly, you need to click on OK on the right-hand side of the preferences windowpane.
In order to implement this feature in a better way, you can close the QuickBooks enterprise software running on the device, and if it doesn’t close on time, then you can always select the task manager to end the running tasks.
And also, you can restart the device and then restart the software for the smooth working of the advanced inventory feature. In certain cases, you might find difficulties like the advanced inventory settings option might be grey in color, and you will not be able to click on it to move the steps ahead. The solution to such a scenario is revealed later in this post.
See Also: Install Multiple QuickBooks Desktop Version on One Computer
Steps to follow for activating the advanced inventory settings
As we mentioned above, these steps can be followed to activate the advanced inventory settings, if the advanced inventory tab is not clickable. The steps involved are:
- It is supposed to align the license that you have got after buying the QuickBooks software, and also before the advanced inventory settings can work for you.
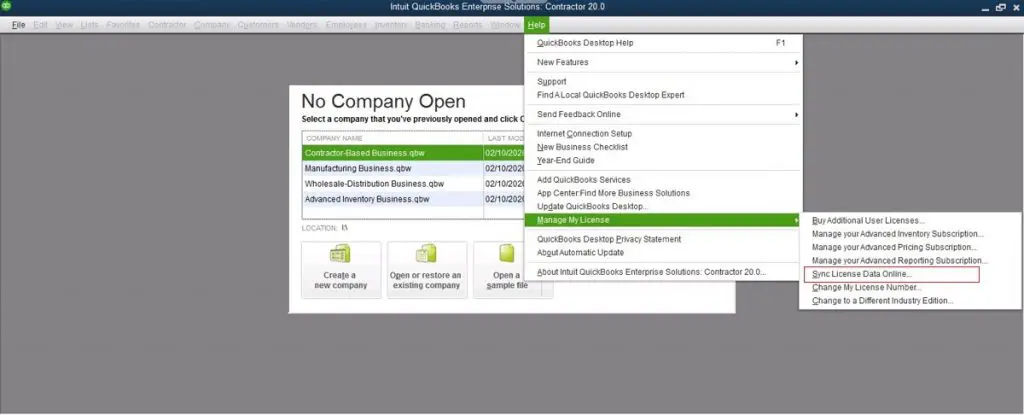
- You will also have to visit the Help on the extreme right-hand side on QuickBooks enterprise version.
- Next step is to hit a click on Manage my license and then click on Sync license data online.
After this you can easily head back to the actual procedure and carry out the remaining steps. Moreover, there can be another common set of issues that might appear in case you are missing one piece of information or another. This could be from the purchase until the final installation of the QuickBooks enterprise software on the working device.
What if Failed in syncing problem occurred?
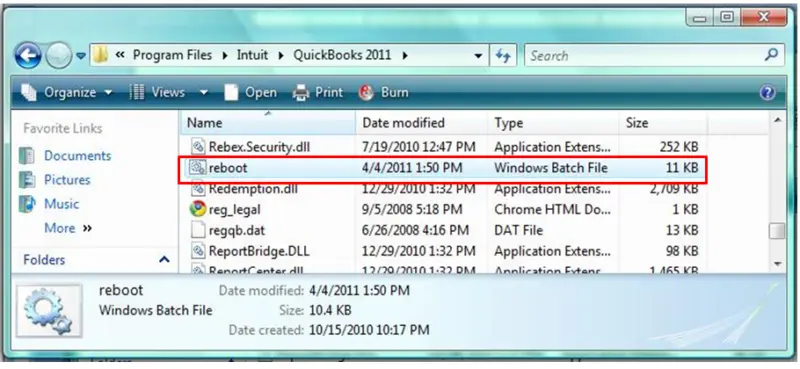
In case you are facing a sync fail issue on the system, then it is a system-specific error. You can opt for the below-stated issues to get rid of the problem. It should be noted that, you need to need to carry out the below steps for Windows.
- Run reboot.bat
- Or fix Microsoft .NET Framework, MSXML, and C++ issues using the QuickBooks install diagnostic tool.
Step 1: Downloading and installing the QuickBooks tool hub
You can opt for QuickBooks tool hub, in order to resolve common issues. The steps involved here are:
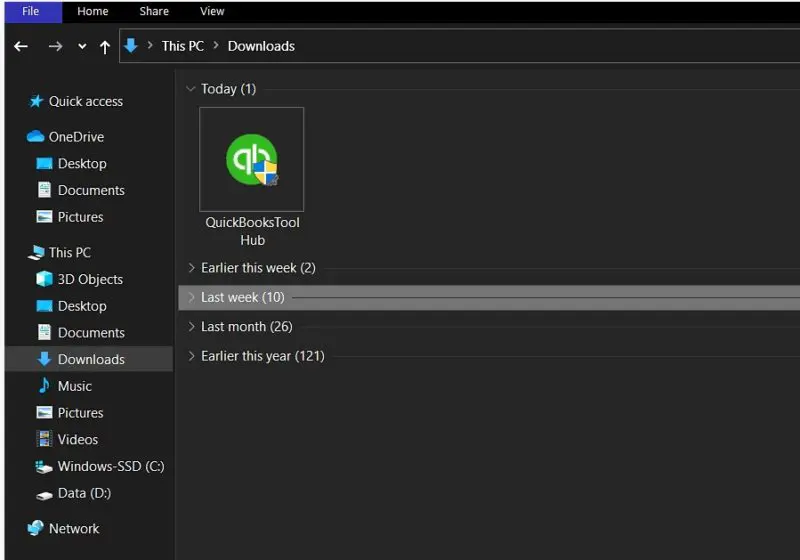
- Initially quit your QuickBooks and then download the QuickBooks tool hub tool from the internet and then save the .exe file someplace, where you can find it easily.
- After that, open QuickBooksToolHub.exe, which is the file downloaded earlier.
- Next step is to follow the on-screen instructions to install and Accept all the terms and condition.
- Next, when the installation completed, open the tool hub and double-click on the Icon.
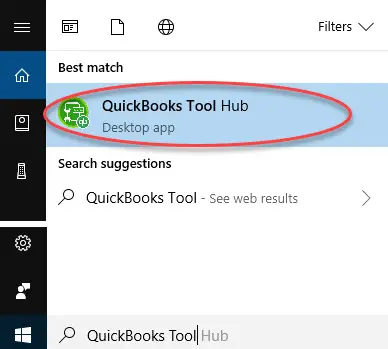
It should be noted that if you are unable to find the icon then you need to navigate to the Windows search bar and do a direct search for QuickBooks and opt for the program.
Step 2: Run Quick fix my program
This tool will run a quick repair and will stop all QuickBooks background process, if any. The steps to be followed here are:
- At first, select Program problems in the tools hub.
- After that hit a click on Quick fix for my program.
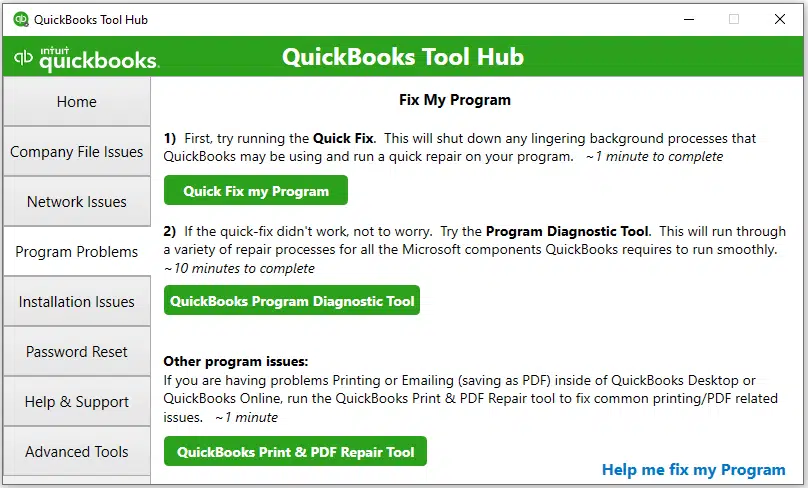
- And then choose the QuickBooks program diagnostic tool.
Important: If you have faced any issue during the repair or uninstalling .NET framework, then it is recommended to consult a professional.
Also read: Convert a QuickBooks for Windows file to Mac
Quick tips for using advanced inventory
- You can easily sync the account to enable the advanced inventory option.
- And then, by using serial or lot numbers you can track the inventory.
- In case more space is needed, you need to ensure that you are having at least 2.5 GB of hard drive space available.
Winding up!
We feel that the above-mentioned information would be enough for users, in order to turn on advanced inventory successfully in QuickBooks enterprise. However, in case of any query or any further information, getting in touch with a professional is recommended. You can call our U.S.-based accounting professionals at 1-800-761-1787, and our QuickBooks enterprise customer support team will be there to provide you with immediate technical assistance. Feel free to call us any time.
More Resources
How to Troubleshoot Most Common QuickBooks Enterprise Errors?
Configure Email Services in QuickBooks Desktop
How to Fix portable company file issues in QuickBooks desktop?