With new updates of QuickBooks rolls new features and functionalities and in order to these functionalities updating the software on a timely basis is a must. Not just that, but updating Windows to the latest release is also something that you need to ensure about. Using an updated Windows operating system is a crucial thing, and when you do not have an updated windows OS, you might get an error stating: You need to install the latest windows updates to keep QuickBooks running smoothly. The error message basically suggests that either some Windows component are missing or the Windows isn’t updated to the latest release an is affecting the QuickBooks Operations.
| Warning | Windows Updates not Installed. You need to install the latest Windows to keep QuickBooks running smoothly. |

While this error might seem simple, fixing it can be a bit confusing, if you aren’t sure about the right solution steps. Thus, to help you with that, here we are with this guide sharing the entire information related to this issue, along with how you can actually fix Windows update not installed warning in QuickBooks. However, if you want our certified experts to get this error resolved for you, then get in direct contact with our accounting professionals via the helpline i.e., 1-800-761-1787.
What reasons can lead you to Windows Updates not installed warning in QuickBooks?
Here are a few reasons that can lead to Windows updates not installed warning in QuickBooks.
- One of the core reasons can be if the Windows installer components (C++ , MSXML and the .NET Framework) are missing or damaged.
- You can further come across Windows updates not installed warning in QuickBooks, in case the Windows components like Microsoft C++ or MSXML is either damaged or corrupted.
- Another reason can be if the Microsoft .Net framework is either damaged or having some issue.
- Outdated Windows OS is running.
You might also like: Fix QuickBooks Error 539: Unknown Client-Specific Tax Form Printing
Methods for Fixing Windows Updates not Installed Warning in QuickBooks
Well, QuickBooks Warning Windows Updates not Installed error can be rectified using some basic set of steps, which include the following:
Note: If you face any technical issue while performing the troubleshooting steps, consult with your IT professional.
Method 1: Repair Microsoft .Net framework
- To start with, you simply have to open Control panel using the Start menu.
- Furthermore, you will have to look for Programs and features and later click on the same.
- The next step is to navigate to Turn Windows features on or off.

- After this, you are supposed to go for .Net framework.
- And further, enable .Net Framework 4.5 by clicking on the checkbox.
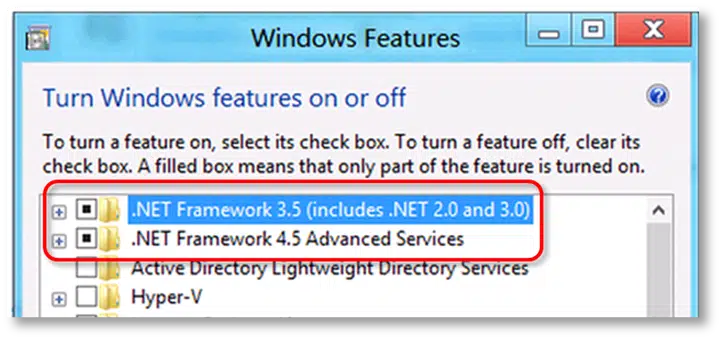
- Later on, enable .Net framework SP1.
- Just in case you see these options already tick marked, then you need to turn them OFF and further turn them ON.
- Now, go for OK tab.
- And you need to reboot the system.
Move to the next solution method, if the error still appears.
Method 2: Repair MSXML component
- This procedure requires you to press Windows and R tabs to simply navigate to the Run box.
- Furthermore, you need to go for Command prompt by entering cmd in the Run box.
- Also, click on OK tab.
- You will see a black screen, and enter regsvr32 MSXML6.dll and go for the Enter tab.
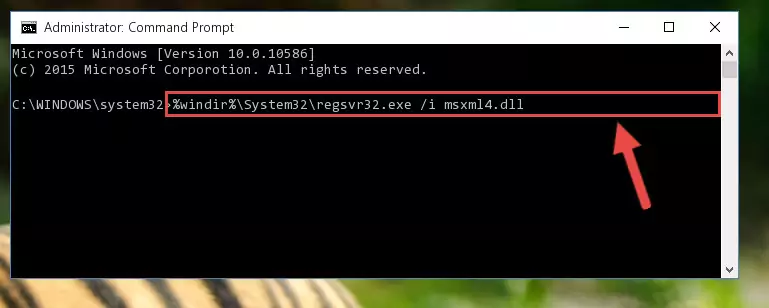
- The last step here is to repair the damaged MSXML component.
Note: If you don't have the latest versions of the Microsoft components installed on your system, then make sure to get them installed from the official website of Microsoft.
Read Also: How to Reconcile Payroll Liabilities in QuickBooks Payroll?
Method 3: Update Windows to the newest version
- In order to update Windows, you need to press Start tab and further enter update in the Search bar.
- You later have to look for Windows update and double click the same.
- Now, head to the Check for updates.

- And then, go for all essential updates and proceed to the start process.
- After all the updates downloaded successfully, you need to get the updates installed.
- And towards the end, you will have to reboot the system.
How to Fix Issues Encountered While Updating Windows?
If you are unable to update your Windows, then it is recommended that you reboot your system in the Selective startup (Safe) mode.
- At first, press the Start or Windows button and search for Run.
- After that, type MSConfig in run box, and hit on Enter key.

- The system configuration Window will open up.
- Here you need to click on Selective Startup Mode and then click on Apply.
- Now, go for a system restart.
- In next step, press the F8 key repeatedly until the Advanced Boot options will show up.
- You now have to choose Safe mode with Networking option and press the Enter key.
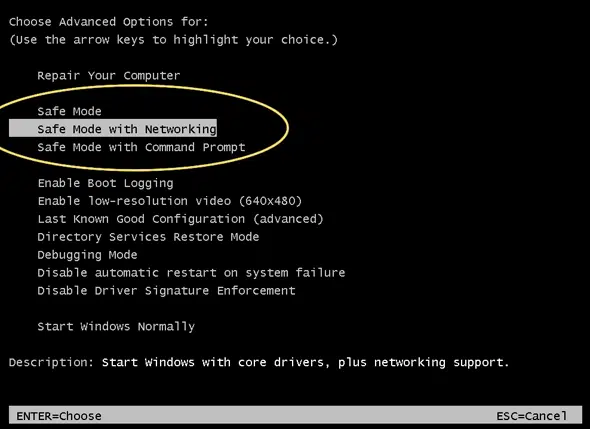
- Now try for updating Windows once again in safe mode and ensure that the updates are getting installed successfully this time.
- Once done with that, go to search and type MSConfig and choose Normal startup mode.

- Restart your computer and let the updates install. Wait for the process to conclude.
See it Also: How to Troubleshoot QuickBooks Error Code 1335?
Winding Up!
Were you able to fix Windows updates not installed warning in QuickBooks with the solutions discussed above? Well, if that doesn’t work for you, then you surely need to reach out to our technical support professionals at 1-800-761-1787, and QuickBooks team will ensure that your queries are addressed within no time. And our QuickBooks enterprise support professionals will definitely help you with the fixation of Windows updates not installed warning in QuickBooks. We will make sure that all your queries get resolved.
More helpful topics:
How to Schedule Automatic QuickBooks Backup?
QuickBooks Error 1603 - How to Resolve It?
Learn How to Set up and use class tracking in QuickBooks Desktop